Introduction to Ilocos Norte
Ilocos Norte, located in the northwestern region of Luzon in the Philippines, is a province renowned for its unique heritage, stunning landscapes, and rich culinary traditions. This region, with its vast history dating back to pre-colonial times, has been significantly shaped by various cultures and influences, including Spanish, Chinese, and indigenous traditions. The blend of these cultures is evident not only in the local architecture and festivals but also in its diverse gastronomic offerings.
The province boasts a picturesque landscape featuring rolling hills, sandy beaches, and iconic landmarks such as the Paoay Church and the Bangui Windmills. Its geographical features contribute to the cultivation of an array of crops, supporting not just the economy, but also the culinary diversity that defines Ilocos Norte. The fertile land and abundant coastline mean that the local cuisine incorporates fresh produce and seafood, offering a delightful experience for any food enthusiast.
Food holds a significant place in the cultural identity of Ilocos Norte, serving as a means of celebrating traditions and family gatherings. Each dish carries a story, reminiscent of the province’s history and traditions. For instance, the famous empanada, a savory pastry stuffed with meat and vegetables, is a testament to both the indigenous and Spanish influence on the local gastronomy. Additionally, the region is known for its savory longganisa (sausage) and bagnet (crispy fried pork), which highlight the distinct flavors that have been honed over generations.
This intricate connection between history, culture, and cuisine reveals why exploring culinary delights in Ilocos Norte is not merely about eating but is, in fact, a profound journey into the heart of Filipino heritage.
Must-Try Local Dishes
Ilocos Norte, a province in the Philippines renowned for its stunning landscapes and rich cultural heritage, is equally celebrated for its distinct culinary offerings. Visitors should not miss the opportunity to sample its iconic dishes, each reflecting the local flavors and traditions.
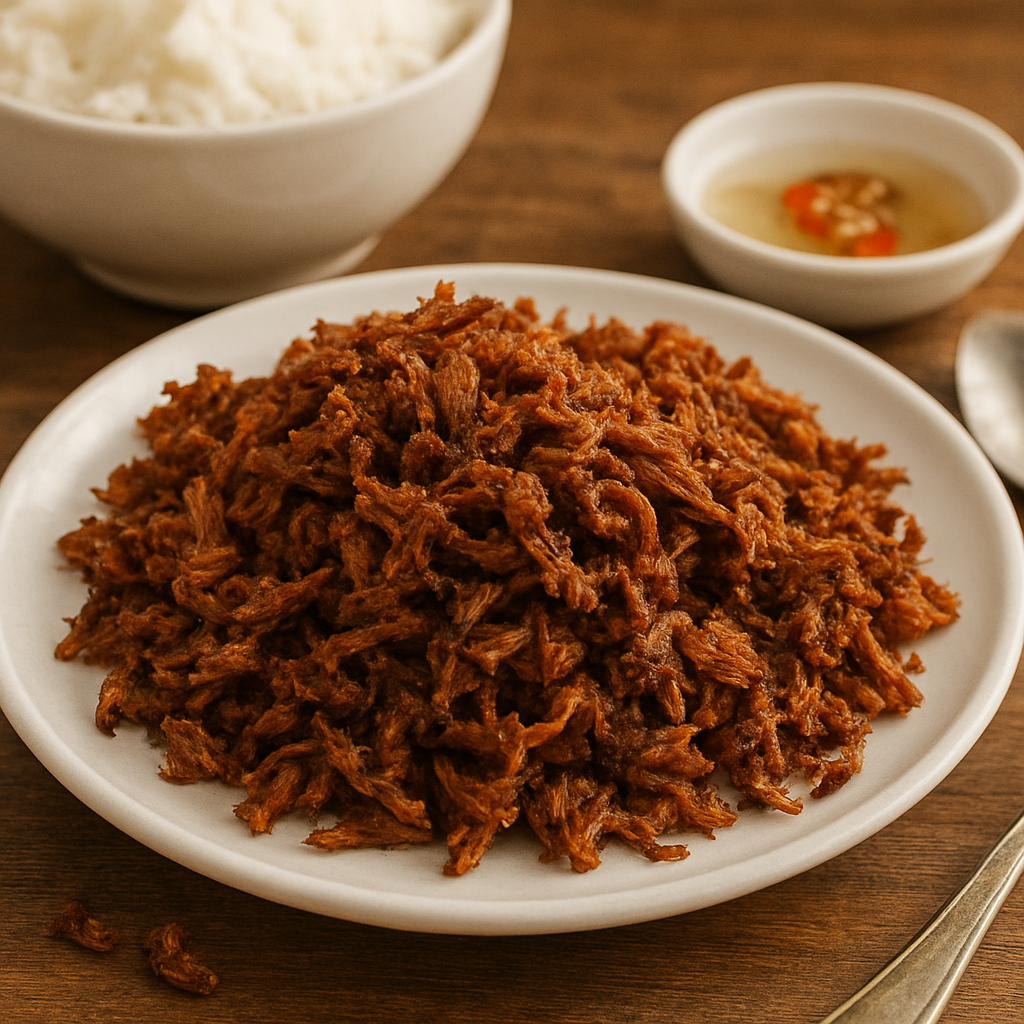
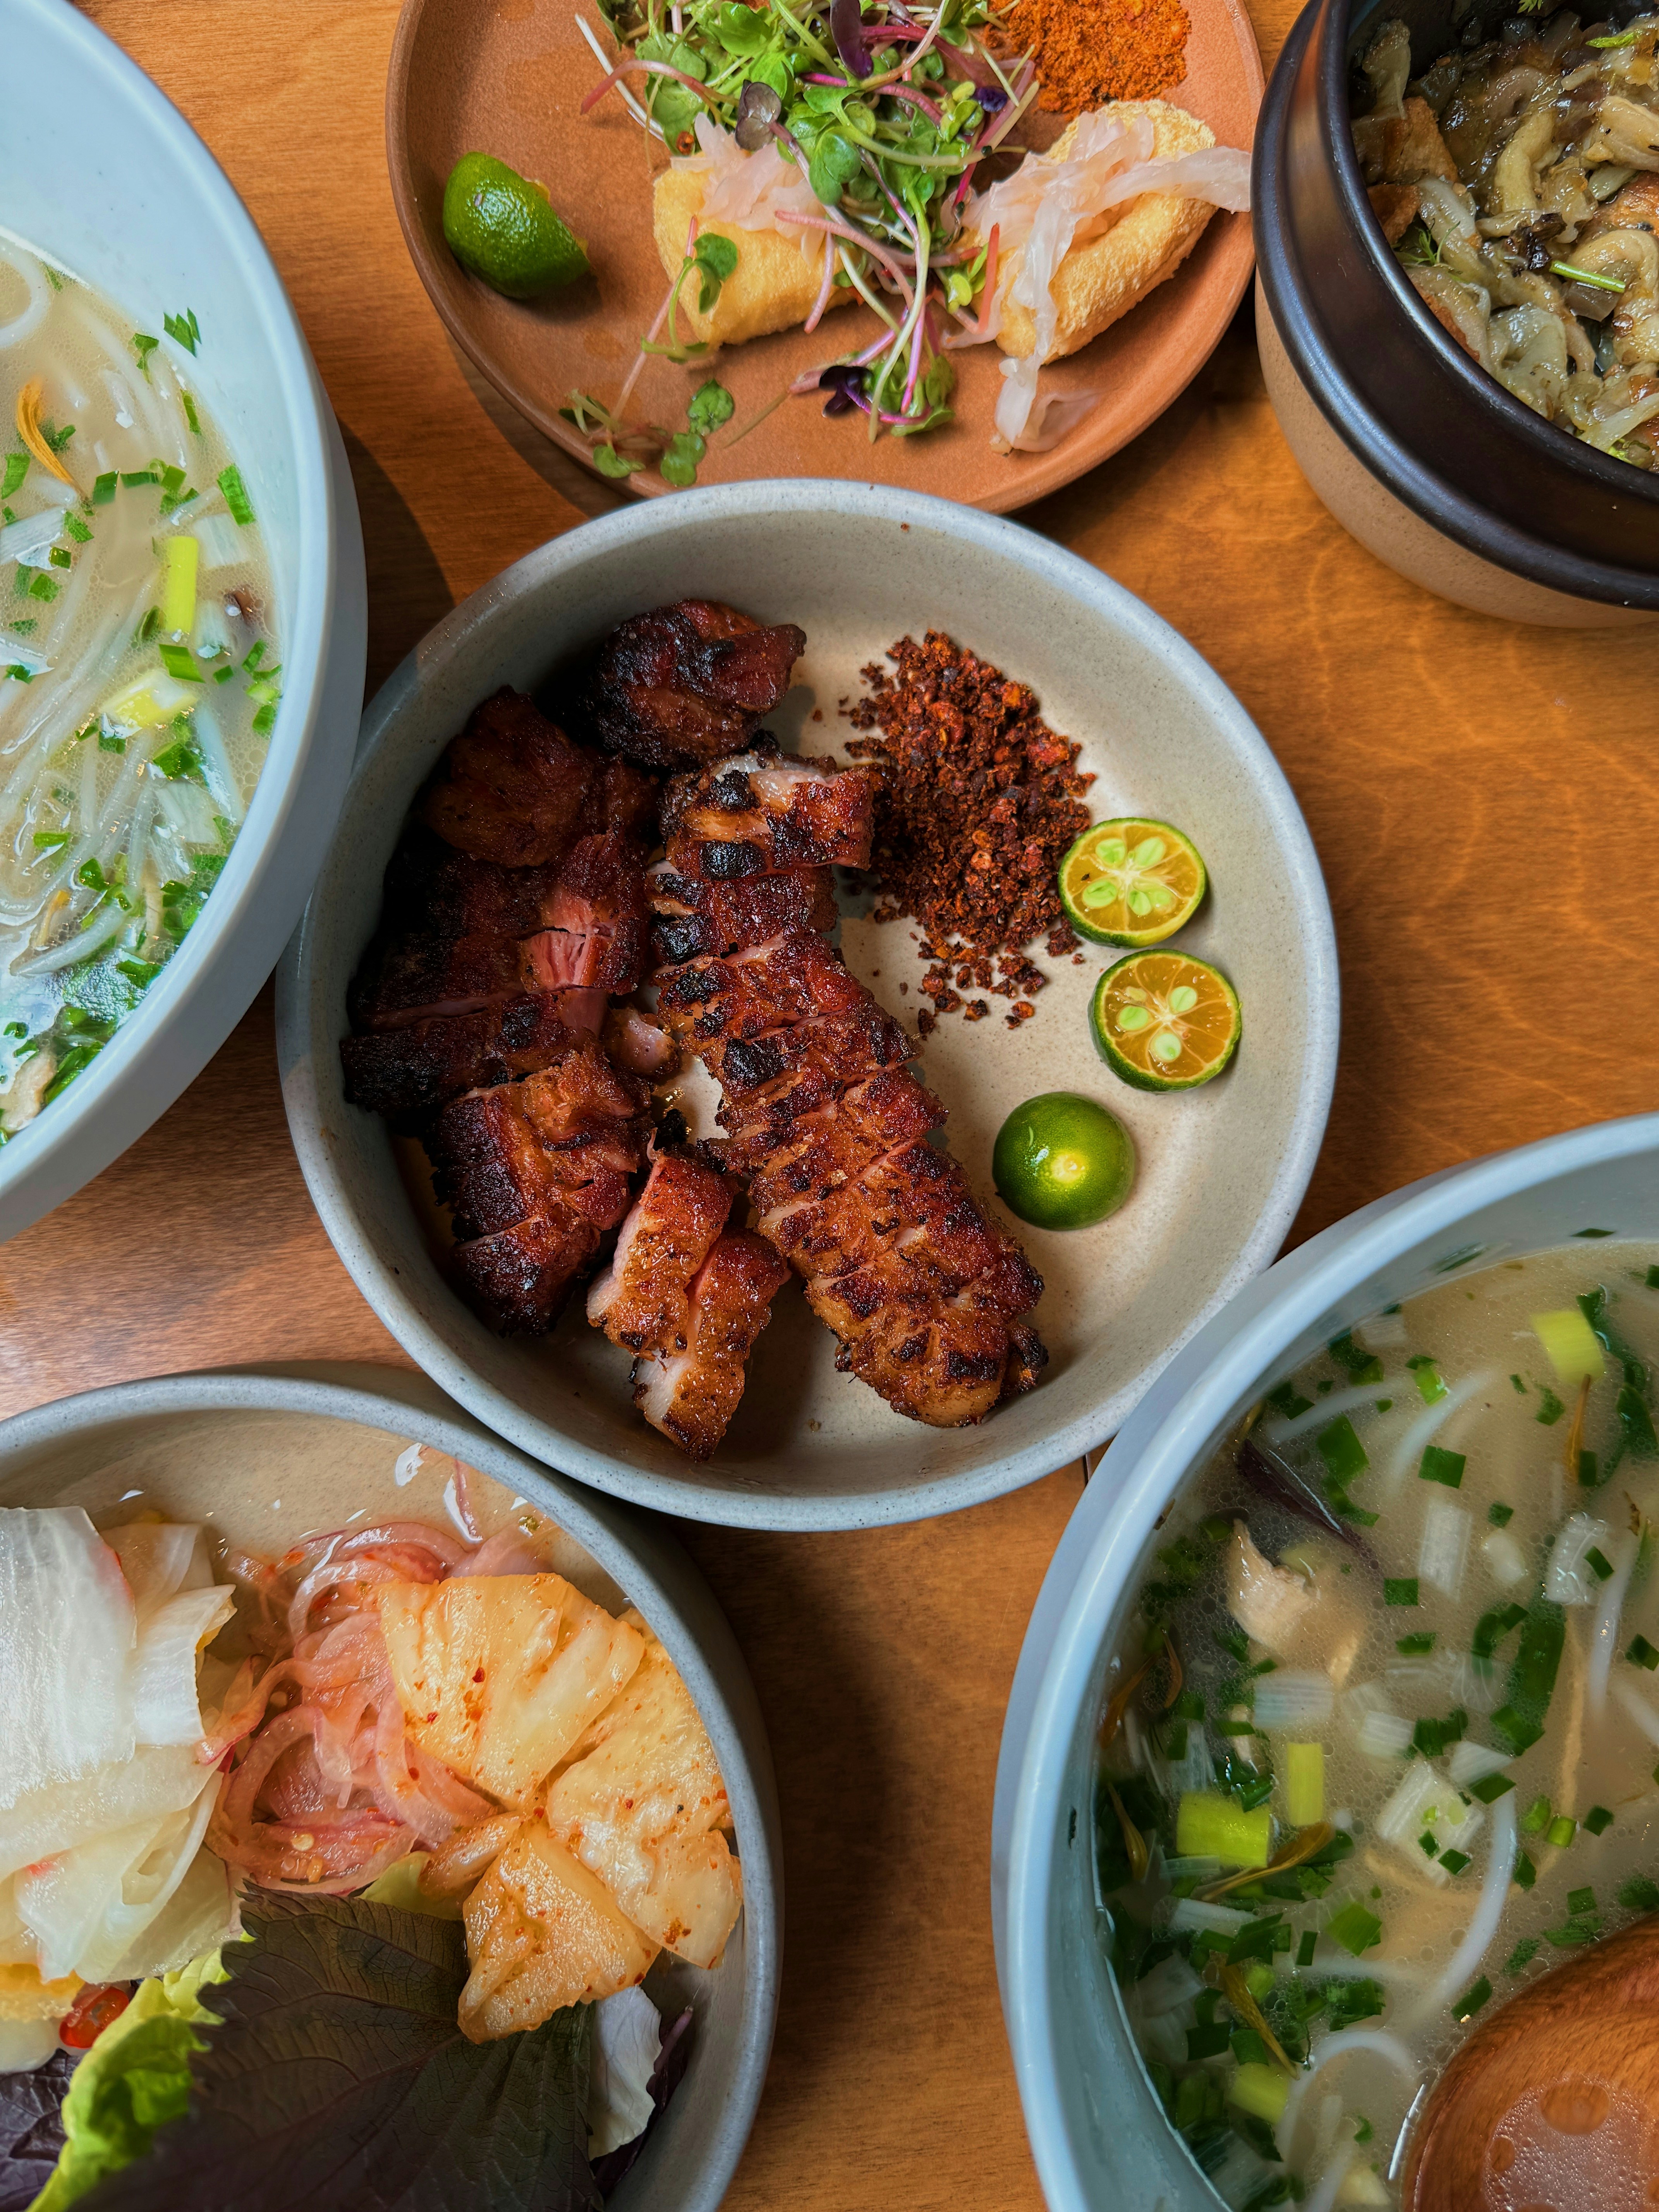
One of the most beloved dishes is Bagnet, a deep-fried pork belly that boasts a crispy texture and savory flavor. Traditionally, the pork is boiled until tender, seasoned with garlic, and then deep-fried, resulting in a crunchy exterior and juicy interior. Bagnet is often served with a side of vinegar dipping sauce, enhancing its irresistible taste.
Another must-try is the Empanada, a popular street food in Ilocos Norte. This savory pastry is typically filled with a combination of ground pork, grated green papaya, and a special blend of spices. The outer layer is made from rice flour, giving it a crispy texture when fried. Empanadas are not only a favorite snack but also hold cultural significance, often enjoyed during festivals and gatherings.
Pinakbet, a vegetable stew originating from the northern regions of the Philippines, is also a notable dish. It features a medley of local vegetables, including bitter melon, eggplant, and long beans, cooked with shrimp paste to enhance its flavor. This dish reflects the agricultural abundance of Ilocos and is often served with rice, celebrating the local farming practices.
Lastly, no visit to Ilocos Norte would be complete without tasting Longganisa, a native sausage known for its distinct sweetness. Made from a blend of minced pork, garlic, and spices, Longganisa is typically enjoyed during breakfast, paired with garlic rice and eggs. This dish showcases the region’s rich culinary heritage and the influence of various cultures.
Each dish tells a story, encapsulating the essence of Ilocos Norte’s vibrant food culture. To truly appreciate these flavors, one must indulge in the culinary experiences that this province has to offer.
Popular Food Markets and Street Food Scenes
Ilocos Norte is not only rich in history and culture but also boasts a vibrant food scene characterized by its bustling markets and tantalizing street food offerings. One of the most notable places to explore is the public market in Laoag City. This market serves as a hub for locals and tourists alike, featuring a wide array of fresh produce, local delicacies, and unique food items that provide a true taste of Ilocano cuisine. Visitors can sample chichacorn, a crunchy corn snack, or indulge in the ever-popular empanada filled with savory pork and vegetables, encapsulated in a yellow-orange pastry that makes for an ideal on-the-go meal.
Another prominent location is the picturesque city of Vigan, known for its historic architecture and delicious street food scene. The street food stalls in Vigan come alive in the evening, offering visitors an array of culinary delights. The famed longganisa, a garlicky pork sausage, is a must-try, often served with vinegar dipping sauce for a delightful flavor combination. Additionally, tourists can enjoy street-side specialties such as bagnet, a deep-fried pork dish that is crispy on the outside and tender inside, providing a satisfying crunch with each bite.
Moreover, the food stalls along Vigan’s Calle Crisologo create an inviting atmosphere where the aroma of local dishes fills the air, enticing visitors to sample each offering. Other local favorites include pinakbet, a vegetable stew vibrant with flavors, and the sweet delicacy known as bibingka, a rice cake often enjoyed during local festivities. Exploring these markets and street food offerings not only satiates the appetite but also serves as an opportunity to connect with the local culture and culinary heritage of Ilocos Norte.
Sampling Traditional Snacks and Sweets
Ilocos Norte, a province in the Philippines, is renowned for its rich culinary heritage that features an array of traditional snacks and sweets. Among the most beloved treats are Bibingka, Vigan Empanada, and Chichacorn, each boasting unique flavors and origins that reflect the local culture.
Bibingka, a rice cake traditionally cooked in clay pots lined with banana leaves, is often enjoyed during the Christmas season. This sweet delicacy is made from glutinous rice flour, coconut milk, and sugar, resulting in a fluffy texture and slightly smoky flavor. The practice of eating Bibingka can be traced back to the Spanish colonial period, where it became a part of local festivities. Cowrie shells are sometimes used as a decorative element, showcasing the blend of indigenous and colonial influences on Ilocos cuisine.
Another iconic snack is the Vigan Empanada, a savory pastry filled with meat, vegetables, and egg. Originating from the city of Vigan, this empanada is distinctive for its orange-hued crust, which is achieved through the use of achuete (annatto seeds). The origins of Vigan Empanada can be linked to the fusion of Spanish and indigenous cooking techniques, making it a staple at local markets and street food stalls. One of the best places to try this delicious treat is at the Vigan Heritage Village, where several vendors offer freshly made empanadas served with vinegar for dipping.
Chichacorn is another popular snack that exemplifies the region’s culinary innovation. This crunchy snack is made from toasted corn kernels, delivering a snack that is both flavorful and satisfying. It is often seasoned with garlic, cheese, or kalabasa (squash) flavors, showcasing the region’s agricultural abundance. Visitors to Ilocos Norte can find Chichacorn at various local shops, where it is usually sold in colorful packaging, making it an ideal souvenir for those looking to share a taste of Ilocos with loved ones.
Recommended Restaurants and Eateries
When exploring the vibrant culinary landscape of Ilocos Norte, a variety of local restaurants and eateries beckon food enthusiasts. Each establishment showcases the rich flavors and culinary traditions of the region. Notable among them is “Cafe Loco,” located in Laoag City, known for its modern take on traditional Ilocano dishes. This inviting cafe serves twisted but authentic recipes, such as their signature pinakbet and longganisa, all prepared using locally sourced ingredients. The contemporary decor combined with warm hospitality creates a welcoming atmosphere for diners.
Another must-visit eatery is “Saramsam Cafe” in Paoay, which offers a delightful array of both local and international dishes. This charming destination is celebrated for its innovative take on Ilocos cuisine, featuring specialties such as bagnet and more, served alongside a selection of local craft beers. The rustic design, adorned with indigenous artwork, reflects the cultural heritage of the Ilocos Region, enhancing the overall dining experience.
For those seeking street food, “Evangeline’s” in Batac City is a culinary hotspot. Renowned for its “empanada,” this stall offers an unforgettable taste with each bite. The crispy shell encases a delectable filling of seasoned meat and vegetables, making it a popular choice among locals and tourists alike. With its casual, vibrant atmosphere, it effectively captures the essence of Ilocos Norte’s bustling food scene.
Lastly, “La Preciosa” in Laoag City stands out for its cozy setting and extensive menu. From traditional Ilocano recipes to innovative fusion dishes, this restaurant caters to a wide range of taste preferences. Each meal is crafted with precision, emphasizing authenticity and freshness. Its inviting ambiance makes it an excellent choice for both intimate and large gatherings. As one delves into the culinary options in Ilocos Norte, these eateries not only promise delicious food but also a taste of the local culture and warm hospitality.
Culinary Experiences and Food Tours
Ilocos Norte, a region renowned for its rich culinary heritage, offers an array of food tours and culinary experiences that invite travelers to fully immerse themselves in its vibrant local food scene. Guided food tours are particularly beneficial, as they provide insights into traditional cooking techniques, regional ingredients, and the cultural significance behind various dishes. These culinary explorations are not only an opportunity to taste authentic Ilocano cuisine but also to engage with local chefs and food artisans.
One popular option is the cooking classes that are conducted by expert local cooks. These hands-on experiences often begin with a visit to a local market, where participants can select fresh produce and learn about essential ingredients used in Ilocano dishes. After gathering the necessary items, the class typically transitions to a home or restaurant kitchen, where participants partake in the preparation of iconic dishes such as “bagnet” and “pinakbet.” This interactive approach not only teaches valuable cooking skills but also fosters a deeper understanding of the region’s culinary traditions.
Moreover, food tours that include tastings at various eateries further enhance the culinary adventure. Participants are guided through curated routes, sampling street food and dishes at local restaurants that are celebrated for their authentic flavors. From crispy empanadas to flavorful longganisa, these tastings allow for an exploration of the diverse food offerings within Ilocos Norte. Additionally, visits to local farms provide an excellent opportunity to learn about the sourcing of ingredients while experiencing farm-to-table dining.
Engaging in these culinary experiences and food tours offers participants a unique lens through which to view Ilocos Norte’s culture and community. Whether through cooking classes, tastings, or farm visits, travelers are bound to develop a richer appreciation for this captivating region’s gastronomy.
Sustainable and Organic Farming Practices
Sustainable and organic farming practices hold significant importance in the Ilocos Norte region, as they not only contribute to the culinary landscape but also enhance environmental health and community well-being. These practices focus on maintaining ecological balance and promoting biodiversity, which are essential for long-term agricultural sustainability. Local farmers have increasingly embraced organic methods that prioritize the use of natural fertilizers, compost, and crop rotation, reducing reliance on chemical pesticides and promoting soil fertility.
By prioritizing sustainable agriculture, Ilocos Norte farmers ensure that their produce is not only fresh but also healthy for consumers. Organic farming enhances the nutritional value of crops, providing communities with vital vitamins and minerals through a diverse range of fruits and vegetables. Furthermore, local farms play a pivotal role in the culinary scene by supplying chefs and restaurants with quality, locally-grown ingredients, which are crucial for the preparation of authentic Ilocano dishes such as pinakbet and bagnet. This farm-to-table approach fosters a stronger connection between consumers and producers, promoting a sense of community and shared responsibility among residents.
In addition to supporting the local economy, sustainable and organic farming practices also focus on preserving the cultural heritage of the region. Traditional cultivation methods passed down through generations are combined with modern techniques to enhance productivity while protecting the environment. By fostering healthy ecosystems, farmers contribute to the resilience of local agriculture against climate change and other challenges. The emphasis on organic practices ensures that future generations can enjoy the rich culinary wonders of Ilocos Norte, sustaining the region’s legacy and promoting a holistic approach to food production.
In conclusion, embracing sustainable and organic farming practices in Ilocos Norte is vital not only for enhancing the culinary scene but also for promoting health, supporting local communities, and preserving cultural heritage.
Cultural Influences on Ilocos Cuisine
The culinary landscape of Ilocos Norte is a vibrant tapestry woven from various cultural influences that have shaped its unique food identity. The region’s cuisine is a reflection of its rich history, marked by interactions with different cultures, primarily Spanish, Chinese, and indigenous elements. These influences combine to create a distinctive flavor profile that characterizes Ilocos dishes.
Spanish colonization in the 16th century played a pivotal role in the evolution of Ilocos cuisine. Spanish settlers introduced a variety of cooking techniques and ingredients, including the extensive use of garlic, vinegar, and tomatoes, which became staples in Ilocano cooking. Dishes such as “bagnet” (crispy fried pork) and “empanada” (stuffed pastry) showcase these Spanish influences, revealing a culinary tradition that embraces both local produce and foreign methods.
Chinese migrants also contributed significantly to the Ilocos food scene, bringing with them a plethora of flavors and cooking styles. The integration of Chinese culinary practices can be seen in popular dishes that utilize stir-frying techniques and seasonings. The Ilocos version of “pinakbet,” a vegetable medley often enhanced with soy sauce and fermented bean paste, exemplifies the fusion of Chinese and indigenous cooking methods. This blend not only highlights the adaptability of the local palate but also underscores the importance of trade links between China and the Philippines throughout history.
Moreover, the indigenous elements of Ilocos cuisine cannot be overlooked. Many traditional recipes, passed down through generations, reflect the agricultural practices and locally available ingredients inherent to the region. Staples such as rice, corn, and various root vegetables are intrinsic to the local diet, often cooked using traditional methods that emphasize simplicity and freshness.
In summary, the culinary journey of Ilocos Norte is marked by a harmonious blend of Spanish, Chinese, and indigenous influences. The resulting fusion of flavors and techniques illustrates how historical events and cultural exchanges have shaped the local food landscape, making it a rich subject of exploration for food enthusiasts.
Plan Your Food Journey in Ilocos Norte
Embarking on a food tour in Ilocos Norte requires careful planning to ensure an unforgettable culinary experience. To begin with, consider the best time to visit. The ideal window for a food adventure in this region is during the dry season, which typically runs from November to April. This period not only offers pleasant weather but also coincides with local festivals, providing guests with a rich cultural experience alongside dynamic food offerings.
Getting around Ilocos Norte can be conveniently managed through various transportation options. Renting a car or motorbike provides flexibility and the opportunity to discover lesser-known eateries nestled in remote areas. Alternatively, local jeepneys and tricycles can act as cost-effective means of transportation. Regardless of which method you choose, planning your route to include popular food spots such as Vigan’s famous empanadas or Laoag’s well-known bagnet will enhance your culinary journey.
Creating a personalized food itinerary is essential for maximizing your experience. Begin by researching local delicacies such as pinakbet, longganisa, and bagnet, ensuring you include establishments renowned for these dishes. It is advisable to seek recommendations from locals, as they often know the hidden gems that may not be highlighted in travel guides. Allocate sufficient time for each dining experience, allowing for leisurely meals that include discussion with restaurant staff about the heritage of each dish.
When engaging in the local dining culture, understanding etiquette is paramount. Familiarize yourself with customs such as sharing food from communal dishes and the importance of greetings before meals. It is also considerate to ask for permission before photographing food, ensuring a respectful interaction with the culinary artisans. In conclusion, with adequate preparation and a respect for local traditions, your food journey in Ilocos Norte will not only be pleasurable but also culturally enriching.