Monthly Archives: January 2025

Crispy Fried Hotdogs with Instant Noodles Recipe

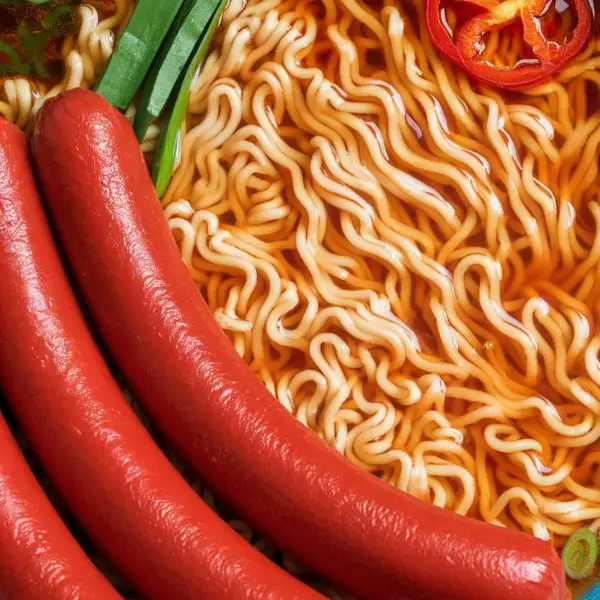
Looking for a quick and satisfying meal that brings a smile to your face? This crispy fried hotdogs paired with instant noodles is just the ticket. It’s a simple dish that combines the nostalgia of childhood favorites with a touch of creativity. You’ll love how easy it is to whip up, and the flavors will take you back to carefree days.

This recipe transforms basic hotdogs into crispy bites that are perfect for snacking or a light meal. The instant noodles add a delightful twist, making this dish comforting and full of flavor. Whether you’re in a hurry or just craving something delicious, this recipe is your go-to solution.

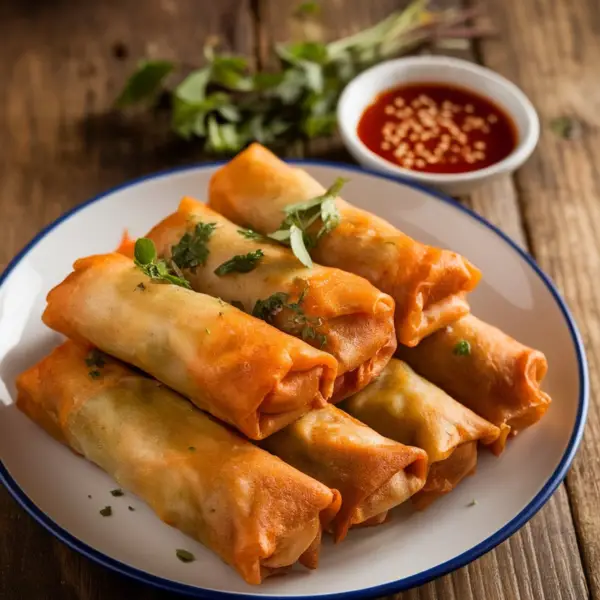
Delightful Hotdogs: A Crispy Treat

The transformation of hotdogs into crispy bites is a culinary delight that elevates a classic.

The golden-brown exterior is not only visually appealing but also ensures a satisfying crunch with each bite.

Herbs sprinkled on top enhance the flavor profile, making them even more irresistible.

Instant Noodles: Quick Comfort Food

Instant noodles serve as the perfect companion to crispy hotdogs.

Their soft and chewy texture complements the crunchiness of the hotdogs, providing a delightful contrast.

When tossed with soy sauce, the noodles take on a savory flavor that ties the dish together, offering a comforting element for a quick meal.

Preparing Your Ingredients

To create this dish, start with the right ingredients.

Using fresh hotdogs and quality instant noodles is key to achieving a delicious outcome.

Gathering a few pantry staples like flour, spices, and breadcrumbs will also aid in the preparation process, allowing you to whip up this dish in no time.

Cooking Techniques for Crunchiness

Frying the hotdogs is an important step that yields that coveted crispy texture.

Dredging them in flour and breadcrumbs before frying helps create a golden crust that locks in flavor.

The ideal frying temperature is crucial; too low, and they’ll absorb oil, too high, and they might burn. Finding that sweet spot is essential for perfecting your hotdogs.

Serving Suggestions

When it comes to serving, presentation plays a role in enhancing the eating experience.

Plating the crispy fried hotdogs next to a mound of glistening noodles creates an appealing contrast that invites you to dig in.

To elevate the dish further, consider adding a side of dipping sauce or fresh herbs for garnish, which can add a pop of color and flavor.

Enjoying the Meal

This dish is not just about taste; it’s about reliving memories of childhood favorites.

Whether you’re enjoying it alone or sharing with friends, it is a meal that brings joy and satisfaction.

Dig into this comforting plate and relish the delightful combination of flavors and textures that make every bite enjoyable.

Quick and Easy Fried Hotdogs with Instant Noodles

Crispy fried hotdogs and instant noodles on a plate, ready to be served.

The crispy fried hotdogs are golden and crunchy on the outside, bursting with juicy flavor on the inside. Paired with instant noodles, this dish offers a lovely textural contrast, making each bite satisfying.

Ingredients

  • 4 hotdogs
  • 1 cup all-purpose flour
  • 1 teaspoon paprika
  • 1/2 teaspoon garlic powder
  • 1/2 teaspoon salt
  • 1/4 teaspoon black pepper
  • 1/2 cup breadcrumbs
  • Oil for frying
  • 2 packs of instant noodles
  • 2 cups water
  • Soy sauce or seasoning from instant noodle packs to taste

Instructions

  1. Prepare the Hotdogs: Cut the hotdogs into halves or quarters, depending on your preference.
  2. Coat the Hotdogs: In a bowl, mix flour, paprika, garlic powder, salt, and black pepper. Dredge the hotdogs in the flour mixture, ensuring they’re fully coated, then dip them in breadcrumbs.
  3. Heat the Oil: In a deep skillet, heat oil over medium heat. Once hot, carefully add the coated hotdogs and fry until golden brown and crispy, about 3-4 minutes. Drain on paper towels.
  4. Cook the Instant Noodles: In a pot, bring water to a boil. Add the instant noodles and cook according to package instructions, usually about 3-4 minutes. Drain and toss with soy sauce or seasoning.
  5. Serve: Plate the crispy fried hotdogs next to the instant noodles. Enjoy while hot!

Cook and Prep Times

  • Prep Time: 10 minutes
  • Cook Time: 15 minutes
  • Total Time: 25 minutes

Nutrition Information

  • Servings: 2 servings
  • Calories: 450kcal
  • Fat: 22g
  • Protein: 15g
  • Carbohydrates: 51g

Authentic Chicken Inasal Recipe

Chicken Inasal is a beloved Filipino grilled chicken dish that bursts with flavor. It’s marinated in a mixture of vinegar, calamansi, and spices, resulting in tender, juicy meat with a delightful tang. Perfect for gatherings or a simple family dinner, this dish embodies the essence of Filipino cuisine.

Imagine the aroma of marinated chicken sizzling over hot coals, each bite revealing layers of flavor. The tangy marinade, combined with a hint of smokiness from grilling, creates a dish that’s both satisfying and memorable. Pair it with steamed rice and a side of atsara for a complete meal.

This recipe is not just a meal; it’s a celebration of flavors that showcases the Filipino love for grilling and bold tastes. With simple ingredients and straightforward steps, you can bring a taste of the Philippines right to your kitchen.

The Allure of Chicken Inasal

Chicken Inasal captivates the senses with its rich marinade and the intoxicating aroma of grilled meat. This dish, hailing from the Philippines, is characterized by its vibrant flavors, combining the tanginess of calamansi and the warmth of spices. Each bite transports you to a rustic Filipino table, where the warmth of tradition meets culinary creativity.

The grilling process not only enhances the flavor but also creates an inviting char that adds depth to the chicken. The hints of smokiness from the grill beautifully complement the tangy marinade, resulting in a dish that is both savory and slightly sweet. Paired with steamed rice, Chicken Inasal becomes a fulfilling meal that delights the palate.

Marinade Magic

The heart of Chicken Inasal lies in its marinade. A blend of vinegar, soy sauce, garlic, ginger, and calamansi juice transforms simple chicken into a culinary masterpiece. The marinade infuses the meat with flavor, ensuring that every bite is bursting with taste.

Allowing the chicken to soak in this vibrant mixture not only tenderizes the meat but also enhances its juiciness. For the best results, marinating overnight is recommended, allowing the flavors to deepen and meld together. This step is where the magic happens, turning basic ingredients into something extraordinary.

The Perfect Grilling Technique

Achieving the ideal char is essential for Chicken Inasal. Preheating the grill to medium-high heat ensures that the chicken cooks evenly while developing those coveted grill marks. Basting the chicken with reserved marinade during grilling contributes to a moister texture and enriches the flavor.

Grilling for 6-8 minutes per side creates a beautiful outer layer while keeping the inside succulent and juicy. The careful attention to timing and temperature makes all the difference, transforming each piece into a grilled delight.

Serving Suggestions

Presentation plays a key role in enjoying Chicken Inasal. A vibrant plate garnished with calamansi slices invites diners to interact with their meal. The zesty fruit not only adds a pop of color but also a refreshing brightness when squeezed over the chicken.

Accompanying the dish with a mound of steamed rice and a small bowl of atsara, a pickled vegetable side, creates a balanced plate. The sweetness and tanginess of atsara cut through the savory richness of the chicken, enhancing the overall dining experience.

The Cultural Connection

Chicken Inasal is more than just a meal; it embodies Filipino culture and hospitality. Often enjoyed during gatherings or special occasions, this dish invites family and friends to come together over something delicious. The vibrant colors and communal style of eating foster a sense of togetherness that resonates deeply within the Filipino spirit.

Every bite of Chicken Inasal tells a story of tradition, love, and celebration. It’s a dish that reflects the warmth of home-cooked meals and the joy of sharing delicious food with loved ones.

Conclusion to the Experience

With its rich marinade, expert grilling, and cultural significance, Chicken Inasal stands out as a beloved Filipino dish. Whether you’re enjoying it at a festive gathering or a simple family dinner, the flavors and aromas create an unforgettable experience that lingers long after the last bite. This culinary gem invites everyone to savor the essence of Filipino cuisine.

The Best Chicken Inasal Recipe

Grilled Chicken Inasal served with rice and atsara, garnished with calamansi on a rustic table.

Chicken Inasal is marinated in a vibrant blend of vinegar, garlic, ginger, and spices, then grilled to perfection. It’s savory and slightly sweet with a smoky flavor, making it a perfect dish for any occasion.

Ingredients

  • 2 pounds chicken (thighs, drumsticks, or whole cut-up chicken)
  • 1/2 cup vinegar (preferably cane vinegar)
  • 1/4 cup soy sauce
  • 1 tablespoon calamansi juice (or lemon juice)
  • 1 head garlic, minced
  • 1 inch ginger, grated
  • 1 teaspoon black pepper
  • 1 tablespoon brown sugar
  • 1 teaspoon salt, adjust to taste
  • Bamboo skewers (optional, for grilling)
  • Banana leaves (optional, for wrapping)

Instructions

  1. Prepare the Marinade: In a bowl, combine vinegar, soy sauce, calamansi juice, minced garlic, grated ginger, black pepper, brown sugar, and salt. Mix well.
  2. Marinate the Chicken: Place the chicken pieces in a large ziplock bag or bowl and pour the marinade over them. Seal or cover, then refrigerate for at least 1 hour, or overnight for best flavor.
  3. Preheat the Grill: Preheat your grill to medium-high heat. If you’re using bamboo skewers, soak them in water for about 30 minutes to prevent burning.
  4. Grill the Chicken: Remove the chicken from the marinade (reserve some marinade for basting). Grill the chicken for about 6-8 minutes on each side, basting occasionally with the reserved marinade, until fully cooked and charred to your liking.
  5. Serve: Once cooked, remove the chicken from the grill and let it rest for a few minutes. Serve hot with steamed rice and a side of atsara.

Cook and Prep Times

  • Prep Time: 15 minutes
  • Marinate Time: 1 hour
  • Cook Time: 20 minutes
  • Total Time: 1 hour 35 minutes

Nutrition Information

  • Servings: 4 servings
  • Calories: 320kcal
  • Fat: 14g
  • Protein: 30g
  • Carbohydrates: 6g

Flavorful Pinakbet Recipe with Vegetables

Pinakbet is a delightful Filipino dish that showcases a medley of fresh vegetables, perfectly simmered to create a hearty and nutritious meal. This dish is not just food; it’s an experience that celebrates the rich flavors of the Philippines, making it a favorite among locals and visitors alike.

Imagine a vibrant plate filled with vegetables like eggplant, bitter melon, and squash, all soaked in a savory shrimp paste sauce. Each bite bursts with flavor, bringing together a balance of sweetness, bitterness, and umami that is simply irresistible.

Perfect for a family dinner or a special occasion, this Pinakbet recipe allows you to embrace the wholesome goodness of vegetables while satisfying your taste buds.

Colors of the Dish

Pinakbet is a feast for the eyes, showcasing a vibrant array of vegetables that are both colorful and nutritious. A combination of squash, eggplant, and bitter melon creates a striking visual presentation that highlights the beauty of Filipino cuisine.

The rich hues of each vegetable not only make the dish appealing but also signify the flavors that await. Each ingredient brings its own unique taste, contributing to a delightful blend that is both satisfying and wholesome.

Savory Shrimp Paste

One of the standout features of pinakbet is the inclusion of shrimp paste, known locally as bagoong. This ingredient adds an umami depth that elevates the dish to new heights.

The savory, salty notes of the shrimp paste intertwine beautifully with the natural sweetness of the vegetables, creating a harmonious flavor profile. It’s a key component that ties the dish together, ensuring each bite is bursting with flavor.

Cooking Techniques

The preparation of pinakbet involves simple yet effective cooking techniques that enhance the taste and texture of the vegetables. Sautéing the onion and garlic at the beginning builds a fragrant base that sets the tone for the dish.

Simmering the vegetables in a broth infused with shrimp paste allows them to absorb the flavors while becoming tender. This method ensures that every ingredient reaches its full potential, delivering a comforting dish that warms the heart.

Serving Suggestions

Pinakbet is traditionally served warm, often accompanied by a side of steamed rice. The simplicity of the rice complements the rich flavors of the dish, making it a perfect pairing.

For an authentic Filipino meal, consider presenting the pinakbet in a rustic bowl, emphasizing its home-cooked nature. This approach invites diners to dig in and enjoy the meal as it was meant to be shared among family and friends.

Nutritional Value

Not only does pinakbet deliver on flavor, but it also offers a range of nutritional benefits. Packed with vegetables, this dish is a great source of vitamins and minerals, making it a healthy option for any meal.

Each serving contains a modest amount of calories, with a good balance of carbohydrates and protein. This makes pinakbet an excellent choice for those looking to enjoy a hearty yet nutritious dish.

Cultural Significance

Pinakbet is more than just a meal; it embodies the essence of Filipino culture. This dish reflects the agricultural roots of the Philippines, where fresh vegetables play a vital role in daily life.

Enjoyed by families across the nation, pinakbet is often prepared during gatherings and celebrations, symbolizing unity and communal dining. It stands as a testament to the rich culinary heritage of the Philippines, cherished for both its taste and tradition.

Traditional Pinakbet with Shrimp Paste

A traditional Filipino pinakbet with mixed vegetables and shrimp paste on a rustic table with rice.

This Pinakbet recipe features a variety of tender vegetables simmered in a rich broth, seasoned with shrimp paste for an authentic Filipino taste. The combination of flavors is both comforting and invigorating, ensuring you enjoy every mouthful.

Ingredients

  • 1 cup squash, diced
  • 1 cup eggplant, sliced
  • 1 cup bitter melon, sliced
  • 1 cup string beans, cut into 2-inch pieces
  • 1 medium onion, chopped
  • 2 cloves garlic, minced
  • 2 tablespoons shrimp paste (bagoong)
  • 2 cups water
  • Salt and pepper to taste
  • 2 tablespoons vegetable oil

Instructions

  1. Sauté Aromatics: Heat vegetable oil in a large pot over medium heat. Add onion and garlic, sautéing until fragrant.
  2. Add Vegetables: Stir in the squash and cook for about 5 minutes, then add eggplant, bitter melon, and string beans. Stir well.
  3. Season: Add shrimp paste and mix thoroughly. Pour in water and bring to a gentle simmer.
  4. Cook: Cover and cook for 10-15 minutes or until the vegetables are tender. Season with salt and pepper to taste.
  5. Serve: Transfer to a serving dish and enjoy warm with steamed rice.

Cook and Prep Times

  • Prep Time: 10 minutes
  • Cook Time: 20 minutes
  • Total Time: 30 minutes

Nutrition Information

  • Servings: 4 servings
  • Calories: 150kcal
  • Fat: 5g
  • Protein: 4g
  • Carbohydrates: 24g

Authentic Kare-Kare Recipe

Kare-Kare is a beloved Filipino dish that brings together a rich peanut sauce and tender oxtail in a comforting embrace. This recipe is not just a meal; it’s a culinary tradition that resonates with family gatherings and special occasions. The depth of flavor is simply unmatched, making it a favorite among many.

Imagine a plate filled with succulent oxtail, vibrant vegetables, and a luscious peanut sauce that dances on your taste buds. This dish is an explosion of textures and flavors – the creamy richness of the sauce paired with the freshness of the vegetables creates a delightful harmony.

Making Kare-Kare may sound intimidating, but with this straightforward recipe, you’ll find it surprisingly accessible. Get ready to impress your friends and family with this Filipino classic!

Understanding Kare-Kare

Kare-Kare is not just another dish; it’s an integral part of Filipino culinary heritage. This rich and flavorful meal features tender oxtail, creating a comforting experience that evokes memories of home and family gatherings. Each bowl serves as a reminder of special occasions filled with laughter and shared stories.

The key to its charm lies in the luscious peanut sauce, which envelops the oxtail and fresh vegetables, creating a delightful balance of flavors. The slight sweetness of the sauce, combined with the savory notes of the meat, makes every bite an enjoyable experience. It’s a dish that embodies the spirit of Filipino cuisine.

Ingredients that Shine

The beauty of Kare-Kare is in its simplicity and the quality of its ingredients. Oxtail is the star, but it’s complemented by a vibrant selection of vegetables including eggplant, banana heart, and string beans. This colorful medley not only enhances the dish visually but also adds various textures and nutrients.

Peanut butter and ground rice form the base of the rich sauce, contributing to its creamy consistency. Fish sauce adds a hint of umami, while chopped peanuts on top provide a delightful crunch. Served with bagoong, a fermented shrimp paste, the flavors come together to create a traditional feast.

Cooking Techniques

Creating the perfect Kare-Kare involves a few essential techniques that ensure tenderness and flavor. The initial step of boiling the oxtail helps to cleanse it, setting the stage for a clean-tasting broth. Simmering the meat slowly allows the flavors to develop fully, resulting in a tender texture that falls off the bone.

Incorporating the peanut sauce requires careful mixing to achieve the right consistency. The addition of vegetables towards the end of cooking helps maintain their vibrant colors and crunch. This method showcases the dish’s freshness while ensuring each component harmonizes beautifully.

Serving Suggestions

Presentation plays a significant role in how Kare-Kare is enjoyed. Ladling the dish into deep bowls and garnishing with chopped peanuts elevates the visual appeal. The contrasting colors of the dish against a wooden table provide a rustic charm that enhances the overall dining experience.

Pairing it with a bowl of bagoong allows each diner to customize their meal, adding a salty punch that balances the richness of the sauce. This interactive element makes eating Kare-Kare not just a meal, but a festive occasion.

Cultural Significance

Kare-Kare is more than just food; it’s a symbol of Filipino culture. Traditionally served during significant celebrations, this dish brings people together, fostering a sense of community. The act of sharing a bowl of Kare-Kare showcases generosity and hospitality, deeply rooted in Filipino values.

As families gather around the table, the dish becomes a centerpiece of conversation, laughter, and connection. The experience of enjoying Kare-Kare extends beyond the palate, resonating with cherished memories and shared moments.

Variations and Modern Takes

While the classic version of Kare-Kare remains beloved, many modern adaptations have emerged, catering to a diverse range of dietary preferences. Some variations include using vegetables as the main ingredient, appealing to vegetarians or vegans, while others may incorporate different proteins such as tripe or even seafood.

Experimenting with the ingredients provides a fresh take on this traditional dish while still honoring its roots. Whether it’s a family recipe passed down through generations or a new interpretation, Kare-Kare continues to evolve, delighting palates around the world.

Traditional Kare-Kare with a Twist

A bowl of Kare-Kare with oxtail and vegetables in peanut sauce, garnished with peanuts, alongside bagoong.

This authentic Kare-Kare features tender oxtail stewed in a velvety peanut sauce, accompanied by a colorful medley of vegetables. Each bite is a perfect balance of savory and slightly sweet, leaving a lasting impression that’s hard to forget.

Ingredients

  • 2 lbs oxtail, cut into pieces
  • 1/2 cup peanut butter
  • 1/4 cup ground rice or rice flour
  • 1 onion, chopped
  • 4 cloves garlic, minced
  • 1/2 lb eggplant, sliced
  • 1/2 lb banana heart, sliced
  • 1/2 lb string beans, trimmed
  • 4 cups beef broth
  • 2 tablespoons fish sauce
  • Salt and pepper to taste
  • Chopped peanuts and bagoong (fermented shrimp paste) for serving

Instructions

  1. Prepare the Oxtail: In a large pot, add the oxtail and cover with water. Boil for about 10 minutes, then drain and rinse. This step helps remove impurities.
  2. Simmer the Oxtail: Return the cleaned oxtail to the pot, add beef broth, onion, and garlic. Simmer for about 1.5 to 2 hours, or until the meat is tender.
  3. Make the Sauce: Once the oxtail is tender, stir in the peanut butter and ground rice, mixing until well combined. Add water if the sauce is too thick.
  4. Add Vegetables: Incorporate the sliced eggplant, banana heart, and string beans into the pot. Cook for an additional 10-15 minutes until the vegetables are tender.
  5. Season: Adjust seasoning with fish sauce, salt, and pepper to taste.
  6. Serve: Ladle the Kare-Kare into bowls and garnish with chopped peanuts. Serve hot with a side of bagoong.

Cook and Prep Times

  • Prep Time: 20 minutes
  • Cook Time: 2 hours
  • Total Time: 2 hours 20 minutes
  • Servings: 6 servings
  • Calories: 450kcal
  • Fat: 28g
  • Protein: 32g
  • Carbohydrates: 20g

Authentic Bistek Tagalog Recipe

Bistek Tagalog, a classic Filipino dish, brings together the savory flavors of marinated beef and the rich taste of onions. This dish is a staple in many households, loved for its simplicity and heartwarming taste. Perfect for family gatherings or a comforting weeknight dinner, Bistek Tagalog is sure to impress.

Imagine tender slices of beef, marinated in soy sauce and calamansi, cooked until perfectly juicy and paired with caramelized onions. The combination of tangy and savory flavors creates a truly delightful experience. Whether served over rice or with a side of vegetables, this dish is a crowd-pleaser.

Understanding Bistek Tagalog

Bistek Tagalog is a beloved dish from the Philippines, showcasing the harmonious blend of tender beef and aromatic onions. The use of soy sauce and calamansi juice in its marinade gives it a distinctive savory and tangy profile.

This dish is not only a staple in many households but also a symbol of Filipino hospitality. It embodies comfort, often bringing families together around the dinner table to share stories and laughter.

Key Ingredients and Their Roles

The main ingredient, beef sirloin, shines in this recipe due to its tenderness. It absorbs the flavors of the marinade beautifully, ensuring each bite is packed with taste.

Onions, sautéed until golden brown, add a sweet depth to the dish. The combination of the marinated beef and caramelized onions creates a fulfilling experience that resonates with both locals and those new to Filipino cuisine.

Aromatic Marinade

Marinating the beef is a vital step that cannot be overlooked. A mixture of soy sauce, calamansi juice, and garlic not only tenderizes the meat but also infuses it with a robust flavor.

Allowing the beef to soak up these ingredients for at least thirty minutes enhances the overall taste, making the final dish even more inviting. The tanginess of calamansi provides a refreshing contrast to the savory notes of the soy sauce.

Cooking Technique

The preparation of Bistek Tagalog involves simple yet effective techniques. Sautéing the onions separately until they caramelize adds complexity to the dish.

Cooking the marinated beef in the same skillet allows the meat to absorb the residual flavors from the onions, enriching the sauce. This method of cooking ensures that the beef remains juicy and flavorful.

Serving Suggestions

When serving Bistek Tagalog, a side of steaming white rice is essential. The rice acts as a neutral base, complementing the rich sauce and meaty flavors of the dish.

For an extra touch, a small bowl of soy sauce for dipping enhances the experience, allowing each diner to personalize their flavor profile. Garnishing with fresh calamansi and green onions adds brightness and visual appeal to the plate.

Embracing Filipino Culture

Every dish tells a story, and Bistek Tagalog is no exception. It reflects the warmth of Filipino culture and the joy of sharing a meal with loved ones.

This delectable dish is perfect for any occasion, whether it’s a family gathering or a casual weeknight dinner. Bistek Tagalog invites diners to savor not just the food but also the moments spent together, making it a cherished part of Filipino dining traditions.

The Best Bistek Tagalog Recipe

A delicious serving of Bistek Tagalog with beef and onions, served alongside rice and calamansi.

This Bistek Tagalog recipe features thinly sliced beef marinated in a flavorful mixture of soy sauce and calamansi juice, then sautéed with onions. The resulting dish is savory, slightly tangy, and incredibly satisfying, making it a favorite at any Filipino dining table.

Ingredients

  • 1 lb beef sirloin, thinly sliced
  • 1/4 cup soy sauce
  • 1/4 cup calamansi juice or lemon juice
  • 2 tablespoons vegetable oil
  • 2 medium onions, sliced into rings
  • 1 teaspoon garlic, minced
  • Salt and pepper to taste
  • Chopped green onions for garnish (optional)

Instructions

  1. Marinate the Beef: In a bowl, combine soy sauce, calamansi juice, minced garlic, salt, and pepper. Add the sliced beef and let it marinate for at least 30 minutes.
  2. Cook the Onions: In a large skillet, heat vegetable oil over medium heat. Add sliced onions and sauté until they are golden brown. Remove from the skillet and set aside.
  3. Cook the Beef: In the same skillet, add the marinated beef (reserve the marinade) and cook until browned. Pour in the reserved marinade and simmer for 5-10 minutes until the beef is tender.
  4. Combine: Add the cooked onions back into the skillet and mix well. Adjust seasoning if necessary.
  5. Serve: Transfer to a serving dish and garnish with chopped green onions if desired. Serve hot with steamed rice.

Cook and Prep Times

  • Prep Time: 10 minutes
  • Cook Time: 20 minutes
  • Total Time: 30 minutes

Nutrition Information

  • Servings: 4 servings
  • Calories: 350kcal
  • Fat: 15g
  • Protein: 30g
  • Carbohydrates: 10g

Refreshing Watermelon Palamig Recipe

Looking for a cool and refreshing treat to beat the heat? This Watermelon Palamig is just the answer! Perfect for warm days, this delightful drink combines the sweetness of ripe melons with a hint of mint, making it a favorite among family and friends. Whether you’re lounging by the pool or hosting a summer gathering, this recipe is sure to impress.

This easy-to-make Melon Palamig is not only a thirst-quencher but also a visually stunning drink that captures the essence of summer in every sip. The combination of juicy watermelon and honeydew creates a beautiful gradient that is as pleasing to the eye as it is to the palate.

Chill Out with This Watermelon Palamig

The Melon Palamig stands out as an ideal choice for those hot summer days. This drink brings a refreshing blend of watermelon and honeydew, creating a delightful combination that is both sweet and invigorating.

With its light and fruity profile, this beverage is perfect for any outdoor gathering. Imagine lounging under the warm sun, sipping on this chilled treat, and feeling the refreshing burst of flavors dance on your palate.

Ingredients That Shine

To create this delightful drink, you’ll need just a few simple ingredients. Fresh watermelon and honeydew melon form the base, bringing their natural sweetness and hydration to the mix.

A touch of sugar can enhance the flavor, while water helps dilute the mixture to a perfect sipping consistency. Finally, fresh mint leaves not only add a pop of color but also a refreshing aroma that elevates the experience.

Preparation Made Easy

Preparing Melon Palamig is a quick and easy task. Start by cutting the watermelon and honeydew into cubes, then blend them until smooth. The vibrant colors of these melons will create a beautiful mixture that is pleasing to the eye.

After blending, add sugar to taste and mix until combined. This step allows you to control the sweetness, making it as light or rich as you prefer.

The Refreshing Experience

Once the mixture is ready, combine it with water in a large pitcher. Stir well to ensure everything is incorporated seamlessly. This step is key to achieving that refreshing taste that defines Melon Palamig.

Chilling the mixture for at least 30 minutes in the refrigerator allows the flavors to meld beautifully. When you’re ready to serve, pour it over ice to create a cool, enjoyable drink.

Garnishing for a Touch of Flair

No drink is complete without a little garnish! Fresh mint leaves add a delightful visual element as well as an aromatic touch. They enhance the overall presentation, making your Melon Palamig look as fantastic as it tastes.

Set the glasses on a sunny patio table, and watch your guests light up as they take that first sip. The combination of colors and the refreshing flavor make this drink a real showstopper.

The Perfect Summer Companion

Melon Palamig is perfect for any summer occasion, whether you’re hosting a barbecue, lounging by the pool, or just enjoying a sunny afternoon in your backyard. Its lightness and refreshing taste make it a favorite for all ages.

Not only will it quench your thirst, but it will also add a burst of color and joy to your summer gatherings. With each glass, you’re not just serving a drink; you’re creating memories of summer relaxation and enjoyment.

Chill Out with This Melon Palamig

A cool glass of Melon Palamig with watermelon and honeydew, garnished with mint, on a sunny patio.

The Melon Palamig is a sweet and refreshing beverage made with fresh melon, water, and a touch of sweetness. It is light, fruity, and bursting with flavor, making it a perfect drink for hot weather.

Ingredients

  • 2 cups watermelon, cubed and deseeded
  • 2 cups honeydew melon, cubed
  • 1/4 cup sugar (adjust to taste)
  • 4 cups water
  • Fresh mint leaves for garnish
  • Ice cubes

Instructions

  1. Prepare the Melons: In a blender, combine the watermelon and honeydew cubes. Blend until smooth.
  2. Sweeten the Mixture: Add sugar to the blended melon mixture and blend again until well combined.
  3. Combine with Water: In a large pitcher, combine the blended melon mixture with water. Stir well to combine.
  4. Chill and Serve: Refrigerate the mixture for at least 30 minutes to chill. Serve over ice and garnish with fresh mint leaves.

Cook and Prep Times

  • Prep Time: 10 minutes
  • Chill Time: 30 minutes
  • Total Time: 40 minutes

Nutrition Information

  • Servings: 4 glasses
  • Calories: 100kcal
  • Fat: 0g
  • Protein: 1g
  • Carbohydrates: 25g

Authentic Pancit Bihon Recipe

Pancit Bihon is a classic Filipino dish that brings family and friends together around the table. This stir-fried noodle dish combines rice noodles with a medley of vibrant vegetables and protein, making it a delicious centerpiece for any gathering. It’s a recipe that holds nostalgia and warmth, perfect for celebrations or everyday meals.

Imagine the delightful aroma of garlic, soy sauce, and fresh vegetables wafting through your kitchen as you prepare this beloved dish. With its savory flavors and satisfying texture, Pancit Bihon is not just food; it’s a celebration of Filipino culture and culinary tradition.

The Essence of Pancit Bihon

Pancit Bihon stands as a beloved staple in Filipino cuisine, often symbolizing celebration and togetherness. This stir-fried noodle dish has a way of bringing people around the table, creating an atmosphere filled with warmth and camaraderie.

At its core, Pancit Bihon is about simplicity and flavor. The combination of rice noodles and an array of colorful vegetables such as bell peppers, carrots, and cabbage creates a visual feast. With every bite, the delightful taste transports you to a place where family gatherings and joyous occasions unfold.

Vibrant Ingredients That Shine

The ingredients in Pancit Bihon are not just functional; they contribute to the dish’s vibrant character. Each vegetable brings its unique texture and flavor, enhancing the overall experience. Carrots add a subtle sweetness, while bell peppers bring a crunchy contrast. Shredded cabbage rounds out the dish with its tender yet crisp nature.

Moreover, the choice of protein—be it chicken, shrimp, or pork—provides an additional layer of richness, making every forkful satisfying. This balance of flavors and textures is what makes Pancit Bihon a favorite among many.

Aromatic Preparation

The process of making Pancit Bihon is as delightful as enjoying the final dish. The aroma of garlic and onions sizzling in oil fills the kitchen, creating an inviting atmosphere. As the vegetables are added, the medley of scents intensifies, culminating in a dish that promises deliciousness.

Stir-frying is key in this recipe, allowing the ingredients to cook quickly while retaining their freshness. The artful tossing of the noodles with soy sauce creates a beautiful sheen, further enhancing their appeal. This preparation method guarantees that each component maintains its distinct flavor.

Garnishing the Dish

Presentation plays a significant role in the enjoyment of Pancit Bihon. Garnishing with chopped green onions not only adds a pop of color but also introduces a fresh, slightly pungent note that complements the savory elements of the dish.

Resting a fork on the side invites a sense of anticipation, beckoning everyone to dig in and savor the flavors. The rustic wooden table setting adds a touch of homey charm, making the meal feel even more inviting.

A Dish for Every Occasion

Pancit Bihon is versatile and fits perfectly into various occasions. Whether it’s a festive celebration, a casual family dinner, or a gathering with friends, this dish adapts effortlessly. It encourages sharing and enjoying good company while savoring each delicious bite.

Moreover, making Pancit Bihon can be a collaborative experience. Friends and family can join in the preparation process, making it a fun activity that strengthens bonds. This aspect of cooking together is integral to the joy that Pancit Bihon brings.

Final Thoughts on Pancit Bihon

Ultimately, Pancit Bihon is more than just a meal; it embodies the spirit of Filipino culture. Its rich flavors, colorful ingredients, and communal nature make every serving a celebration. Each plate tells a story of love, tradition, and togetherness.

So whether you are enjoying it at a special occasion or simply as a comforting weeknight meal, Pancit Bihon is sure to leave a lasting impression. It’s a delicious reminder that food can indeed bridge connections and create cherished memories.

Traditional Pancit Bihon Recipe

A plate of Pancit Bihon with rice noodles, vegetables, and green onions on a rustic wooden table.

Pancit Bihon features thin rice noodles stir-fried with a colorful assortment of vegetables, such as carrots, bell peppers, and cabbage. The dish is typically enhanced with soy sauce, garlic, and your choice of protein, resulting in a savory and slightly sweet flavor profile that is both comforting and satisfying.

Ingredients

  • 8 ounces bihon (rice vermicelli noodles)
  • 2 tablespoons vegetable oil
  • 4 cloves garlic minced
  • 1 medium onion sliced
  • 1 medium carrot julienned
  • 1 bell pepper sliced
  • 2 cups cabbage shredded
  • 2 cups cooked chicken, shrimp, or pork (optional)
  • 3 tablespoons soy sauce
  • 1 tablespoon oyster sauce (optional)
  • Salt and pepper to taste
  • Chopped green onions for garnish

Instructions

  1. Prepare the Noodles: Soak the bihon noodles in warm water for about 10-15 minutes until softened. Drain and set aside.
  2. Sauté the Aromatics: In a large skillet or wok, heat the vegetable oil over medium heat. Add the minced garlic and sliced onion, sautéing until fragrant and translucent.
  3. Cook the Vegetables: Stir in the carrots and bell peppers, cooking for about 3-4 minutes until slightly tender. Add the cabbage and cooked protein (if using), and continue to stir-fry for another 2-3 minutes.
  4. Combine the Noodles: Add the soaked bihon noodles to the skillet along with soy sauce and oyster sauce. Toss everything together gently, ensuring the noodles are coated evenly with the sauce and heated through.
  5. Season and Serve: Taste and adjust the seasoning with salt, pepper, or additional soy sauce as needed. Once everything is well combined and heated, remove from heat and garnish with chopped green onions before serving.

Cook and Prep Times

  • Prep Time: 15 minutes
  • Cook Time: 20 minutes
  • Total Time: 35 minutes

Nutrition Information

  • Servings: 4 servings
  • Calories: 300kcal
  • Fat: 10g
  • Protein: 15g
  • Carbohydrates: 40g

Savory Beef Caldereta Recipe

If you’re looking for a heartwarming dish that brings comfort and satisfaction, look no further than this Beef Caldereta recipe. This Filipino classic is not just a meal; it’s an experience that fills your kitchen with inviting aromas and makes your taste buds dance. Perfect for family gatherings or special occasions, this dish promises to impress everyone at the table.

What makes this Beef Caldereta truly special is its rich, savory flavor. Slow-cooked to perfection, the tender beef absorbs all the delightful spices and ingredients. Imagine a luscious sauce that’s both tangy and slightly sweet, perfectly balanced by the natural flavors of the beef and vegetables. Each bite is a harmony of tastes that will leave you craving more.

Understanding Beef Caldereta

Beef Caldereta is a staple in Filipino cuisine, renowned for its rich and savory profile. This dish is a celebration of flavors, showcasing tender beef simmered in a luscious tomato-based sauce. Each ingredient plays an important role in creating a robust meal that warms the heart and delights the palate.

The essence of Caldereta lies in its slow-cooking method. The prolonged simmer allows the beef to absorb the flavors from the sauce and spices, resulting in tender chunks that practically melt in your mouth. The addition of vibrant vegetables like carrots, potatoes, and bell peppers not only enhances the visual appeal but also adds a variety of textures and tastes that complement the beef beautifully.

Ingredients That Make It Special

This dish features a combination of wholesome ingredients that contribute to its hearty nature. The use of liver spread enriches the sauce, elevating the flavor profile and offering a unique twist that sets it apart from other stews.

Tomato sauce serves as the base, providing a tangy sweetness that balances the savory elements of the beef. The careful selection of spices, along with fresh garlic and onions, ensures that every spoonful is bursting with flavor, inviting everyone to savor the dish.

Preparation Steps to Perfection

Preparing Beef Caldereta is a straightforward yet rewarding process. It begins with sautéing garlic and onions in oil, filling the kitchen with an inviting aroma. The next step involves searing the beef until it’s beautifully browned, which locks in the juices and enhances the overall flavor.

Once the beef is seared, it’s time to combine it with the tomato sauce, beef broth, and liver spread. Bringing this mixture to a boil and then allowing it to simmer is crucial for tenderness. It’s during this stage that the flavors meld together, creating the signature taste people love.

The Role of Vegetables

Vegetables are not just an afterthought in Beef Caldereta; they are essential for creating a balanced meal. Potatoes and carrots add natural sweetness, while bell peppers provide a fresh crunch that contrasts with the succulent beef.

Adding these vegetables at the right time ensures they are perfectly cooked – tender yet not mushy. Their vibrant colors make the dish visually appealing, enticing everyone to dig into this comforting feast.

Serving Suggestions

Beef Caldereta is traditionally served in a charming Filipino bowl, often garnished with fresh parsley for a pop of color. This presentation not only highlights the dish’s inviting nature but also emphasizes its role as a communal meal meant to be enjoyed with family and friends.

Accompanying this dish with steamed rice is a common practice, allowing diners to soak up the rich sauce with each bite. Whether it’s a festive occasion or a simple family dinner, Beef Caldereta makes for a delightful centerpiece that brings people together.

Nutrition and Serving Size

This comforting dish provides a balanced meal with a generous serving of protein from the beef, along with essential vitamins and minerals from the vegetables. Each serving of Beef Caldereta contains approximately 350 calories, making it a filling option without being overly heavy.

With the potential to serve six, it’s perfect for gathering loved ones around the table, creating an atmosphere of warmth and togetherness. This classic dish not only satisfies hunger but also nourishes the soul.

Authentic Beef Caldereta

A hearty bowl of beef caldereta with beef, vegetables in rich tomato sauce, garnished with parsley.

This Beef Caldereta features tender chunks of beef stewed in a rich tomato sauce, combined with bell peppers, carrots, and potatoes. The dish is often enriched with liver spread and spices, making it a hearty and satisfying meal that showcases the best of Filipino cuisine.

Ingredients

  • 2 lbs beef chuck, cut into cubes
  • 1 cup tomato sauce
  • 1 cup beef broth
  • 1/2 cup liver spread
  • 2 medium potatoes, diced
  • 2 medium carrots, sliced
  • 1 red bell pepper, sliced
  • 1 green bell pepper, sliced
  • 1 onion, chopped
  • 4 cloves garlic, minced
  • 2 tablespoons soy sauce
  • 2 tablespoons cooking oil
  • 1 teaspoon black pepper
  • Salt to taste
  • Chopped parsley for garnish (optional)

Instructions

  1. Heat oil in a large pot over medium heat. Sauté the onions and garlic until fragrant.
  2. Add the beef cubes and sear until browned on all sides.
  3. Stir in the tomato sauce, beef broth, liver spread, soy sauce, and black pepper. Bring to a boil, then reduce heat to low.
  4. Cover and simmer for about 1.5 to 2 hours, or until the beef is tender.
  5. Add the potatoes, carrots, and bell peppers. Cook until the vegetables are tender, about 15-20 minutes.
  6. Season with salt to taste. Serve hot, garnished with chopped parsley if desired.

Cook and Prep Times

  • Prep Time: 15 minutes
  • Cook Time: 2 hours
  • Total Time: 2 hours 15 minutes

Nutrition Information

  • Servings: 6 servings
  • Calories: 350kcal
  • Fat: 20g
  • Protein: 30g
  • Carbohydrates: 20g

Authentic Filipino Chicken Curry Recipe

If you’re looking for a comforting and flavorful dish, this Filipino chicken curry is a must-try. This recipe captures the essence of home-cooked meals, delivering rich and savory flavors that are sure to please your palate. The combination of tender chicken, aromatic spices, and creamy coconut milk creates a delightful harmony of taste that will transport you straight to the Philippines.

This chicken curry is not just a meal; it’s an experience. With every bite, you’ll savor the warmth of turmeric, the sweetness of carrots, and the creamy texture of coconut milk. Whether you’re serving it for a family dinner or special occasion, this dish will impress everyone at the table.

Discover the Rich Flavors of Filipino Chicken Curry

This Filipino chicken curry presents a vibrant medley of flavors, bringing together tender pieces of chicken in a luscious coconut milk sauce. The addition of colorful vegetables, like carrots and bell peppers, enhances both the visual appeal and the nutritional value of the dish.

Infused with aromatic spices, this dish delivers a comforting experience that evokes the essence of traditional Filipino cooking. The warmth of the curry and the creaminess of the coconut milk create a delightful balance that is truly satisfying.

The Art of Preparing Chicken Curry

Preparing this Filipino chicken curry is a straightforward yet rewarding process. Begin by sautéing the aromatic vegetables such as onions, garlic, and ginger in a pot. This step lays the foundation for the dish, filling the kitchen with enticing scents.

Next, brown the chicken pieces to lock in their juices. Once the chicken is seared, introduce the vibrant vegetables and let them soften slightly. This layering of flavors ensures that every ingredient contributes to the overall taste profile.

Cooking Down to Perfection

Once the chicken and vegetables are combined, sprinkle the curry powder and pour in the creamy coconut milk. This combination is key, as it melds the spices into the dish, creating a rich sauce.

Allow the mixture to simmer gently. The slow cooking process melds the flavors beautifully, resulting in tender chicken enveloped in a thick, flavorful sauce. Adjusting the seasoning with salt and pepper will ensure a balanced taste.

Serving Suggestions

For a complete meal, serve the Filipino chicken curry hot alongside steaming white rice. The rice not only complements the rich flavors of the curry but also provides a satisfying base to soak up the sauce.

To add a fresh touch, garnish the dish with chopped green onions. This final addition brings a pop of color and a hint of freshness, enhancing the overall presentation of the dish.

The Cultural Touch

Filipino chicken curry is more than just a meal; it is a reflection of Filipino hospitality and warmth. Enjoyed in a rustic setting, the dish evokes a sense of community and togetherness, making it perfect for family gatherings or special occasions.

The traditional elements of the meal, from the vibrant colors to the homey flavors, create a welcoming atmosphere that invites everyone to the table. Sharing this dish can become a cherished experience that celebrates Filipino culture and cuisine.

Nutrition and Enjoyment

This chicken curry is not only pleasing to the palate but also packs a nutritional punch. With a balance of protein, healthy fats, and carbohydrates, it is a wholesome choice for any meal.

Enjoy the harmony of flavors and the comforting essence of this Filipino chicken curry. Whether indulging on a cozy night in or serving it during a festive occasion, this dish is sure to impress and satisfy.

Discover the Rich Flavors of Filipino Chicken Curry

A bowl of Filipino chicken curry with tender chicken, colorful vegetables in coconut sauce, and a side of white rice.

This Filipino chicken curry is a vibrant and satisfying dish that combines tender chicken pieces with an array of vegetables in a luscious coconut milk sauce. It’s infused with spices that give it a distinctive warmth and depth, making it a perfect choice for any meal.

Ingredients

  • 2 lbs chicken thighs, cut into pieces
  • 1 cup coconut milk
  • 2 tablespoons curry powder
  • 1 medium onion, chopped
  • 3 cloves garlic, minced
  • 1 tablespoon ginger, grated
  • 2 medium potatoes, cubed
  • 1 medium carrot, sliced
  • 1 red bell pepper, sliced
  • 2 tablespoons fish sauce
  • 1 tablespoon vegetable oil
  • Salt and pepper to taste
  • Chopped green onions for garnish

Instructions

  1. Sauté Aromatics: Heat vegetable oil in a large pot over medium heat. Add onions, garlic, and ginger, sautéing until fragrant and golden.
  2. Cook Chicken: Add chicken pieces to the pot and cook until browned on all sides.
  3. Add Vegetables: Stir in potatoes, carrots, and bell pepper. Cook for a few minutes until they start to soften.
  4. Make the Curry: Sprinkle curry powder over the chicken and vegetables. Pour in coconut milk and fish sauce. Stir to combine and bring to a simmer.
  5. Simmer: Cover the pot and let it cook for about 20-30 minutes, or until the chicken is tender and the sauce thickens. Adjust seasoning with salt and pepper as needed.
  6. Serve: Garnish with chopped green onions and serve hot with steamed rice.

Cook and Prep Times

  • Prep Time: 15 minutes
  • Cook Time: 40 minutes
  • Total Time: 55 minutes
  • Servings: 4 servings
  • Calories: 450kcal
  • Fat: 30g
  • Protein: 30g
  • Carbohydrates: 25g

Delicious Paksiw na Bangus Recipe

Paksiw na Bangus is a delightful Filipino dish that features milkfish simmered in a tangy vinegar sauce. This recipe is a staple in many households, perfect for those who appreciate the bold flavors of vinegar combined with the mild taste of bangus. It’s a dish that brings back memories of family gatherings and home-cooked meals.

Imagine the aroma of tender bangus cooking in a savory broth of vinegar, garlic, and spices. This dish is not only comforting but also incredibly easy to prepare, making it a favorite for both novice and experienced cooks alike. The best part? It’s healthy, satisfying, and can be served with rice for a complete meal.

Understanding Paksiw na Bangus

Paksiw na Bangus is a traditional Filipino dish that showcases the delicate flavor of milkfish, known locally as bangus.

This dish is characterized by its tangy vinegar sauce, which brings a lively zest to the tender fish, making it a favorite among many.

The cooking method involves simmering the fish in a fragrant mixture of vinegar, garlic, and spices, allowing the flavors to meld harmoniously.

The Ingredients That Make It Special

The essence of Paksiw na Bangus lies in its simple yet flavorful ingredients.

Fresh bangus is the star, butterflied for even cooking and better absorption of the tangy sauce.

Vinegar is a key component, lending a sharpness that cuts through the richness of the fish. Sliced onions and minced garlic add depth, while black peppercorns and finger chilies contribute warmth and subtle heat.

Aromatic Cooking Process

The preparation of this dish begins with cleaning and butterflying the bangus, ensuring it’s ready to soak up the delicious marinade.

In a large pot, vinegar, water, onions, garlic, and spices come together to create a fragrant broth.

Once the fish is added, it is gently simmered, allowing it to become tender and infused with the savory sauce. The cooking time is crucial, as it allows the fish to reach the perfect level of doneness while soaking up all the flavors.

The Art of Presentation

Serving Paksiw na Bangus is as important as the cooking process.

A beautifully arranged plate features the fish at its center, garnished with vibrant green onions and slices of onion that add a pop of color.

Accompanying the dish, a bowl of steaming white rice is essential, as it balances the tangy flavors of the paksiw and completes the meal.

Cultural Significance

Paksiw na Bangus is not just a meal; it embodies the warmth of Filipino hospitality.

Often served during family gatherings and celebrations, it carries a sense of nostalgia and comfort for many.

The dish reflects the Filipino love for bold flavors, blending simplicity with tradition in every bite.

Health Benefits of Paksiw na Bangus

This dish is not only satisfying but also nutritious.

Bangus is a good source of protein and healthy fats, making it a wholesome option for any meal.

The use of vinegar in cooking also has health benefits, including potential digestion assistance and aiding in blood sugar control.

When paired with rice, Paksiw na Bangus becomes a complete meal that nourishes and delights.

Authentic Paksiw na Bangus Recipe

A serving of Paksiw na Bangus on a plate, garnished with onions and green onions, with rice in the background.

This Paksiw na Bangus is a savory dish made with fresh bangus, marinated in vinegar and cooking spices until tender. The taste is a perfect balance of tangy and savory, with hints of garlic and pepper that enhance the natural flavor of the fish. It’s a flavorful dish that’s sure to please anyone at the table.

Ingredients

  • 1 whole bangus (milkfish), cleaned and butterflied
  • 1 cup vinegar
  • 1 cup water
  • 1 onion, sliced
  • 4 cloves garlic, minced
  • 1 teaspoon black peppercorns
  • 2-3 pieces finger chili (siling pangsigang)
  • Salt to taste
  • 1 tablespoon cooking oil
  • Chopped green onions for garnish (optional)

Instructions

  1. Prepare the Fish: Clean the bangus thoroughly and butterfly it, making sure to remove all entrails.
  2. Combine Ingredients: In a large pot, combine vinegar, water, sliced onion, minced garlic, black peppercorns, and finger chili. Stir to mix well.
  3. Add the Fish: Place the bangus in the pot, ensuring it’s submerged in the liquid. Season with salt to taste.
  4. Cook the Dish: Cover the pot and bring to a boil over medium heat. Once boiling, lower the heat and let it simmer for about 20-30 minutes, or until the fish is cooked through and tender.
  5. Serve: Carefully transfer the paksiw na bangus to a serving dish. Garnish with chopped green onions if desired. Serve hot with steamed rice.

Cook and Prep Times

  • Prep Time: 10 minutes
  • Cook Time: 30 minutes
  • Total Time: 40 minutes
  • Servings: 4 servings
  • Calories: 200kcal
  • Fat: 10g
  • Protein: 25g
  • Carbohydrates: 5g

Authentic Filipino Beef Tapa Recipe

Craving a hearty and flavorful dish that transports you straight to the Philippines? This beef tapa recipe is exactly what you need. It’s a classic Filipino breakfast staple that combines tender marinated beef with bold flavors, perfect for any time of the day.

Imagine juicy slices of beef, marinated to perfection, served with a side of garlic rice and a sunny-side-up egg. This dish is not just a meal; it’s an experience that will awaken your taste buds and make you feel at home. Whether you’re serving it for breakfast or dinner, this beef tapa is sure to impress.

What makes this recipe special is the balance of sweetness and savory notes from the marinade, which really enhances the natural flavors of the beef. It’s a simple yet satisfying dish that will have everyone coming back for seconds.

The Allure of Filipino Beef Tapa

Filipino beef tapa stands out as a beloved dish that captures the essence of Filipino cuisine. Its unique combination of flavors and textures makes it a memorable meal that can be enjoyed any time of day.

The dish features tender marinated beef, known for its savory and slightly sweet taste, which is achieved through a carefully crafted marinade. This delightful blend of soy sauce, vinegar, garlic, and a hint of brown sugar creates a flavor profile that resonates with food enthusiasts.

Ingredients That Make a Difference

Quality ingredients play a vital role in the success of this dish. Using fresh beef, preferably sirloin or flank steak, ensures that each slice is juicy and tender. The marinade not only enhances the taste but also helps in tenderizing the meat.

Complementing the beef are fragrant garlic rice and a sunny-side-up egg, adding both flavor and visual appeal to the plate. Fresh tomatoes and green onions provide a pop of color and freshness, balancing the richness of the beef.

Mastering the Marinade

The marinating process is where the magic begins. Combining soy sauce, vinegar, minced garlic, brown sugar, and black pepper creates a harmonious blend that infuses the beef with deep flavor. It’s recommended to marinate for at least an hour, although overnight marination enhances the taste even more.

As the beef absorbs the marinade, it transforms into a tender delight, ready to be cooked to perfection. This step is crucial, as it sets the foundation for the dish’s overall flavor and texture.

The Cooking Process

Cooking the beef tapa requires attention to detail. Using a skillet over medium-high heat allows for the beef to sear beautifully, creating a caramelized crust that locks in moisture. Frying in batches prevents overcrowding, ensuring each piece cooks evenly.

Once cooked, the beef should have a slightly caramelized exterior while remaining tender inside. This contrast in textures is what makes every bite enjoyable and satisfying.

Serving Suggestions

Presenting beef tapa is an art in itself. A generous serving alongside garlic rice and a perfectly cooked sunny-side-up egg creates a visually stunning plate that invites you to dig in.

Garnishing with fresh tomatoes and a sprinkle of green onions not only enhances the dish’s aesthetic appeal but also adds a refreshing crunch that balances the richness of the beef and egg.

A Taste of Home

Beyond its taste, beef tapa evokes memories of home-cooked meals and family gatherings. It’s a dish that brings people together, whether enjoyed at breakfast, lunch, or dinner.

This dish is a celebration of flavors and traditions, making it a staple in many Filipino households. With its combination of savory beef, aromatic garlic rice, and creamy egg, it promises to create a comforting and satisfying dining experience.

The Perfect Beef Tapa for Any Occasion

A delicious serving of Filipino beef tapa with garlic rice and a sunny-side-up egg on a rustic plate.

This beef tapa is marinated in a mixture of soy sauce, vinegar, garlic, and sugar, giving it a rich, savory-sweet flavor profile. The beef is cooked until tender and slightly caramelized, making each bite incredibly satisfying.

Ingredients

  • 1 pound beef sirloin or flank steak, thinly sliced
  • 1/4 cup soy sauce
  • 1/4 cup vinegar
  • 4 cloves garlic, minced
  • 2 tablespoons brown sugar
  • 1 teaspoon black pepper
  • 2 tablespoons cooking oil for frying
  • Salt to taste

Instructions

  1. Marinate the Beef: In a bowl, combine soy sauce, vinegar, minced garlic, brown sugar, and black pepper. Add the sliced beef, ensuring all pieces are coated. Cover and marinate in the refrigerator for at least 1 hour or overnight for best results.
  2. Cook the Beef: Heat cooking oil in a skillet over medium-high heat. Remove the beef from the marinade, allowing excess liquid to drip off. Fry the beef in batches until cooked through and slightly caramelized, about 3-5 minutes per side.
  3. Serve: Serve the beef tapa with garlic rice and a sunny-side-up egg on the side. Enjoy it with sliced tomatoes or pickled vegetables for added freshness.

Cook and Prep Times

  • Prep Time: 15 minutes
  • Marinating Time: 1 hour
  • Cook Time: 15 minutes
  • Total Time: 1 hour 30 minutes
  • Servings: 4
  • Calories: 310 kcal
  • Fat: 10g
  • Protein: 35g
  • Carbohydrates: 8g

Savory Pork Pata Humba Recipe

Looking for a dish that embodies the rich flavors of Filipino cuisine? Pork Pata Humba is a succulent, slow-cooked dish that brings together tender pork hocks and a blend of savory ingredients to create a feast for the senses. It’s perfect for family gatherings or special occasions that call for something truly comforting and satisfying.

This recipe is a treasure trove of flavor, featuring a delightful combination of soy sauce, vinegar, and spices that create a beautifully balanced sauce. The pork becomes meltingly tender, and the aroma wafting through your kitchen will have everyone eagerly anticipating the meal.

With this Pork Pata Humba, you can impress your loved ones with your cooking skills while enjoying the deliciously rich and slightly sweet taste that defines this beloved Filipino dish.

Rich Flavors of Pork Pata Humba

Pork Pata Humba is a well-loved dish that captures the essence of Filipino cuisine. It is celebrated for its tender pork hocks simmered in a dark, savory sauce that combines soy sauce, vinegar, and an array of spices.

This dish is slow-cooked to allow the flavors to meld perfectly, resulting in a comforting meal that is both satisfying and delicious. The aroma that fills the kitchen while it’s cooking can make anyone’s mouth water.

Ingredients That Create Magic

The magic of Pork Pata Humba lies in its ingredients. The primary component, pork hocks, is ideal for slow cooking, becoming tender and rich in flavor as it simmers.

Alongside the pork, essential ingredients such as garlic, onions, and black peppercorns contribute depth to the dish. The addition of brown sugar brings a hint of sweetness that perfectly balances the savory elements, making each bite delightful.

Cooking Technique

Preparing Pork Pata Humba involves a few essential steps that ensure optimal flavor and texture. Beginning with marinating the pork hocks allows the meat to absorb the rich flavors of the sauce.

After marinating, the pork is browned to enhance its flavor before being simmered in a mixture that includes a combination of the marinade and bay leaves. This process transforms the pork into a melt-in-your-mouth delicacy.

Serving Suggestions

Pork Pata Humba is typically served with fluffy white rice, making it a hearty meal. The rice serves as the perfect accompaniment, soaking up the rich sauce and complementing the pork beautifully.

Garnishing with vibrant chopped green onions adds a pop of color and freshness, elevating the dish both visually and flavor-wise. The combination of textures and flavors makes for a truly satisfying dining experience.

Perfect for Any Occasion

This dish is ideal for family gatherings, special occasions, or even a cozy meal at home. Its comforting nature and rich flavor profile make it a favorite among many.

Whether you’re looking to impress guests or enjoy a comforting meal, Pork Pata Humba is sure to deliver satisfaction and delight. Its appeal goes beyond just taste—it’s a dish that brings people together around the table.

A Culinary Delight Worth Sharing

Pork Pata Humba is not just a meal; it’s a celebration of culture and tradition. Sharing this dish with friends and family fosters connections and creates lasting memories around the dining table.

As you enjoy this savory dish, you’ll appreciate the rich flavors that define Filipino cuisine. It serves as a reminder of the joy that home-cooked meals can bring, uniting loved ones over a shared experience of flavor and comfort.

The Ultimate Pork Pata Humba Recipe

A bowl of savory Pork Pata Humba with tender pork hocks in rich sauce, garnished with green onions, served with rice.

Pork Pata Humba is a Filipino classic known for its rich, savory, and slightly sweet flavors. The dish features tender pork hocks stewed slowly until juicy and melt-in-your-mouth, infused with a flavorful sauce made from soy sauce, vinegar, garlic, and spices.

Ingredients

  • 2 lbs pork hocks (pata), cleaned and cut into pieces
  • 1/2 cup soy sauce
  • 1/4 cup vinegar
  • 1 cup water
  • 1 medium onion, chopped
  • 4 cloves garlic, minced
  • 1 teaspoon black peppercorns
  • 2 bay leaves
  • 1/4 cup brown sugar
  • 2 tablespoons cooking oil
  • Salt to taste
  • Chopped green onions for garnish

Instructions

  1. Marinate the Pork: In a bowl, combine the pork hocks with soy sauce, vinegar, minced garlic, and black peppercorns. Let it marinate for at least 30 minutes.
  2. Sauté Aromatics: In a large pot, heat cooking oil over medium heat. Add chopped onions and sauté until translucent.
  3. Brown the Pork: Add the marinated pork hocks to the pot and sear until browned on all sides.
  4. Simmer: Pour in the marinade, water, and add bay leaves. Bring to a boil, then reduce the heat to low. Cover and let it simmer for about 1.5 to 2 hours or until the pork is tender.
  5. Add Sweetness: Once the pork is tender, stir in the brown sugar and adjust seasoning with salt as needed. Let it simmer for an additional 10-15 minutes to thicken the sauce.
  6. Serve: Transfer the Pork Pata Humba to a serving dish, garnish with chopped green onions, and enjoy with steamed rice.

Cook and Prep Times

  • Prep Time: 40 minutes
  • Cook Time: 2 hours
  • Total Time: 2 hours 40 minutes

Nutrition Information

  • Servings: 4-6 servings
  • Calories: 480kcal
  • Fat: 30g
  • Protein: 36g
  • Carbohydrates: 10g

Crispy Lumpiang Shanghai Recipe

If you’re looking for a fun and delicious appetizer, look no further than Lumpiang Shanghai. This Filipino spring roll is perfect for gatherings, parties, or even just a cozy night in with friends. It’s crispy, savory, and bursting with flavor, making it a favorite at any table.

Lumpiang Shanghai is a delightful treat filled with ground pork, vegetables, and a medley of spices, all wrapped in a delicate spring roll skin. These crispy rolls are incredibly versatile – you can serve them with sweet and sour sauce, vinegar, or even soy sauce for dipping.

Get ready to impress your guests with this easy-to-follow recipe that will have everyone asking for seconds.

Delightful Presentation of Lumpiang Shanghai

A plate of Lumpiang Shanghai creates an inviting scene that can elevate any meal. The golden brown spring rolls are carefully arranged, showcasing their crispy exterior, which immediately tempts the appetite.

Accompanying these delicious rolls is a small bowl of sweet and sour sauce, perfect for dipping. The vibrant color of the sauce contrasts beautifully with the golden spring rolls, making the dish not just appetizing but also visually appealing.

Fresh herbs garnishing the plate add a touch of color and a hint of freshness, enhancing the overall presentation while inviting guests to indulge in this delightful appetizer. The rustic wooden table provides a warm backdrop, creating a cozy atmosphere for sharing food with family and friends.

The Savory Filling of Lumpiang Shanghai

What makes Lumpiang Shanghai truly special is its savory filling. Ground pork combines with a medley of vegetables, including grated carrots and minced green beans, creating a harmonious blend of textures and flavors.

The filling is seasoned with garlic, onion, soy sauce, and a touch of salt and pepper, ensuring that every bite bursts with savory goodness. This combination not only tantalizes the taste buds but also provides a satisfying crunch when enveloped in a crisp wrapper.

Each roll is filled to perfection, ensuring that every spring roll delivers that signature crunch paired with a tender and flavorful filling, making them an irresistible snack or appetizer.

Perfecting the Crunch

The key to achieving perfectly crispy Lumpiang Shanghai lies in the frying process. The oil must be hot enough for frying but not so hot that the rolls burn before cooking through.

Frying the rolls in small batches allows for even cooking and ensures that each spring roll gets that gorgeous golden-brown color. The satisfying crunch that results from this technique is what makes these spring rolls a favorite among many.

Once they are ready, letting them drain on paper towels helps to remove excess oil, keeping each roll light and crispy for serving.

Serving Suggestions for a Flavorful Experience

Serving Lumpiang Shanghai alongside various dipping sauces can enhance the flavor experience. While sweet and sour sauce is a popular choice, other options such as vinegar or soy sauce can also complement the crispy rolls beautifully.

Pairing these rolls with a refreshing salad or a side of steamed rice can complete the meal, making it a versatile choice for any occasion. Whether it’s a festive gathering, a casual dinner, or a party, Lumpiang Shanghai shines as a crowd-pleaser.

Offering guests a choice of sauces allows for a fun and interactive dining experience, where they can customize each bite to their liking.

Versatility and Occasions

Lumpiang Shanghai is not just an appetizer; it fits perfectly into various dining occasions. From festive celebrations to simple family dinners, these crispy rolls cater to a wide range of tastes.

Being easy to prepare makes them a great option for gatherings. Preparing a large batch means there’s enough to share, and the enticing aroma will draw guests to the table.

Whether served at a birthday party, holiday gathering, or just a cozy night in, the crispy, savory goodness of Lumpiang Shanghai will always be a hit, leaving everyone asking for more.

Conclusion: A Must-Try Appetizer

Incorporating Lumpiang Shanghai into your meal plans is a delightful way to impress family and friends. With their crispy texture and savory filling, these spring rolls are sure to become a favorite.

The combination of flavors, textures, and the option to choose dipping sauces creates a culinary experience that’s enjoyable for everyone involved. So, gather your ingredients and get ready to share this delicious Filipino treat with your loved ones!

The Best Crispy Lumpiang Shanghai Recipe

Crispy Lumpiang Shanghai spring rolls on a plate with sweet and sour sauce.

These crispy Lumpiang Shanghai spring rolls are golden brown and crunchy on the outside, while the filling is tender and packed with seasoned meat and vegetables. Each bite delivers a satisfying crunch followed by a burst of savory goodness that will keep you coming back for more.

Ingredients

  • 1 pound ground pork
  • 1 cup grated carrots
  • 1 cup minced green beans
  • 1/2 cup minced onion
  • 2 cloves garlic, minced
  • 1/4 cup soy sauce
  • 1 teaspoon ground black pepper
  • 1 teaspoon salt
  • 1 package spring roll wrappers
  • Oil for frying

Instructions

  1. Prepare the Filling: In a large bowl, combine ground pork, grated carrots, minced green beans, minced onion, garlic, soy sauce, black pepper, and salt. Mix until well combined.
  2. Wrap the Rolls: Take a spring roll wrapper and place about a tablespoon of the filling near one corner. Fold the corner over the filling, then fold the sides in, and roll tightly.
  3. Heat the Oil: In a deep frying pan, heat oil over medium heat until hot enough for frying.
  4. Fry the Rolls: Carefully add the spring rolls to the hot oil, frying in batches until golden brown and crispy, about 3-5 minutes per side.
  5. Drain and Serve: Remove the spring rolls from the oil and let them drain on paper towels. Serve hot with your choice of dipping sauce.

Cook and Prep Times

  • Prep Time: 20 minutes
  • Cook Time: 30 minutes
  • Total Time: 50 minutes

Nutrition Information

  • Servings: 4-6 servings
  • Calories: 300kcal
  • Fat: 18g
  • Protein: 12g
  • Carbohydrates: 30g

Crispy Kanto-Style Fried Chicken Recipe

Ever had a craving for fried chicken that’s seasoned to perfection with a Japanese twist? This Kanto-style fried chicken recipe is your answer! Known for its crispy texture and rich flavors, this chicken is perfect for any meal or snack time. Whether you’re hosting a gathering or just enjoying a cozy night in, this dish will surely impress.

Imagine biting into succulent, juicy chicken coated in a light, crispy crust that crunches with every bite. This recipe combines traditional Japanese spices and techniques, making it not just a meal, but a delightful experience. Serve it with rice, salads, or even as a standalone snack for that satisfying crunch.

With easy-to-follow steps and simple ingredients, you’ll be able to create this delicious dish at home in no time. Get ready to bring the taste of Japan right to your kitchen!

The Charm of Kanto-Style Fried Chicken

Kanto-style fried chicken brings a delightful twist to a beloved classic. Known for its exceptional crunch and unique flavor profile, this dish elevates any dining experience.

The secret lies in marinating the chicken with a mix of soy sauce, sake, garlic, and ginger. This infusion of flavors ensures that each bite is not only crispy but also bursting with savory notes that tantalize the palate.

Perfecting the Crunch

The crispy exterior is achieved through a well-balanced coating made of all-purpose flour and cornstarch. This combination creates a texture that’s light yet firm, allowing for a satisfying crunch upon biting.

Using baking powder in the mix contributes to a fluffier crust, making each piece of chicken a delightful experience. It’s this contrast of textures that makes Kanto-style fried chicken truly stand out.

Serving Suggestions

This fried chicken is not just a meal; it’s versatile enough to be served in various ways. Pair it with fluffy white rice for a comforting meal, or serve it alongside fresh salads for a refreshing balance.

Dipping saucescan enhance the experience further. Whether you prefer a tangy, spicy, or sweet sauce, the options are endless. The chicken’s crispy texture complements any sauce beautifully.

Nutritional Value

This dish serves four, making it a suitable option for family meals or gatherings. Each serving offers around 400 calories, with a hearty amount of protein to keep you satisfied.

While it contains 22 grams of fat, the joy of enjoying a crispy fried chicken experience can be well worth it. Balance it with lighter sides for a wholesome meal.

Preparation Tips

Starting with high-quality chicken thighs can significantly enhance the final dish. Boneless and skinless options work best for frying, ensuring they cook evenly.

Don’t rush the marinating process; allowing the chicken to soak in the flavors for at least 30 minutes will yield the best results. Patience here leads to a more flavorful outcome.

Cooking Techniques

When frying, maintaining the right oil temperature is crucial. Too hot, and the exterior will burn before the inside cooks; too cool, and the chicken can become greasy. Aim for around 350°F (175°C) for perfect frying.

Frying in batches prevents overcrowding, ensuring each piece gets the attention it deserves for that perfect golden-brown color. Drain the fried chicken on paper towels to remove excess oil before serving.

The Ultimate Kanto Fried Chicken Recipe

Crispy Kanto-style fried chicken served on a red plate with parsley and dipping sauce.

This Kanto-style fried chicken is a delightful fusion of textures and flavors. The chicken is marinated in a blend of soy sauce, sake, and garlic, then coated with a crispy batter for an irresistible crunch. Each bite reveals not only a satisfying crunch but also a burst of savory umami that leaves you wanting more.

Ingredients

  • 2 lbs chicken thighs, boneless and skinless
  • 1/4 cup soy sauce
  • 2 tablespoons sake
  • 2 cloves garlic, minced
  • 1 teaspoon ginger, grated
  • 1 cup all-purpose flour
  • 1/2 cup cornstarch
  • 1 teaspoon baking powder
  • Salt and pepper to taste
  • Vegetable oil for frying

Instructions

  1. Marinate the Chicken: In a bowl, combine soy sauce, sake, garlic, and ginger. Add chicken thighs and let marinate for at least 30 minutes.
  2. Prepare the Coating: In another bowl, mix flour, cornstarch, baking powder, salt, and pepper.
  3. Coat the Chicken: Remove chicken from the marinade and let excess drip off. Dredge each piece in the flour mixture, ensuring it’s well-coated.
  4. Heat the Oil: In a deep pan, heat vegetable oil over medium-high heat until hot (about 350°F or 175°C).
  5. Fry the Chicken: Carefully add the chicken pieces to the hot oil in batches. Fry until golden brown and cooked through, about 5-7 minutes. Remove and drain on paper towels.
  6. Serve: Enjoy hot with your favorite dipping sauce or alongside rice and vegetables.

Cook and Prep Times

  • Prep Time: 10 minutes
  • Marinating Time: 30 minutes
  • Cook Time: 20 minutes
  • Total Time: 1 hour

Nutrition Information

  • Servings: 4 servings
  • Calories: 400kcal
  • Fat: 22g
  • Protein: 30g
  • Carbohydrates: 20g

Delicious Ginataang Mackerel Sardines Recipe

Looking for a seafood dish that is both comforting and full of flavor? This Ginataang Mackerel Sardines recipe is just what you need. With its rich coconut milk base and tender mackerel, it’s a delightful combination that brings a taste of the Philippines right to your table.

Picture this: succulent mackerel swimming in a creamy coconut sauce, infused with spices that dance on your palate. This dish not only warms you up but also satisfies your cravings for something unique and delicious. Plus, it’s simple enough to whip up any night of the week!

Authentic Filipino Ginataang Mackerel Sardines

Ginataang Mackerel Sardines offers a comforting embrace of flavors that exemplifies Filipino cuisine. This dish features tender pieces of mackerel simmered in a rich, creamy coconut milk sauce, creating a delightful combination of textures and tastes.

The coconut milk serves as the perfect complement to the savory mackerel, elevating the natural flavors of the fish while adding depth and richness. Spices and aromatics contribute an inviting fragrance that beckons you to indulge in every bite.

Simple Ingredients for a Wholesome Meal

The beauty of Ginataang Mackerel Sardines lies in its simplicity. A few key ingredients come together to create a meal that is both nutritious and satisfying. Mackerel sardines, canned and convenient, are combined with coconut milk, garlic, onions, and chili peppers to bring forth the essence of traditional Filipino cooking.

The use of fresh garnishes, such as green onions or cilantro, adds a pop of color, enhancing both the presentation and flavor. It’s an ideal dish for those seeking a quick yet wholesome meal, perfect for any night of the week.

Aromatic Preparation Steps

Preparing Ginataang Mackerel Sardines is a straightforward process. It begins with sautéing sliced onions and minced garlic until they release their aromatic essence, setting the tone for the dish.

Next, the canned mackerel is added to the pot, followed by the creamy coconut milk and sliced green chili peppers. This mixture is gently stirred, allowing the flavors to meld together in a harmonious blend.

Seasoning for Flavor Balance

The finishing touch comes with seasoning. A dash of fish sauce, salt, and pepper helps to enhance the overall flavor profile, ensuring that the dish is well-balanced and rich in taste.

Allow the mixture to simmer, letting the ingredients infuse their flavors into one another. This process transforms simple components into a comforting bowl of warmth, perfect for sharing with family or friends.

Perfect Pairing with Steamed Rice

To complete the meal, serve Ginataang Mackerel Sardines alongside a steaming bowl of rice. This combination not only makes for a hearty meal but also enhances the experience, as the rice absorbs the luscious coconut sauce.

Each spoonful promises a delightful burst of flavor, making it a dish that is both satisfying and nourishing. Whether it’s for a family gathering or a cozy dinner at home, this dish is sure to please everyone at the table.

Nutrition and Serving Suggestions

This comforting dish serves four and is relatively low in calories, making it a healthy option for seafood lovers. Each serving provides a good balance of protein and healthy fats, ensuring a wholesome meal.

Whether you’re serving it for lunch or dinner, Ginataang Mackerel Sardines offers a unique taste of the Philippines that is both satisfying and comforting. Enjoy it with loved ones and make memories over this delicious homemade meal.

Authentic Filipino Ginataang Mackerel Sardines

A bowl of Ginataang Mackerel Sardines in coconut milk, garnished with green onions, served with rice.

This Ginataang Mackerel Sardines is a creamy and savory dish made with mackerel fish simmered in coconut milk, combined with aromatic spices and vegetables. The taste is a beautiful balance of rich coconut creaminess and the natural flavor of the mackerel, making each bite a delightful experience.

Ingredients

  • 2 cans of mackerel sardines in tomato sauce
  • 1 cup coconut milk
  • 1 onion, sliced
  • 3 cloves garlic, minced
  • 1-2 green chili peppers, sliced
  • 1 tablespoon fish sauce
  • Salt and pepper to taste
  • Chopped green onions or cilantro for garnish

Instructions

  1. Sauté Aromatics: In a pot, heat a little oil over medium heat. Add the sliced onion and minced garlic, sauté until fragrant.
  2. Add Mackerel: Pour in the canned mackerel sardines with the tomato sauce and gently stir to combine.
  3. Incorporate Coconut Milk: Add the coconut milk and green chili peppers. Stir well to mix everything together.
  4. Season: Add fish sauce, salt, and pepper to taste. Allow the mixture to simmer for about 10-15 minutes, letting the flavors meld.
  5. Serve: Garnish with chopped green onions or cilantro and serve hot with steamed rice.

Cook and Prep Times

  • Prep Time: 5 minutes
  • Cook Time: 20 minutes
  • Total Time: 25 minutes

Nutrition Information

  • Servings: 4 servings
  • Calories: 280kcal
  • Fat: 20g
  • Protein: 18g
  • Carbohydrates: 6g