Monthly Archives: January 2025

Creamy Garlic Mushroom Chicken Recipe

If you’re searching for a comforting dish that seamlessly combines tender chicken, earthy mushrooms, and a rich, creamy sauce, look no further. This creamy garlic mushroom chicken is a delightful choice for a family dinner or a special occasion. The best part? It’s simple enough to whip up on a weeknight yet impressive enough to serve guests.

This recipe will have you savoring every bite. The sauce is packed with flavor, thanks to garlic and herbs, making each mouthful a delicious experience. Plus, the combination of garlic and mushrooms creates a savory medley that pairs perfectly with the chicken.

Delicious Creamy Garlic Mushroom Chicken

This creamy garlic mushroom chicken showcases succulent chicken breasts elevated by a rich and flavorful mushroom sauce. The combination of tender chicken and the earthy taste of mushrooms creates a mouthwatering dish that’s both comforting and sophisticated.

The luscious sauce, infused with garlic and herbs, brings a depth of flavor that transforms a simple meal into a culinary delight. Each bite offers a delightful medley of tastes, making it perfect for family dinners or special occasions.

Ingredients That Shine

The beauty of this dish lies in its straightforward yet high-quality ingredients. You’ll need boneless, skinless chicken breasts for tenderness, along with fresh mushrooms that add an earthy note. Garlic plays a pivotal role, imparting a warm aroma that enhances the overall experience.

A rich combination of heavy cream and chicken broth creates the sauce’s creamy texture, while dried thyme adds a subtle herbal flavor. Fresh parsley serves as a lovely garnish, bringing a pop of color and freshness to the plate.

Cooking Method: Step by Step

Start by pan-searing the chicken in olive oil until golden brown. This step is crucial for developing flavor and ensuring a juicy texture. Once cooked, set the chicken aside and turn your attention to the mushrooms.

In the same skillet, sauté the sliced mushrooms until browned, then introduce minced garlic. This sequence allows the flavors to meld beautifully. Next, deglaze the pan with chicken broth, scraping up any delicious bits stuck to the bottom.

The Creamy Sauce Transformation

Add heavy cream and dried thyme to the skillet, allowing the mixture to simmer until it thickens slightly. This step is where the magic happens—transforming simple ingredients into a rich, velvety sauce that envelops the chicken.

Once the sauce reaches the desired consistency, return the chicken to the pan, ensuring each piece is generously coated. A brief cooking time will allow the chicken to absorb the flavors of the sauce.

A Beautiful Presentation

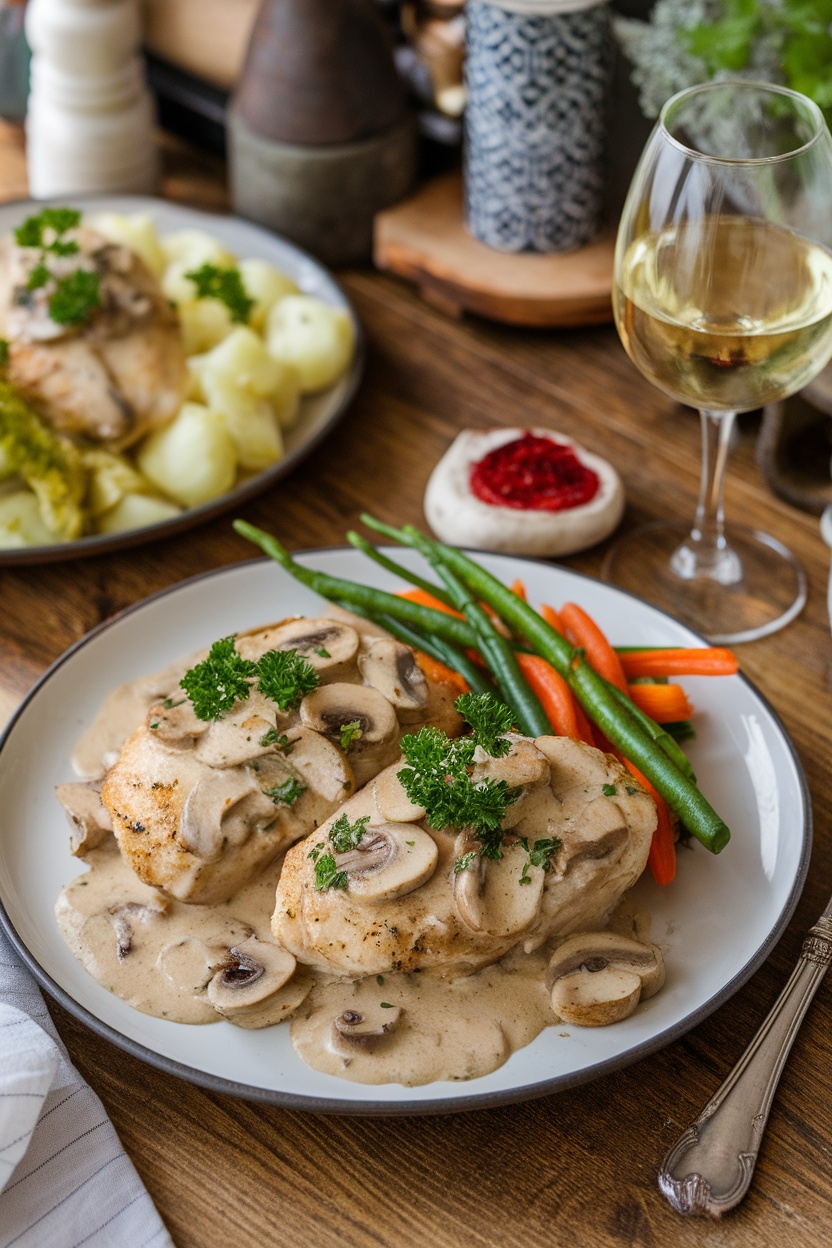
To serve, plate the creamy garlic mushroom chicken with a sprinkle of fresh parsley on top for a burst of color. This dish pairs wonderfully with sides like steamed vegetables or rice, making for a balanced meal.

Imagine enjoying this dish at a beautifully set table, complete with a glass of white wine. The rustic wooden table adds a warm touch, creating an inviting dining experience that is sure to impress your guests.

Nutritional Information

This creamy garlic mushroom chicken offers a satisfying meal with approximately 450 calories per serving. It’s packed with 32 grams of protein and 30 grams of fat, along with just 8 grams of carbohydrates, making it a well-rounded choice for a hearty dinner.

This dish not only fills the stomach but also warms the heart, making it a beloved recipe for any occasion. Whether it’s a family gathering or a romantic dinner, it’s sure to leave a lasting impression.

Delicious Creamy Garlic Mushroom Chicken

Creamy garlic mushroom chicken with mushroom sauce, garnished with parsley, served with vegetables on a rustic table.

This creamy garlic mushroom chicken features juicy, pan-seared chicken breasts coated in a luscious garlic and mushroom sauce. The sauce is creamy and rich, with a hint of garlic that elevates the dish to new heights, making it utterly irresistible.

Ingredients

  • 4 boneless, skinless chicken breasts
  • 2 tablespoons olive oil
  • 8 ounces mushrooms, sliced
  • 4 cloves garlic, minced
  • 1 cup heavy cream
  • 1/2 cup chicken broth
  • 1/2 teaspoon dried thyme
  • Salt and pepper to taste
  • Fresh parsley for garnish

Instructions

  1. Cook the Chicken: In a large skillet, heat olive oil over medium heat. Season chicken breasts with salt and pepper, then add to the skillet. Cook for 6-7 minutes on each side or until golden brown and cooked through. Remove from the skillet and set aside.
  2. Sauté the Mushrooms: In the same skillet, add sliced mushrooms and cook until browned, about 5 minutes. Add minced garlic and sauté for an additional minute until fragrant.
  3. Make the Sauce: Pour in the chicken broth and scrape up any browned bits from the bottom of the skillet. Stir in the heavy cream and thyme, and let simmer for 5 minutes until slightly thickened.
  4. Combine: Return the chicken to the skillet, coating it with the sauce. Cook for an additional 2-3 minutes until heated through.
  5. Serve: Garnish with fresh parsley and serve hot with your choice of sides, such as rice or vegetables.

Cook and Prep Times

  • Prep Time: 10 minutes
  • Cook Time: 25 minutes
  • Total Time: 35 minutes

Nutrition Information

  • Servings: 4 servings
  • Calories: 450kcal
  • Fat: 30g
  • Protein: 32g
  • Carbohydrates: 8g

Delicious Tokwa Sisig Recipe

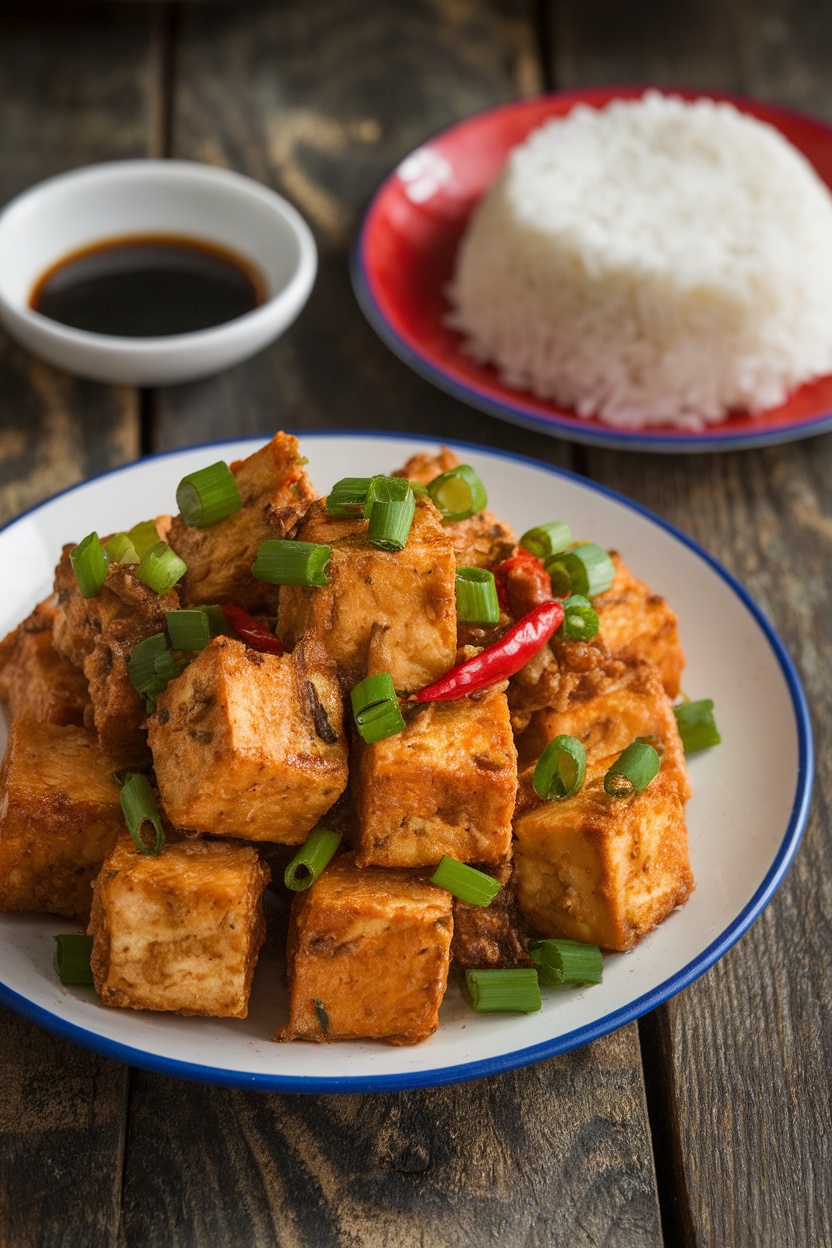
Tokwa Sisig is a delightful twist on the traditional Filipino sisig, substituting crispy tofu for pork, making it a perfect dish for vegetarians or those looking to enjoy a lighter meal. This dish combines the crunchiness of fried tofu with a medley of flavors that will tantalize your taste buds.

Imagine biting into a generous serving of this savory dish, bursting with umami flavors from soy sauce and calamansi, paired beautifully with the warmth of onions and chili. It’s not just a meal – it’s a celebration of textures and tastes that evoke the essence of Filipino cuisine.

A Flavorful Take on Filipino Sisig

Tokwa Sisig offers a delightful twist on the classic Filipino dish. By replacing traditional pork with crispy tofu, it caters to vegetarians and those seeking lighter meal options.

The golden fried tofu cubes bring a satisfying crunch, soaking up the zesty sauce that elevates the dish. Each mouthful bursts with umami flavors, enhanced by the warmth of sautéed onions and the spicy kick from bird’s eye chilies.

Texture and Taste Harmony

This dish showcases a beautiful balance of textures and flavors. The crispy tofu contrasts wonderfully with the tender onions and crunchy chilies, creating a symphony of sensations in every bite.

The incorporation of soy sauce and calamansi juice adds a tangy depth, making Tokwa Sisig not just a meal, but a celebration of Filipino culinary heritage. It’s a popular choice for family gatherings, potlucks, or any occasion where a crowd-pleasing dish is needed.

Ingredients That Shine

At the heart of Tokwa Sisig is firm tofu, which is pressed and cubed for optimal texture. The frying process transforms these cubes into golden morsels that are incredibly satisfying.

Other key ingredients include finely chopped onions and vibrant bird’s eye chilies. These aromatics infuse the dish with fragrance and heat, while soy sauce and calamansi juice harmonize the flavors beautifully.

Cooking Process

The cooking method is straightforward, making this dish accessible even for novice cooks. Start by frying the pressed tofu until golden and crispy, then sauté the onions and chilies until fragrant.

Mix everything together in the same pan, allowing the tofu to absorb the rich flavors of the sauce. This simple technique ensures that each bite is bursting with flavor.

Perfect Serving Suggestions

Tokwa Sisig shines when served hot, garnished with fresh green onions for a touch of color and flavor. Pair it with steamed rice for a complete meal, and consider serving it alongside a small bowl of soy sauce for those who enjoy an extra dip.

The rustic presentation on a wooden table adds to the inviting aspect of the dish, making it perfect for sharing with family and friends. Whether it’s for a casual dinner or a festive gathering, this dish is sure to impress.

Nutritional Insights

This flavorful dish is not only satisfying but also relatively light, with around 180 calories per serving. It provides a balanced mix of protein from the tofu and healthy fats, making it a nutritious choice.

With its low carbohydrate content, the Tokwa Sisig can fit well into various dietary plans, allowing everyone to indulge in its delightful flavors without guilt.

A Flavorful Take on Filipino Sisig

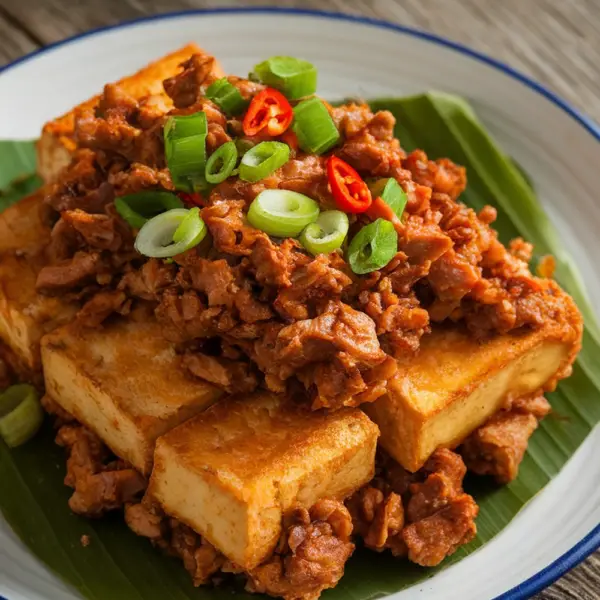
A plate of Tokwa Sisig with crispy tofu, onions, and chilies, served with rice.

This Tokwa Sisig is both crispy and savory, featuring golden fried tofu that perfectly absorbs the zesty sauce. Each bite is a delightful combination of textures and flavors, making it a popular choice for any meal or gathering.

Ingredients

  • 400g firm tofu, pressed and cubed
  • 1 medium onion, finely chopped
  • 2-3 bird’s eye chilies, chopped (adjust to taste)
  • 3 tablespoons soy sauce
  • 3 tablespoons calamansi juice (or lemon juice)
  • 1 tablespoon mayonnaise (optional)
  • Salt and pepper to taste
  • Vegetable oil for frying
  • Chopped green onions for garnish

Instructions

  1. Prepare the Tofu: Press the tofu to remove excess moisture, then cut it into cubes.
  2. Fry the Tofu: In a pan, heat vegetable oil over medium-high heat. Fry the tofu cubes until golden brown and crispy on all sides. Remove and drain on paper towels.
  3. Sauté Aromatics: In the same pan, sauté the chopped onion and chilies until fragrant.
  4. Combine Ingredients: Add the fried tofu back to the pan. Pour in the soy sauce and calamansi juice, mixing well. Adjust seasoning with salt and pepper, and stir in mayonnaise if using.
  5. Serve: Transfer the Tokwa Sisig to a serving plate and garnish with chopped green onions. Serve hot, preferably with steamed rice.

Cook and Prep Times

  • Prep Time: 15 minutes
  • Cook Time: 20 minutes
  • Total Time: 35 minutes

Nutrition Information

  • Servings: 4
  • Calories: 180kcal
  • Fat: 12g
  • Protein: 10g
  • Carbohydrates: 8g

Comforting Lugaw Dilaw (Filipino Rice Porridge) Recipe

Are you in need of a warm and soothing dish that brings back memories of home? Lugaw Dilaw is a traditional Filipino rice porridge that delivers just that. This dish is not only simple to prepare but also incredibly comforting, making it perfect for those chilly nights or whenever you’re feeling under the weather.

The star of this recipe is the addition of turmeric, giving it that distinct yellow hue and a hint of warm earthiness. Each spoonful is creamy with a slight chew from the rice, and the flavors meld together beautifully, making it a delightful experience for your taste buds.

Comforting Essence of Lugaw Dilaw

This Filipino rice porridge serves as a warm hug on chilly days or a remedy for when you’re feeling under the weather.

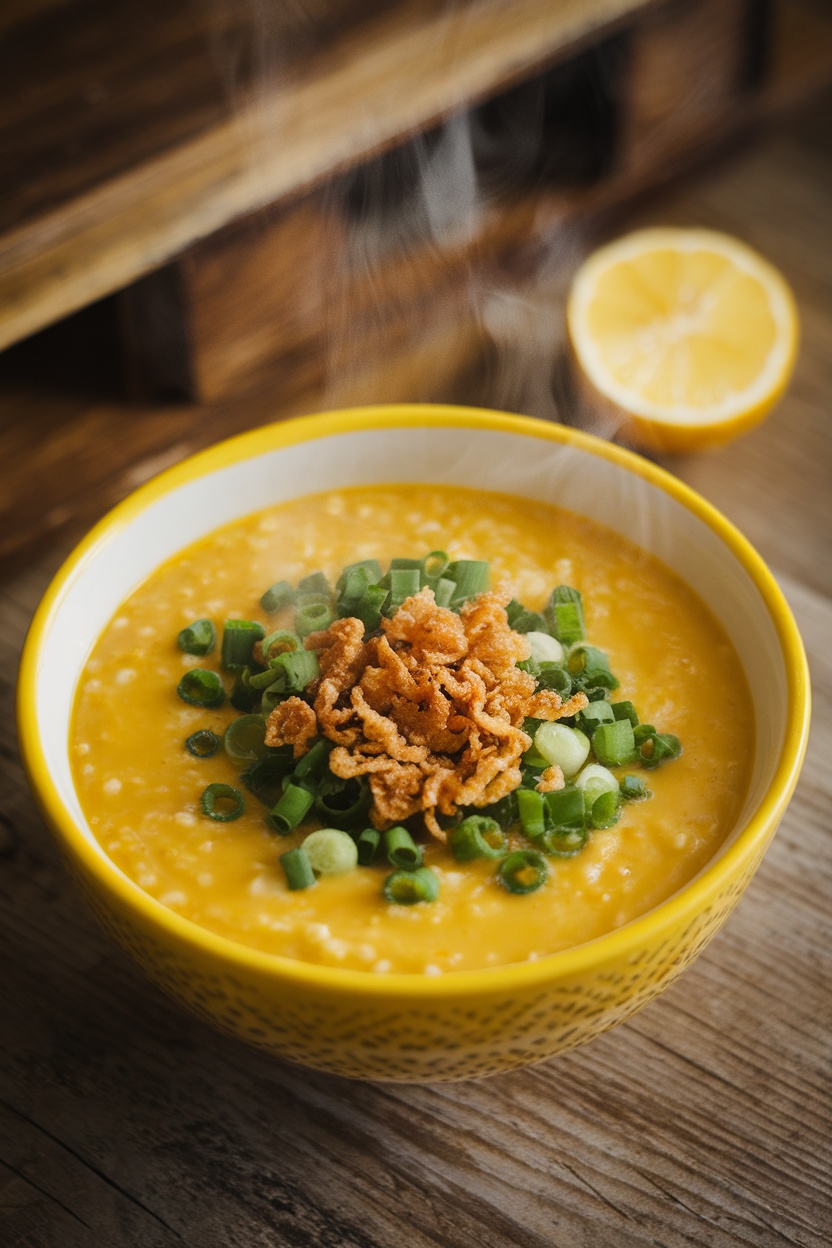
With a beautiful yellow hue, the dish brightens up any table and invites you to take a seat and savor its warmth.

The infusion of turmeric not only gives Lugaw Dilaw its signature color but also provides a subtle earthiness that enhances the overall flavor profile.

A Hearty and Nourishing Dish

Lugaw Dilaw is not just a dish; it’s an experience rooted in tradition.

The porridge is made with simple ingredients like rice, chicken, and aromatic spices, making it both nourishing and fulfilling.

Each spoonful promises a creamy texture, often enhanced by a hint of ginger, which warms both the heart and body.

Ingredients that Sing Together

The beauty of this recipe lies in its simplicity.

A handful of ingredients come together to create a delightful dish.

The jasmine rice forms the base, while the spices elevate its flavor, making it comforting yet exciting to eat.

Perfectly Paired Garnishes

No bowl of Lugaw Dilaw is complete without its garnishes.

Chopped green onions add a fresh crunch, while crispy fried garlic introduces a depth of flavor that complements the creamy porridge beautifully.

A slice of lemon or calamansi on the side allows for an optional zesty twist, enhancing the dish’s bright character.

Cooking Methods for a Cozy Meal

Preparing Lugaw Dilaw is a straightforward process, perfect for cooks of all skill levels.

Start by sautéing aromatics until fragrant, then incorporate the chicken if desired.

As the rice cooks, the aromas fill the air, creating an inviting atmosphere that sets the stage for a comforting meal.

Serving Suggestions and Enjoyment

When ready to serve, ladle the steaming hot porridge into bowls and sprinkle with your chosen garnishes.

Pair it with a slice of lemon to squeeze over the top for an extra pop of flavor.

Not only is this dish warm and filling, but it also serves as a reminder of home, making it a beloved classic in many Filipino households.

Delicious and Nourishing Lugaw Dilaw Recipe

A bowl of Lugaw Dilaw with green onions and fried garlic on a wooden table, accompanied by a lemon slice.

This easy Lugaw Dilaw is a hearty, nourishing dish made with rice, chicken, and aromatic spices. It’s thick, creamy, and full of flavor, making it a go-to recipe for a quick meal or a comforting treat.

Ingredients

  • 1 cup jasmine rice, rinsed
  • 6 cups water or chicken broth
  • 1 tablespoon turmeric powder
  • 1 medium onion, chopped
  • 3 cloves garlic, minced
  • 2 tablespoons ginger, minced
  • 1 pound chicken, cut into pieces (optional)
  • Salt to taste
  • Chopped green onions or fried garlic for garnish
  • Lemon or calamansi for serving (optional)

Instructions

  1. Prepare the Ingredients: Rinse the jasmine rice under cold water until the water runs clear.
  2. Sauté Aromatics: In a large pot, heat a bit of oil over medium heat. Add the chopped onion, garlic, and ginger, and sauté until fragrant.
  3. Cook the Chicken: If using chicken, add it to the pot and cook until lightly browned. Pour in the water or chicken broth, and bring to a boil.
  4. Add Rice and Turmeric: Stir in the rinsed rice and turmeric powder. Reduce the heat to low, cover, and simmer for about 30-40 minutes, stirring occasionally, until the rice is soft and the porridge has thickened.
  5. Season: Add salt to taste and adjust the consistency with more water or broth if needed.
  6. Serve: Ladle the lugaw into bowls and top with chopped green onions or fried garlic. Serve with lemon or calamansi on the side for a zesty touch.

Cook and Prep Times

  • Prep Time: 10 minutes
  • Cook Time: 40 minutes
  • Total Time: 50 minutes

Nutrition Information

  • Servings: 6 bowls
  • Calories: 180kcal
  • Fat: 4g
  • Protein: 8g
  • Carbohydrates: 28g

Korean Garlic Cheese Bread (Filipino Style) Recipe

Introduction to Korean Garlic Cheese Bread

Korean Garlic Cheese Bread, often referred to as “Korean cheese bread,” has gained substantial popularity in the Philippines, becoming a delightful treat cherished by many. Its origins trace back to South Korea, where it enjoyed a favorable reception as a street food item. The dish typically comprises a soft, fluffy bread filled with a rich, flavorful garlic butter and gooey cheese, encapsulating a perfect balance of savory and sweet flavors that appeal to a wide audience. As Korean culture has flourished globally, so too has this unique culinary creation, evolving with local adaptations that cater to the Filipino palate.

The growing fascination with Korean cuisine in the Philippines can be attributed to the wider K-drama and K-pop trends that have captivated audiences. These influences have led to an increased curiosity about Korean dishes, with the Korean Garlic Cheese Bread standing out due to its unique combination of textures and tastes. The bread’s flaky crust alongside a buttery, fragrant garlic infusion provides an enticing experience that is hard to resist. Additionally, the melted cheese adds a creamy layer that complements the bread’s spongy interior, making each bite a harmonious blend of flavor.

Culturally, Korean Garlic Cheese Bread serves as a bridge between Korean and Filipino food traditions. In the Philippines, bread products hold a special place in everyday meals and celebrations, and the introduction of this Korean twist emphasizes the evolving nature of culinary practices within various cultures. The dish’s accessibility and flavorful profile undoubtedly contribute to its sustained appeal, illustrating how food can foster cross-cultural connections while also showcasing each culture’s unique identity. As both nations continue to engage in culinary exchange, Korean Garlic Cheese Bread will likely remain a beloved staple for years to come.

Ingredients You Will Need

To prepare Korean Garlic Cheese Bread in Filipino style, a variety of fresh ingredients are essential to achieve the desired flavor and texture. Here is a detailed list of the key components needed for this delectable recipe.

1. Bread Rolls: The base of this dish is soft, fluffy bread rolls. Ideally, using Filipino pandesal is recommended due to its light and airy texture. Alternatively, you can use any soft, sweet bread rolls available at your local bakery. Look for options with a slightly crusty exterior and a warm, soft inside.

2. Garlic: Fresh garlic is vital for imparting the rich aromatic flavor that makes this recipe stand out. About 4-6 cloves, minced finely, should suffice. If fresh garlic is not accessible, garlic powder can be a substitute, but use it sparingly. Filipino markets often sell locally grown garlic, which tends to be more pungent and flavorful.

3. Butter: Unsalted butter is preferred for this recipe to control the salt levels. It provides moisture and richness that complements the garlic flavor. If vegan options are necessary, substitute with coconut oil or a plant-based butter available in local stores.

4. Cheese: For the cheesy filling, a blend of mozzarella and cheddar cheese is suggested. Mozzarella provides the stretchiness while cheddar enhances the flavor. Local cheeses such as quick-melt cheese can also be used as a budget-friendly option without compromising taste.

5. Parsley: Fresh parsley is used for garnishing and adding a hint of freshness. If fresh parsley is difficult to find, dried parsley can be used in a pinch, but the flavor will vary slightly.

Each of these ingredients plays a crucial role in creating Korean Garlic Cheese Bread, Filipino style. Providing diverse substitutes ensures that the recipe can be adapted to meet specific preferences and ingredient availability.

Preparation Equipment

To create the delicious Korean Garlic Cheese Bread in a Filipino style, having the right kitchen equipment is essential for achieving optimal results. Firstly, a sturdy mixing bowl is fundamental for combining ingredients such as flour, sugar, and yeast. It is advisable to use a large bowl to allow enough space for kneading and mixing, ensuring the consistency of the dough is smooth and uniform.

A reliable measuring set (including cups and spoons) is crucial for measuring ingredients accurately. Precision in measuring flour, butter, and garlic ensures the flavor profile and texture of the bread align perfectly with the recipe. For kneading the dough, a clean, flat surface or a silicone baking mat is highly beneficial, providing a non-stick area to work on.

In addition to standard tools, a stand mixer or a hand mixer may be advantageous for efficiently mixing the dough, especially when incorporating sticky ingredients. A dough scraper can also assist in managing the sticky mixture and is helpful for portioning dough into equal pieces. Furthermore, a baking sheet lined with parchment paper is recommended for easy transfer of the shaped dough and to prevent it from sticking during the baking process.

Other items that may enhance your baking experience are a food processor for quickly mincing garlic and a rolling pin for shaping the bread. It is also important to use an oven thermometer to ensure your oven is at the right temperature for baking, as this directly impacts the bread’s rise and texture.

When using these kitchen tools, proper maintenance and safety precautions are essential. Regularly inspect your measuring cups and spoons for any wear and ensure surfaces are kept clean to avoid cross-contamination. Always handle sharp tools with care, and store your equipment in a designated area to prolong its lifespan. With the right preparation equipment, making Korean Garlic Cheese Bread can be a rewarding and enjoyable experience.

Step-by-Step Recipe Instructions

To create Korean Garlic Cheese Bread with a Filipino twist, one must follow a carefully constructed process that merges technique and flavor. Below are the detailed steps to guide you through this culinary journey.

Step 1: Prepare the Dough
Begin by combining 2 cups of all-purpose flour, 1 tablespoon of sugar, 1 teaspoon of salt, and 1 packet of instant yeast in a large mixing bowl. Mix these dry ingredients thoroughly. In a separate bowl, warm ¾ cup of milk and melt 3 tablespoons of unsalted butter. Gradually add the milk mixture to the dry ingredients, stirring until it forms a dough. Knead the dough on a floured surface for about 10 minutes until smooth and elastic.

Step 2: First Rise
Once kneaded, place the dough in a greased bowl, cover it with a clean cloth, and let it rise in a warm place for approximately 1 hour, or until it doubles in size. This fermentation process is critical, as it enhances the flavor and texture of the bread.

Step 3: Prepare the Garlic Cheese Filling
While the dough is rising, prepare the garlic cheese filling. In a bowl, mix ½ cup of softened cream cheese, 1 cup of grated cheese (preferably a combination of cheddar and mozzarella), 4 cloves of minced garlic, and 2 tablespoons of finely chopped parsley. This mixture should be creamy and fragrant, characteristic of traditional Filipino flavors.

Step 4: Forming the Bread
After the dough has risen, punch it down and divide it into small balls, about the size of a golf ball. Flatten each ball and place a generous spoonful of the garlic cheese filling in the center. Fold the sides over the filling and shape it into a round bun. Ensure that the filling is enclosed to prevent it from leaking during baking.

Step 5: Second Rise
Arrange the formed buns on a lined baking tray, cover them again, and let them rise for another 30 minutes. This step is essential for achieving a light and airy texture.

Step 6: Baking
Preheat the oven to 350°F (175°C). Once the buns have completed their second rise, bake them for 15-20 minutes, or until they attain a golden brown color. The aroma of garlic and cheese will fill your kitchen, signaling that they are almost ready.

Step 7: Serve
Once baked, allow the buns to cool slightly before serving. Enjoy your Korean Garlic Cheese Bread, garnished with additional parsley if desired. This Filipino-inspired version is sure to delight those who appreciate savory and cheesy breads.

Tips for the Perfect Garlic Cheese Bread

Achieving the ideal Korean Garlic Cheese Bread requires attention to detail in various stages of preparation, from dough handling to baking techniques. The first step to perfecting this recipe is in the kneading process. It is vital to knead the dough for an adequate duration, typically around 10-15 minutes, ensuring that it becomes smooth and elastic. This elasticity enables the dough to rise properly and achieve the desired fluffy texture.

Proofing is another critical aspect that can greatly affect the final product. After kneading, allow the dough to rest in a warm, draft-free area until it doubles in size, which generally takes about an hour. This process enhances the bread’s flavor and contributes to its airy consistency. For optimal results, consider using a damp cloth to cover the dough during proofing, preventing it from drying out.

When it comes to flavor, the quality of the garlic and cheese plays a crucial role. Fresh garlic, minced finely, imparts a robust taste that complements the bread perfectly. Avoid using garlic powder, as it may not provide the same flavor depth. Pairing this with high-quality cheese, such as mozzarella or cream cheese, will not only enhance the dish’s richness but also create that desirable gooey texture you seek in Korean Garlic Cheese Bread. Ensure the cheese is at room temperature before incorporating it into the dough to facilitate even melting during baking.

Finally, for an appealing presentation, consider brushing the top of the bread with a garlic butter mixture before baking. This not only adds flavor but creates a golden brown crust that is visually enticing. Optionally, garnish with chopped parsley or chili flakes to provide a pop of color and enhance the culinary experience. Following these expert tips will ensure that your Korean Garlic Cheese Bread is consistently delicious and visually appealing.

Serving Suggestions and Variations

Korean Garlic Cheese Bread is a delightful treat that can be enjoyed in various ways, making it a versatile addition to any dining experience. This appetizing bread is not only suitable as a satisfying snack but can also serve as a dessert or star in a more substantial meal. Its rich garlic and cheese flavor profile pairs well with an array of beverages, such as iced tea, coffee, or even a refreshing fruit shake, providing a complementary experience that enhances the dish’s appeal.

When serving Korean Garlic Cheese Bread, consider adding a side of fresh salad or sautéed vegetables to balance its richness. For a unique twist, integrating traditional Filipino elements can deepen the flavor experience. For instance, pairing the bread with a spicy vinegar dip, like sawsawan, can offer a contrasting tanginess that accentuates the flavors of the garlic and cheese. Additionally, serving it alongside a hearty dish, such as spaghetti or adobo, can transform it into a delightful accompaniment that enriches the overall meal.

Exploration of variations can further enhance this culinary delight, catering specifically to Filipino tastes. Different types of cheese, such as kesong puti or cheddar, can be used to alter the flavor profile while retaining its cheesy essence. Likewise, incorporating ingredients like diced bell peppers or jalapeños can add a delightful kick to each bite. Another creative option is to spread a layer of ube halaya on the bread before applying the garlic and cheese mixture, resulting in a visually appealing and serendipitous flavor combination that resonates well with Filipino preferences.

Ultimately, Korean Garlic Cheese Bread is not just a single recipe but a canvas for creativity. By incorporating these various serving suggestions and thoughtful variations, it can flourish as a beloved staple, adaptable to any occasion and suitable for diverse palates.

Storage and Reheating Tips

Korean Garlic Cheese Bread, a delightful fusion of flavors, is best enjoyed fresh. However, should you have leftovers, proper storage methods can help maintain its quality and taste. Ideally, it is recommended to store the bread in an airtight container to prevent it from becoming stale. For short-term storage, the bread can be placed in the refrigerator, where it typically remains fresh for up to three days. Ensure that the container is sealed tightly to protect the bread from moisture and odors.

If you plan to keep the Korean Garlic Cheese Bread for a more extended period, freezing is an effective option. Wrap the bread in plastic wrap or aluminum foil, and then place it in a freezer-safe bag. This double-wrapping method offers a protective barrier against freezer burn, allowing the bread to be stored for up to three months without significant quality loss. It is advisable to label the packaging with the date to ensure you consume it within the recommended timeframe.

When it comes to reheating, the best method to restore the bread’s original texture and flavor is by using an oven or toaster oven. Preheat the oven to 350°F (175°C) and reheat the bread for about 10-15 minutes. This method helps maintain its crispy exterior and gooey cheese filling while preventing it from drying out. Alternatively, you can microwave the bread for about 20-30 seconds, but be cautious as this may result in a chewier texture. Always check for signs of spoilage before consumption, such as an off smell or unusual color, to ensure food safety. Proper storage and reheating techniques can significantly enhance your experience of this delicious treat.

Cultural Context and Popularity in the Philippines

Korean Garlic Cheese Bread has seen a notable surge in popularity in the Philippines, particularly among the younger generation. This rise can be attributed to the increasing interest in Korean culture, largely fueled by the Korean Wave (Hallyu), which encompasses K-pop, K-dramas, and Korean cuisine. The infusion of this delectable bread into the local food scene represents a fascinating blend of culinary traditions, where Filipino flavors harmoniously intersect with Korean influences.

The allure of Korean Garlic Cheese Bread lies in its unique combination of ingredients: a soft, fluffy bread filled with a rich garlic butter spread and a gooey cheese centre. This fusion of flavors resonates well with the Filipino palate, which is known for appreciating savory and cheesy snacks. The bread’s texture and taste have made it a highly sought-after treat, particularly in local bakeries. Many bakers have customized their recipes to incorporate local ingredients, making it a versatile option that appeals to a wider audience.

Moreover, the social significance of Korean Garlic Cheese Bread cannot be understated. It has become a popular treat during gatherings, celebrations, and even casual meet-ups among friends and family. The act of sharing this delightful snack often strengthens social bonds, making it more than just a food item; it embodies a shared experience. Social media further amplifies its appeal, with many posts showcasing beautifully toasted pieces, leading to an engaging community focused on food discovery.

The growing trend of Korean Garlic Cheese Bread in the Philippines is a testament to the country’s openness to culinary experimentation. As Filipino adaptations emerge and flavors are personalized, this flavorful bread is likely to secure a lasting spot in the hearts and taste buds of many Filipinos. Its cultural impact illustrates a broader narrative of globalization within the food industry, where traditional boundaries are continually being redefined.

Conclusion and Final Thoughts

In summary, making Korean Garlic Cheese Bread (Filipino Style) at home offers a delightful culinary experience that combines the creamy richness of cheese with the aromatic flavors of garlic, resulting in a truly memorable dish. Throughout this recipe, we explored the carefully selected ingredients, which include fluffy bread, melty cheese, and a savory garlic butter spread. The preparation steps highlighted the importance of allowing the bread to rise properly and achieving a golden-brown finish, ensuring an inviting texture and taste.

The unique twist of infusing Filipino flavors into a popular Korean treat showcases the versatility of this dish. Each step in the recipe brings you closer to a warm, comforting loaf that is perfect for sharing during family gatherings or casual brunches. I personally recall preparing this recipe during a festive occasion with friends; the aroma wafting through the kitchen ignited excitement and anticipation. Watching everyone gather around the table, I realized that this dish is more than just a scrumptious treat; it is a medium for connection and joy.

I encourage each of you to try your hand at making Korean Garlic Cheese Bread in your own kitchens. Embrace the process, experiment with variations, and personalize the recipe to suit your tastes. Whether you choose to add spices, explore different types of cheese, or even incorporate local ingredients, your culinary creativity will undoubtedly yield a delicious result.

As you embark on this culinary journey, I invite you to share your experiences, feedback, or any variations you create. Join the community of food lovers who appreciate the harmony of flavors and the happiness that comes from homemade delights. Your contributions can inspire others to try this inviting and flavorful bread.
Spicy & Creamy Bicol Express na may Sitaw Perfect for Any Filipino Feast!

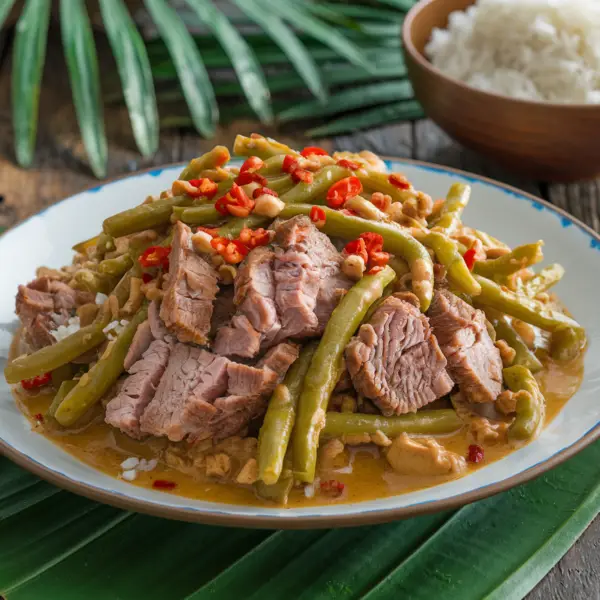
Bicol Express na may Sitaw

Prep Time: 15 minutes
Cook Time: 30 minutes
Total Time: 45 minutes
Servings: 4 servings
Calories: 250 per serving


Why You’ll Love This Recipe

Bicol Express na may Sitaw combines the creamy, spicy flavors of traditional Bicol Express with the crunch and freshness of string beans (sitaw). This Filipino classic is perfect for those who crave something rich and spicy yet balanced with the natural sweetness of coconut milk. Serve it with a steaming plate of rice, and you have a meal to please the entire family.


Ingredients

  • 300 grams string beans (sitaw), cut into 2-inch lengths
  • 250 grams pork belly or pork shoulder, diced
  • 1 tablespoon cooking oil
  • 4 cloves garlic, minced
  • 1 medium onion, chopped
  • 2 tablespoons shrimp paste (bagoong alamang)
  • 3-4 pieces red chilies (siling labuyo), sliced (adjust to taste)
  • 1 cup coconut milk
  • 1 cup coconut cream
  • Salt and pepper to taste
  • Optional: additional chili flakes or green chilies for garnish

Step-by-Step Instructions

1. Prepare the Ingredients

  1. Wash and cut the string beans (sitaw) into 2-inch pieces. Set aside.
  2. Dice the pork into small, bite-sized cubes.

2. Sauté the Aromatics

  1. Heat cooking oil in a pan over medium heat.
  2. Add the minced garlic and chopped onion. Sauté until fragrant and translucent.

3. Cook the Pork

  1. Add the diced pork to the pan. Cook until lightly browned and the fat begins to render.
  2. Stir in the shrimp paste (bagoong alamang) and cook for another 2 minutes.

4. Add the Coconut Base

  1. Pour in the coconut milk and bring to a gentle simmer.
  2. Add the sliced chilies for spice.
  3. Let it simmer for 15-20 minutes or until the pork is tender and the sauce thickens slightly.

5. Add the String Beans

  1. Add the string beans to the pan and stir to coat them in the sauce.
  2. Pour in the coconut cream for added richness. Simmer for another 5-7 minutes, or until the beans are tender but still slightly crisp.

6. Final Seasoning

  1. Season with salt and pepper to taste.
  2. Adjust the spice level with more chilies or chili flakes, if desired.

7. Serve and Enjoy

  1. Transfer to a serving bowl and garnish with additional chilies or chili flakes.
  2. Serve hot with steamed rice.

Tips for the Perfect Bicol Express na may Sitaw

  • Balance the Heat: Adjust the number of chilies to suit your spice tolerance.
  • Use Fresh Ingredients: Fresh coconut milk and cream will elevate the dish’s flavor.
  • Experiment with Vegetables: Add eggplant or squash for variety.
  • Make It Seafood-Friendly: Substitute pork with shrimp or squid for a lighter version.

FAQs

1. Can I use frozen string beans?
Yes, but fresh string beans will provide a better texture and flavor. If using frozen, thaw and drain them before adding.

2. How do I store leftovers?
Store leftovers in an airtight container in the refrigerator for up to 3 days. Reheat gently on the stovetop, adding a splash of water if the sauce has thickened too much.

3. Can I make it vegetarian?
Yes, replace the pork with tofu or mushrooms and use vegetarian bagoong or soy sauce instead of shrimp paste.


Share Your Bicol Express Love!

Did you try this recipe? Tag us on social media with your creations and share your personal twists! Don’t forget to pin this recipe for later and subscribe for more Filipino favorites!


More Filipino Dishes You’ll Love

  • Laing (Taro Leaves in Coconut Milk)
  • Ginataang Kalabasa at Sitaw (Squash and String Beans in Coconut Milk)
  • Pinakbet (Vegetable Stew with Shrimp Paste)

Bookmark this page and make Bicol Express na may Sitaw your next go-to meal. It’s a dish full of bold flavors that truly represents the richness of Filipino cuisine!

Creamy Avocado and Condensed Milk Dessert: A Tropical Sweet Treat!

Avocado and Condensed Milk Dessert (Abukado Lamaw)

Prep Time: 10 minutes
Total Time: 10 minutes
Servings: 2-3 servings
Calories: 230 per serving


Why You’ll Love This Recipe

Abukado Lamaw is a classic Filipino dessert that’s creamy, sweet, and incredibly easy to make. Perfect for hot days or as a quick indulgence, it’s made with just 3 ingredients but packs a rich, refreshing flavor. Whether craving something nostalgic or trying a new treat, this dessert is simple yet satisfying.


Ingredients

  • 2 ripe avocados, halved and pitted
  • 1/2 cup sweetened condensed milk
  • 1/4 cup evaporated milk (optional, for a thinner consistency)
  • Crushed ice (optional, for serving)

Step-by-Step Instructions

1. Prepare the Avocado

  1. Scoop out the flesh of the avocados into a bowl.
  2. Mash lightly with a fork, leaving small chunks for texture.

2. Mix the Ingredients

  1. Add the sweetened condensed milk to the mashed avocado.
  2. Stir until the mixture is smooth and well combined. Add evaporated milk if you prefer a creamier texture.

3. Serve and Enjoy

  1. Spoon the dessert into serving glasses or bowls.
  2. Top with crushed ice for an extra refreshing finish.
  3. Serve immediately and savor every spoonful.

Tips for the Perfect Abukado Lamaw

  • Ripe Avocados Are Key: Make sure your avocados are soft and ripe for the best flavor and texture.
  • Adjust Sweetness: Add more or less condensed milk depending on your preference.
  • Upgrade It: Sprinkle with grated cheese or drizzle with chocolate syrup for added indulgence.

FAQs

1. Can I make this ahead of time?
It’s best enjoyed fresh, but you can refrigerate it for up to 2 hours. Add crushed ice right before serving.

2. What other toppings can I add?
You can mix in nata de coco, tapioca pearls, or fresh fruits for added texture.

3. Is it vegan-friendly?
Substitute condensed milk with coconut condensed milk for a vegan version.


Share Your Dessert Love!

Did you try this recipe? Tag us on social media with your creations and share your twists! Don’t forget to pin this recipe for later and subscribe for more Filipino favorites!


More Filipino Desserts You’ll Love

  • Leche Flan (Caramel Custard)
  • Mango Float (Refrigerated Cake)
  • Halo-Halo (Mixed Dessert)

Bookmark this page and make Abukado Lamaw your go-to sweet fix. It’s not just dessert—a taste of Filipino comfort in every bite!