Category Archives: Filipino Food

Authentic Bistek Tagalog Recipe

Bistek Tagalog, a classic Filipino dish, brings together the savory flavors of marinated beef and the rich taste of onions. This dish is a staple in many households, loved for its simplicity and heartwarming taste. Perfect for family gatherings or a comforting weeknight dinner, Bistek Tagalog is sure to impress.

Imagine tender slices of beef, marinated in soy sauce and calamansi, cooked until perfectly juicy and paired with caramelized onions. The combination of tangy and savory flavors creates a truly delightful experience. Whether served over rice or with a side of vegetables, this dish is a crowd-pleaser.

Understanding Bistek Tagalog

Bistek Tagalog is a beloved dish from the Philippines, showcasing the harmonious blend of tender beef and aromatic onions. The use of soy sauce and calamansi juice in its marinade gives it a distinctive savory and tangy profile.

This dish is not only a staple in many households but also a symbol of Filipino hospitality. It embodies comfort, often bringing families together around the dinner table to share stories and laughter.

Key Ingredients and Their Roles

The main ingredient, beef sirloin, shines in this recipe due to its tenderness. It absorbs the flavors of the marinade beautifully, ensuring each bite is packed with taste.

Onions, sautéed until golden brown, add a sweet depth to the dish. The combination of the marinated beef and caramelized onions creates a fulfilling experience that resonates with both locals and those new to Filipino cuisine.

Aromatic Marinade

Marinating the beef is a vital step that cannot be overlooked. A mixture of soy sauce, calamansi juice, and garlic not only tenderizes the meat but also infuses it with a robust flavor.

Allowing the beef to soak up these ingredients for at least thirty minutes enhances the overall taste, making the final dish even more inviting. The tanginess of calamansi provides a refreshing contrast to the savory notes of the soy sauce.

Cooking Technique

The preparation of Bistek Tagalog involves simple yet effective techniques. Sautéing the onions separately until they caramelize adds complexity to the dish.

Cooking the marinated beef in the same skillet allows the meat to absorb the residual flavors from the onions, enriching the sauce. This method of cooking ensures that the beef remains juicy and flavorful.

Serving Suggestions

When serving Bistek Tagalog, a side of steaming white rice is essential. The rice acts as a neutral base, complementing the rich sauce and meaty flavors of the dish.

For an extra touch, a small bowl of soy sauce for dipping enhances the experience, allowing each diner to personalize their flavor profile. Garnishing with fresh calamansi and green onions adds brightness and visual appeal to the plate.

Embracing Filipino Culture

Every dish tells a story, and Bistek Tagalog is no exception. It reflects the warmth of Filipino culture and the joy of sharing a meal with loved ones.

This delectable dish is perfect for any occasion, whether it’s a family gathering or a casual weeknight dinner. Bistek Tagalog invites diners to savor not just the food but also the moments spent together, making it a cherished part of Filipino dining traditions.

The Best Bistek Tagalog Recipe

A delicious serving of Bistek Tagalog with beef and onions, served alongside rice and calamansi.

This Bistek Tagalog recipe features thinly sliced beef marinated in a flavorful mixture of soy sauce and calamansi juice, then sautéed with onions. The resulting dish is savory, slightly tangy, and incredibly satisfying, making it a favorite at any Filipino dining table.

Ingredients

  • 1 lb beef sirloin, thinly sliced
  • 1/4 cup soy sauce
  • 1/4 cup calamansi juice or lemon juice
  • 2 tablespoons vegetable oil
  • 2 medium onions, sliced into rings
  • 1 teaspoon garlic, minced
  • Salt and pepper to taste
  • Chopped green onions for garnish (optional)

Instructions

  1. Marinate the Beef: In a bowl, combine soy sauce, calamansi juice, minced garlic, salt, and pepper. Add the sliced beef and let it marinate for at least 30 minutes.
  2. Cook the Onions: In a large skillet, heat vegetable oil over medium heat. Add sliced onions and sauté until they are golden brown. Remove from the skillet and set aside.
  3. Cook the Beef: In the same skillet, add the marinated beef (reserve the marinade) and cook until browned. Pour in the reserved marinade and simmer for 5-10 minutes until the beef is tender.
  4. Combine: Add the cooked onions back into the skillet and mix well. Adjust seasoning if necessary.
  5. Serve: Transfer to a serving dish and garnish with chopped green onions if desired. Serve hot with steamed rice.

Cook and Prep Times

  • Prep Time: 10 minutes
  • Cook Time: 20 minutes
  • Total Time: 30 minutes

Nutrition Information

  • Servings: 4 servings
  • Calories: 350kcal
  • Fat: 15g
  • Protein: 30g
  • Carbohydrates: 10g

Refreshing Watermelon Palamig Recipe

Looking for a cool and refreshing treat to beat the heat? This Watermelon Palamig is just the answer! Perfect for warm days, this delightful drink combines the sweetness of ripe melons with a hint of mint, making it a favorite among family and friends. Whether you’re lounging by the pool or hosting a summer gathering, this recipe is sure to impress.

This easy-to-make Melon Palamig is not only a thirst-quencher but also a visually stunning drink that captures the essence of summer in every sip. The combination of juicy watermelon and honeydew creates a beautiful gradient that is as pleasing to the eye as it is to the palate.

Chill Out with This Watermelon Palamig

The Melon Palamig stands out as an ideal choice for those hot summer days. This drink brings a refreshing blend of watermelon and honeydew, creating a delightful combination that is both sweet and invigorating.

With its light and fruity profile, this beverage is perfect for any outdoor gathering. Imagine lounging under the warm sun, sipping on this chilled treat, and feeling the refreshing burst of flavors dance on your palate.

Ingredients That Shine

To create this delightful drink, you’ll need just a few simple ingredients. Fresh watermelon and honeydew melon form the base, bringing their natural sweetness and hydration to the mix.

A touch of sugar can enhance the flavor, while water helps dilute the mixture to a perfect sipping consistency. Finally, fresh mint leaves not only add a pop of color but also a refreshing aroma that elevates the experience.

Preparation Made Easy

Preparing Melon Palamig is a quick and easy task. Start by cutting the watermelon and honeydew into cubes, then blend them until smooth. The vibrant colors of these melons will create a beautiful mixture that is pleasing to the eye.

After blending, add sugar to taste and mix until combined. This step allows you to control the sweetness, making it as light or rich as you prefer.

The Refreshing Experience

Once the mixture is ready, combine it with water in a large pitcher. Stir well to ensure everything is incorporated seamlessly. This step is key to achieving that refreshing taste that defines Melon Palamig.

Chilling the mixture for at least 30 minutes in the refrigerator allows the flavors to meld beautifully. When you’re ready to serve, pour it over ice to create a cool, enjoyable drink.

Garnishing for a Touch of Flair

No drink is complete without a little garnish! Fresh mint leaves add a delightful visual element as well as an aromatic touch. They enhance the overall presentation, making your Melon Palamig look as fantastic as it tastes.

Set the glasses on a sunny patio table, and watch your guests light up as they take that first sip. The combination of colors and the refreshing flavor make this drink a real showstopper.

The Perfect Summer Companion

Melon Palamig is perfect for any summer occasion, whether you’re hosting a barbecue, lounging by the pool, or just enjoying a sunny afternoon in your backyard. Its lightness and refreshing taste make it a favorite for all ages.

Not only will it quench your thirst, but it will also add a burst of color and joy to your summer gatherings. With each glass, you’re not just serving a drink; you’re creating memories of summer relaxation and enjoyment.

Chill Out with This Melon Palamig

A cool glass of Melon Palamig with watermelon and honeydew, garnished with mint, on a sunny patio.

The Melon Palamig is a sweet and refreshing beverage made with fresh melon, water, and a touch of sweetness. It is light, fruity, and bursting with flavor, making it a perfect drink for hot weather.

Ingredients

  • 2 cups watermelon, cubed and deseeded
  • 2 cups honeydew melon, cubed
  • 1/4 cup sugar (adjust to taste)
  • 4 cups water
  • Fresh mint leaves for garnish
  • Ice cubes

Instructions

  1. Prepare the Melons: In a blender, combine the watermelon and honeydew cubes. Blend until smooth.
  2. Sweeten the Mixture: Add sugar to the blended melon mixture and blend again until well combined.
  3. Combine with Water: In a large pitcher, combine the blended melon mixture with water. Stir well to combine.
  4. Chill and Serve: Refrigerate the mixture for at least 30 minutes to chill. Serve over ice and garnish with fresh mint leaves.

Cook and Prep Times

  • Prep Time: 10 minutes
  • Chill Time: 30 minutes
  • Total Time: 40 minutes

Nutrition Information

  • Servings: 4 glasses
  • Calories: 100kcal
  • Fat: 0g
  • Protein: 1g
  • Carbohydrates: 25g

Authentic Pancit Bihon Recipe

Pancit Bihon is a classic Filipino dish that brings family and friends together around the table. This stir-fried noodle dish combines rice noodles with a medley of vibrant vegetables and protein, making it a delicious centerpiece for any gathering. It’s a recipe that holds nostalgia and warmth, perfect for celebrations or everyday meals.

Imagine the delightful aroma of garlic, soy sauce, and fresh vegetables wafting through your kitchen as you prepare this beloved dish. With its savory flavors and satisfying texture, Pancit Bihon is not just food; it’s a celebration of Filipino culture and culinary tradition.

The Essence of Pancit Bihon

Pancit Bihon stands as a beloved staple in Filipino cuisine, often symbolizing celebration and togetherness. This stir-fried noodle dish has a way of bringing people around the table, creating an atmosphere filled with warmth and camaraderie.

At its core, Pancit Bihon is about simplicity and flavor. The combination of rice noodles and an array of colorful vegetables such as bell peppers, carrots, and cabbage creates a visual feast. With every bite, the delightful taste transports you to a place where family gatherings and joyous occasions unfold.

Vibrant Ingredients That Shine

The ingredients in Pancit Bihon are not just functional; they contribute to the dish’s vibrant character. Each vegetable brings its unique texture and flavor, enhancing the overall experience. Carrots add a subtle sweetness, while bell peppers bring a crunchy contrast. Shredded cabbage rounds out the dish with its tender yet crisp nature.

Moreover, the choice of protein—be it chicken, shrimp, or pork—provides an additional layer of richness, making every forkful satisfying. This balance of flavors and textures is what makes Pancit Bihon a favorite among many.

Aromatic Preparation

The process of making Pancit Bihon is as delightful as enjoying the final dish. The aroma of garlic and onions sizzling in oil fills the kitchen, creating an inviting atmosphere. As the vegetables are added, the medley of scents intensifies, culminating in a dish that promises deliciousness.

Stir-frying is key in this recipe, allowing the ingredients to cook quickly while retaining their freshness. The artful tossing of the noodles with soy sauce creates a beautiful sheen, further enhancing their appeal. This preparation method guarantees that each component maintains its distinct flavor.

Garnishing the Dish

Presentation plays a significant role in the enjoyment of Pancit Bihon. Garnishing with chopped green onions not only adds a pop of color but also introduces a fresh, slightly pungent note that complements the savory elements of the dish.

Resting a fork on the side invites a sense of anticipation, beckoning everyone to dig in and savor the flavors. The rustic wooden table setting adds a touch of homey charm, making the meal feel even more inviting.

A Dish for Every Occasion

Pancit Bihon is versatile and fits perfectly into various occasions. Whether it’s a festive celebration, a casual family dinner, or a gathering with friends, this dish adapts effortlessly. It encourages sharing and enjoying good company while savoring each delicious bite.

Moreover, making Pancit Bihon can be a collaborative experience. Friends and family can join in the preparation process, making it a fun activity that strengthens bonds. This aspect of cooking together is integral to the joy that Pancit Bihon brings.

Final Thoughts on Pancit Bihon

Ultimately, Pancit Bihon is more than just a meal; it embodies the spirit of Filipino culture. Its rich flavors, colorful ingredients, and communal nature make every serving a celebration. Each plate tells a story of love, tradition, and togetherness.

So whether you are enjoying it at a special occasion or simply as a comforting weeknight meal, Pancit Bihon is sure to leave a lasting impression. It’s a delicious reminder that food can indeed bridge connections and create cherished memories.

Traditional Pancit Bihon Recipe

A plate of Pancit Bihon with rice noodles, vegetables, and green onions on a rustic wooden table.

Pancit Bihon features thin rice noodles stir-fried with a colorful assortment of vegetables, such as carrots, bell peppers, and cabbage. The dish is typically enhanced with soy sauce, garlic, and your choice of protein, resulting in a savory and slightly sweet flavor profile that is both comforting and satisfying.

Ingredients

  • 8 ounces bihon (rice vermicelli noodles)
  • 2 tablespoons vegetable oil
  • 4 cloves garlic minced
  • 1 medium onion sliced
  • 1 medium carrot julienned
  • 1 bell pepper sliced
  • 2 cups cabbage shredded
  • 2 cups cooked chicken, shrimp, or pork (optional)
  • 3 tablespoons soy sauce
  • 1 tablespoon oyster sauce (optional)
  • Salt and pepper to taste
  • Chopped green onions for garnish

Instructions

  1. Prepare the Noodles: Soak the bihon noodles in warm water for about 10-15 minutes until softened. Drain and set aside.
  2. Sauté the Aromatics: In a large skillet or wok, heat the vegetable oil over medium heat. Add the minced garlic and sliced onion, sautéing until fragrant and translucent.
  3. Cook the Vegetables: Stir in the carrots and bell peppers, cooking for about 3-4 minutes until slightly tender. Add the cabbage and cooked protein (if using), and continue to stir-fry for another 2-3 minutes.
  4. Combine the Noodles: Add the soaked bihon noodles to the skillet along with soy sauce and oyster sauce. Toss everything together gently, ensuring the noodles are coated evenly with the sauce and heated through.
  5. Season and Serve: Taste and adjust the seasoning with salt, pepper, or additional soy sauce as needed. Once everything is well combined and heated, remove from heat and garnish with chopped green onions before serving.

Cook and Prep Times

  • Prep Time: 15 minutes
  • Cook Time: 20 minutes
  • Total Time: 35 minutes

Nutrition Information

  • Servings: 4 servings
  • Calories: 300kcal
  • Fat: 10g
  • Protein: 15g
  • Carbohydrates: 40g

Savory Beef Caldereta Recipe

If you’re looking for a heartwarming dish that brings comfort and satisfaction, look no further than this Beef Caldereta recipe. This Filipino classic is not just a meal; it’s an experience that fills your kitchen with inviting aromas and makes your taste buds dance. Perfect for family gatherings or special occasions, this dish promises to impress everyone at the table.

What makes this Beef Caldereta truly special is its rich, savory flavor. Slow-cooked to perfection, the tender beef absorbs all the delightful spices and ingredients. Imagine a luscious sauce that’s both tangy and slightly sweet, perfectly balanced by the natural flavors of the beef and vegetables. Each bite is a harmony of tastes that will leave you craving more.

Understanding Beef Caldereta

Beef Caldereta is a staple in Filipino cuisine, renowned for its rich and savory profile. This dish is a celebration of flavors, showcasing tender beef simmered in a luscious tomato-based sauce. Each ingredient plays an important role in creating a robust meal that warms the heart and delights the palate.

The essence of Caldereta lies in its slow-cooking method. The prolonged simmer allows the beef to absorb the flavors from the sauce and spices, resulting in tender chunks that practically melt in your mouth. The addition of vibrant vegetables like carrots, potatoes, and bell peppers not only enhances the visual appeal but also adds a variety of textures and tastes that complement the beef beautifully.

Ingredients That Make It Special

This dish features a combination of wholesome ingredients that contribute to its hearty nature. The use of liver spread enriches the sauce, elevating the flavor profile and offering a unique twist that sets it apart from other stews.

Tomato sauce serves as the base, providing a tangy sweetness that balances the savory elements of the beef. The careful selection of spices, along with fresh garlic and onions, ensures that every spoonful is bursting with flavor, inviting everyone to savor the dish.

Preparation Steps to Perfection

Preparing Beef Caldereta is a straightforward yet rewarding process. It begins with sautéing garlic and onions in oil, filling the kitchen with an inviting aroma. The next step involves searing the beef until it’s beautifully browned, which locks in the juices and enhances the overall flavor.

Once the beef is seared, it’s time to combine it with the tomato sauce, beef broth, and liver spread. Bringing this mixture to a boil and then allowing it to simmer is crucial for tenderness. It’s during this stage that the flavors meld together, creating the signature taste people love.

The Role of Vegetables

Vegetables are not just an afterthought in Beef Caldereta; they are essential for creating a balanced meal. Potatoes and carrots add natural sweetness, while bell peppers provide a fresh crunch that contrasts with the succulent beef.

Adding these vegetables at the right time ensures they are perfectly cooked – tender yet not mushy. Their vibrant colors make the dish visually appealing, enticing everyone to dig into this comforting feast.

Serving Suggestions

Beef Caldereta is traditionally served in a charming Filipino bowl, often garnished with fresh parsley for a pop of color. This presentation not only highlights the dish’s inviting nature but also emphasizes its role as a communal meal meant to be enjoyed with family and friends.

Accompanying this dish with steamed rice is a common practice, allowing diners to soak up the rich sauce with each bite. Whether it’s a festive occasion or a simple family dinner, Beef Caldereta makes for a delightful centerpiece that brings people together.

Nutrition and Serving Size

This comforting dish provides a balanced meal with a generous serving of protein from the beef, along with essential vitamins and minerals from the vegetables. Each serving of Beef Caldereta contains approximately 350 calories, making it a filling option without being overly heavy.

With the potential to serve six, it’s perfect for gathering loved ones around the table, creating an atmosphere of warmth and togetherness. This classic dish not only satisfies hunger but also nourishes the soul.

Authentic Beef Caldereta

A hearty bowl of beef caldereta with beef, vegetables in rich tomato sauce, garnished with parsley.

This Beef Caldereta features tender chunks of beef stewed in a rich tomato sauce, combined with bell peppers, carrots, and potatoes. The dish is often enriched with liver spread and spices, making it a hearty and satisfying meal that showcases the best of Filipino cuisine.

Ingredients

  • 2 lbs beef chuck, cut into cubes
  • 1 cup tomato sauce
  • 1 cup beef broth
  • 1/2 cup liver spread
  • 2 medium potatoes, diced
  • 2 medium carrots, sliced
  • 1 red bell pepper, sliced
  • 1 green bell pepper, sliced
  • 1 onion, chopped
  • 4 cloves garlic, minced
  • 2 tablespoons soy sauce
  • 2 tablespoons cooking oil
  • 1 teaspoon black pepper
  • Salt to taste
  • Chopped parsley for garnish (optional)

Instructions

  1. Heat oil in a large pot over medium heat. Sauté the onions and garlic until fragrant.
  2. Add the beef cubes and sear until browned on all sides.
  3. Stir in the tomato sauce, beef broth, liver spread, soy sauce, and black pepper. Bring to a boil, then reduce heat to low.
  4. Cover and simmer for about 1.5 to 2 hours, or until the beef is tender.
  5. Add the potatoes, carrots, and bell peppers. Cook until the vegetables are tender, about 15-20 minutes.
  6. Season with salt to taste. Serve hot, garnished with chopped parsley if desired.

Cook and Prep Times

  • Prep Time: 15 minutes
  • Cook Time: 2 hours
  • Total Time: 2 hours 15 minutes

Nutrition Information

  • Servings: 6 servings
  • Calories: 350kcal
  • Fat: 20g
  • Protein: 30g
  • Carbohydrates: 20g

Authentic Filipino Chicken Curry Recipe

If you’re looking for a comforting and flavorful dish, this Filipino chicken curry is a must-try. This recipe captures the essence of home-cooked meals, delivering rich and savory flavors that are sure to please your palate. The combination of tender chicken, aromatic spices, and creamy coconut milk creates a delightful harmony of taste that will transport you straight to the Philippines.

This chicken curry is not just a meal; it’s an experience. With every bite, you’ll savor the warmth of turmeric, the sweetness of carrots, and the creamy texture of coconut milk. Whether you’re serving it for a family dinner or special occasion, this dish will impress everyone at the table.

Discover the Rich Flavors of Filipino Chicken Curry

This Filipino chicken curry presents a vibrant medley of flavors, bringing together tender pieces of chicken in a luscious coconut milk sauce. The addition of colorful vegetables, like carrots and bell peppers, enhances both the visual appeal and the nutritional value of the dish.

Infused with aromatic spices, this dish delivers a comforting experience that evokes the essence of traditional Filipino cooking. The warmth of the curry and the creaminess of the coconut milk create a delightful balance that is truly satisfying.

The Art of Preparing Chicken Curry

Preparing this Filipino chicken curry is a straightforward yet rewarding process. Begin by sautéing the aromatic vegetables such as onions, garlic, and ginger in a pot. This step lays the foundation for the dish, filling the kitchen with enticing scents.

Next, brown the chicken pieces to lock in their juices. Once the chicken is seared, introduce the vibrant vegetables and let them soften slightly. This layering of flavors ensures that every ingredient contributes to the overall taste profile.

Cooking Down to Perfection

Once the chicken and vegetables are combined, sprinkle the curry powder and pour in the creamy coconut milk. This combination is key, as it melds the spices into the dish, creating a rich sauce.

Allow the mixture to simmer gently. The slow cooking process melds the flavors beautifully, resulting in tender chicken enveloped in a thick, flavorful sauce. Adjusting the seasoning with salt and pepper will ensure a balanced taste.

Serving Suggestions

For a complete meal, serve the Filipino chicken curry hot alongside steaming white rice. The rice not only complements the rich flavors of the curry but also provides a satisfying base to soak up the sauce.

To add a fresh touch, garnish the dish with chopped green onions. This final addition brings a pop of color and a hint of freshness, enhancing the overall presentation of the dish.

The Cultural Touch

Filipino chicken curry is more than just a meal; it is a reflection of Filipino hospitality and warmth. Enjoyed in a rustic setting, the dish evokes a sense of community and togetherness, making it perfect for family gatherings or special occasions.

The traditional elements of the meal, from the vibrant colors to the homey flavors, create a welcoming atmosphere that invites everyone to the table. Sharing this dish can become a cherished experience that celebrates Filipino culture and cuisine.

Nutrition and Enjoyment

This chicken curry is not only pleasing to the palate but also packs a nutritional punch. With a balance of protein, healthy fats, and carbohydrates, it is a wholesome choice for any meal.

Enjoy the harmony of flavors and the comforting essence of this Filipino chicken curry. Whether indulging on a cozy night in or serving it during a festive occasion, this dish is sure to impress and satisfy.

Discover the Rich Flavors of Filipino Chicken Curry

A bowl of Filipino chicken curry with tender chicken, colorful vegetables in coconut sauce, and a side of white rice.

This Filipino chicken curry is a vibrant and satisfying dish that combines tender chicken pieces with an array of vegetables in a luscious coconut milk sauce. It’s infused with spices that give it a distinctive warmth and depth, making it a perfect choice for any meal.

Ingredients

  • 2 lbs chicken thighs, cut into pieces
  • 1 cup coconut milk
  • 2 tablespoons curry powder
  • 1 medium onion, chopped
  • 3 cloves garlic, minced
  • 1 tablespoon ginger, grated
  • 2 medium potatoes, cubed
  • 1 medium carrot, sliced
  • 1 red bell pepper, sliced
  • 2 tablespoons fish sauce
  • 1 tablespoon vegetable oil
  • Salt and pepper to taste
  • Chopped green onions for garnish

Instructions

  1. Sauté Aromatics: Heat vegetable oil in a large pot over medium heat. Add onions, garlic, and ginger, sautéing until fragrant and golden.
  2. Cook Chicken: Add chicken pieces to the pot and cook until browned on all sides.
  3. Add Vegetables: Stir in potatoes, carrots, and bell pepper. Cook for a few minutes until they start to soften.
  4. Make the Curry: Sprinkle curry powder over the chicken and vegetables. Pour in coconut milk and fish sauce. Stir to combine and bring to a simmer.
  5. Simmer: Cover the pot and let it cook for about 20-30 minutes, or until the chicken is tender and the sauce thickens. Adjust seasoning with salt and pepper as needed.
  6. Serve: Garnish with chopped green onions and serve hot with steamed rice.

Cook and Prep Times

  • Prep Time: 15 minutes
  • Cook Time: 40 minutes
  • Total Time: 55 minutes
  • Servings: 4 servings
  • Calories: 450kcal
  • Fat: 30g
  • Protein: 30g
  • Carbohydrates: 25g

Delicious Paksiw na Bangus Recipe

Paksiw na Bangus is a delightful Filipino dish that features milkfish simmered in a tangy vinegar sauce. This recipe is a staple in many households, perfect for those who appreciate the bold flavors of vinegar combined with the mild taste of bangus. It’s a dish that brings back memories of family gatherings and home-cooked meals.

Imagine the aroma of tender bangus cooking in a savory broth of vinegar, garlic, and spices. This dish is not only comforting but also incredibly easy to prepare, making it a favorite for both novice and experienced cooks alike. The best part? It’s healthy, satisfying, and can be served with rice for a complete meal.

Understanding Paksiw na Bangus

Paksiw na Bangus is a traditional Filipino dish that showcases the delicate flavor of milkfish, known locally as bangus.

This dish is characterized by its tangy vinegar sauce, which brings a lively zest to the tender fish, making it a favorite among many.

The cooking method involves simmering the fish in a fragrant mixture of vinegar, garlic, and spices, allowing the flavors to meld harmoniously.

The Ingredients That Make It Special

The essence of Paksiw na Bangus lies in its simple yet flavorful ingredients.

Fresh bangus is the star, butterflied for even cooking and better absorption of the tangy sauce.

Vinegar is a key component, lending a sharpness that cuts through the richness of the fish. Sliced onions and minced garlic add depth, while black peppercorns and finger chilies contribute warmth and subtle heat.

Aromatic Cooking Process

The preparation of this dish begins with cleaning and butterflying the bangus, ensuring it’s ready to soak up the delicious marinade.

In a large pot, vinegar, water, onions, garlic, and spices come together to create a fragrant broth.

Once the fish is added, it is gently simmered, allowing it to become tender and infused with the savory sauce. The cooking time is crucial, as it allows the fish to reach the perfect level of doneness while soaking up all the flavors.

The Art of Presentation

Serving Paksiw na Bangus is as important as the cooking process.

A beautifully arranged plate features the fish at its center, garnished with vibrant green onions and slices of onion that add a pop of color.

Accompanying the dish, a bowl of steaming white rice is essential, as it balances the tangy flavors of the paksiw and completes the meal.

Cultural Significance

Paksiw na Bangus is not just a meal; it embodies the warmth of Filipino hospitality.

Often served during family gatherings and celebrations, it carries a sense of nostalgia and comfort for many.

The dish reflects the Filipino love for bold flavors, blending simplicity with tradition in every bite.

Health Benefits of Paksiw na Bangus

This dish is not only satisfying but also nutritious.

Bangus is a good source of protein and healthy fats, making it a wholesome option for any meal.

The use of vinegar in cooking also has health benefits, including potential digestion assistance and aiding in blood sugar control.

When paired with rice, Paksiw na Bangus becomes a complete meal that nourishes and delights.

Authentic Paksiw na Bangus Recipe

A serving of Paksiw na Bangus on a plate, garnished with onions and green onions, with rice in the background.

This Paksiw na Bangus is a savory dish made with fresh bangus, marinated in vinegar and cooking spices until tender. The taste is a perfect balance of tangy and savory, with hints of garlic and pepper that enhance the natural flavor of the fish. It’s a flavorful dish that’s sure to please anyone at the table.

Ingredients

  • 1 whole bangus (milkfish), cleaned and butterflied
  • 1 cup vinegar
  • 1 cup water
  • 1 onion, sliced
  • 4 cloves garlic, minced
  • 1 teaspoon black peppercorns
  • 2-3 pieces finger chili (siling pangsigang)
  • Salt to taste
  • 1 tablespoon cooking oil
  • Chopped green onions for garnish (optional)

Instructions

  1. Prepare the Fish: Clean the bangus thoroughly and butterfly it, making sure to remove all entrails.
  2. Combine Ingredients: In a large pot, combine vinegar, water, sliced onion, minced garlic, black peppercorns, and finger chili. Stir to mix well.
  3. Add the Fish: Place the bangus in the pot, ensuring it’s submerged in the liquid. Season with salt to taste.
  4. Cook the Dish: Cover the pot and bring to a boil over medium heat. Once boiling, lower the heat and let it simmer for about 20-30 minutes, or until the fish is cooked through and tender.
  5. Serve: Carefully transfer the paksiw na bangus to a serving dish. Garnish with chopped green onions if desired. Serve hot with steamed rice.

Cook and Prep Times

  • Prep Time: 10 minutes
  • Cook Time: 30 minutes
  • Total Time: 40 minutes
  • Servings: 4 servings
  • Calories: 200kcal
  • Fat: 10g
  • Protein: 25g
  • Carbohydrates: 5g

Authentic Filipino Beef Tapa Recipe

Craving a hearty and flavorful dish that transports you straight to the Philippines? This beef tapa recipe is exactly what you need. It’s a classic Filipino breakfast staple that combines tender marinated beef with bold flavors, perfect for any time of the day.

Imagine juicy slices of beef, marinated to perfection, served with a side of garlic rice and a sunny-side-up egg. This dish is not just a meal; it’s an experience that will awaken your taste buds and make you feel at home. Whether you’re serving it for breakfast or dinner, this beef tapa is sure to impress.

What makes this recipe special is the balance of sweetness and savory notes from the marinade, which really enhances the natural flavors of the beef. It’s a simple yet satisfying dish that will have everyone coming back for seconds.

The Allure of Filipino Beef Tapa

Filipino beef tapa stands out as a beloved dish that captures the essence of Filipino cuisine. Its unique combination of flavors and textures makes it a memorable meal that can be enjoyed any time of day.

The dish features tender marinated beef, known for its savory and slightly sweet taste, which is achieved through a carefully crafted marinade. This delightful blend of soy sauce, vinegar, garlic, and a hint of brown sugar creates a flavor profile that resonates with food enthusiasts.

Ingredients That Make a Difference

Quality ingredients play a vital role in the success of this dish. Using fresh beef, preferably sirloin or flank steak, ensures that each slice is juicy and tender. The marinade not only enhances the taste but also helps in tenderizing the meat.

Complementing the beef are fragrant garlic rice and a sunny-side-up egg, adding both flavor and visual appeal to the plate. Fresh tomatoes and green onions provide a pop of color and freshness, balancing the richness of the beef.

Mastering the Marinade

The marinating process is where the magic begins. Combining soy sauce, vinegar, minced garlic, brown sugar, and black pepper creates a harmonious blend that infuses the beef with deep flavor. It’s recommended to marinate for at least an hour, although overnight marination enhances the taste even more.

As the beef absorbs the marinade, it transforms into a tender delight, ready to be cooked to perfection. This step is crucial, as it sets the foundation for the dish’s overall flavor and texture.

The Cooking Process

Cooking the beef tapa requires attention to detail. Using a skillet over medium-high heat allows for the beef to sear beautifully, creating a caramelized crust that locks in moisture. Frying in batches prevents overcrowding, ensuring each piece cooks evenly.

Once cooked, the beef should have a slightly caramelized exterior while remaining tender inside. This contrast in textures is what makes every bite enjoyable and satisfying.

Serving Suggestions

Presenting beef tapa is an art in itself. A generous serving alongside garlic rice and a perfectly cooked sunny-side-up egg creates a visually stunning plate that invites you to dig in.

Garnishing with fresh tomatoes and a sprinkle of green onions not only enhances the dish’s aesthetic appeal but also adds a refreshing crunch that balances the richness of the beef and egg.

A Taste of Home

Beyond its taste, beef tapa evokes memories of home-cooked meals and family gatherings. It’s a dish that brings people together, whether enjoyed at breakfast, lunch, or dinner.

This dish is a celebration of flavors and traditions, making it a staple in many Filipino households. With its combination of savory beef, aromatic garlic rice, and creamy egg, it promises to create a comforting and satisfying dining experience.

The Perfect Beef Tapa for Any Occasion

A delicious serving of Filipino beef tapa with garlic rice and a sunny-side-up egg on a rustic plate.

This beef tapa is marinated in a mixture of soy sauce, vinegar, garlic, and sugar, giving it a rich, savory-sweet flavor profile. The beef is cooked until tender and slightly caramelized, making each bite incredibly satisfying.

Ingredients

  • 1 pound beef sirloin or flank steak, thinly sliced
  • 1/4 cup soy sauce
  • 1/4 cup vinegar
  • 4 cloves garlic, minced
  • 2 tablespoons brown sugar
  • 1 teaspoon black pepper
  • 2 tablespoons cooking oil for frying
  • Salt to taste

Instructions

  1. Marinate the Beef: In a bowl, combine soy sauce, vinegar, minced garlic, brown sugar, and black pepper. Add the sliced beef, ensuring all pieces are coated. Cover and marinate in the refrigerator for at least 1 hour or overnight for best results.
  2. Cook the Beef: Heat cooking oil in a skillet over medium-high heat. Remove the beef from the marinade, allowing excess liquid to drip off. Fry the beef in batches until cooked through and slightly caramelized, about 3-5 minutes per side.
  3. Serve: Serve the beef tapa with garlic rice and a sunny-side-up egg on the side. Enjoy it with sliced tomatoes or pickled vegetables for added freshness.

Cook and Prep Times

  • Prep Time: 15 minutes
  • Marinating Time: 1 hour
  • Cook Time: 15 minutes
  • Total Time: 1 hour 30 minutes
  • Servings: 4
  • Calories: 310 kcal
  • Fat: 10g
  • Protein: 35g
  • Carbohydrates: 8g

Savory Pork Pata Humba Recipe

Looking for a dish that embodies the rich flavors of Filipino cuisine? Pork Pata Humba is a succulent, slow-cooked dish that brings together tender pork hocks and a blend of savory ingredients to create a feast for the senses. It’s perfect for family gatherings or special occasions that call for something truly comforting and satisfying.

This recipe is a treasure trove of flavor, featuring a delightful combination of soy sauce, vinegar, and spices that create a beautifully balanced sauce. The pork becomes meltingly tender, and the aroma wafting through your kitchen will have everyone eagerly anticipating the meal.

With this Pork Pata Humba, you can impress your loved ones with your cooking skills while enjoying the deliciously rich and slightly sweet taste that defines this beloved Filipino dish.

Rich Flavors of Pork Pata Humba

Pork Pata Humba is a well-loved dish that captures the essence of Filipino cuisine. It is celebrated for its tender pork hocks simmered in a dark, savory sauce that combines soy sauce, vinegar, and an array of spices.

This dish is slow-cooked to allow the flavors to meld perfectly, resulting in a comforting meal that is both satisfying and delicious. The aroma that fills the kitchen while it’s cooking can make anyone’s mouth water.

Ingredients That Create Magic

The magic of Pork Pata Humba lies in its ingredients. The primary component, pork hocks, is ideal for slow cooking, becoming tender and rich in flavor as it simmers.

Alongside the pork, essential ingredients such as garlic, onions, and black peppercorns contribute depth to the dish. The addition of brown sugar brings a hint of sweetness that perfectly balances the savory elements, making each bite delightful.

Cooking Technique

Preparing Pork Pata Humba involves a few essential steps that ensure optimal flavor and texture. Beginning with marinating the pork hocks allows the meat to absorb the rich flavors of the sauce.

After marinating, the pork is browned to enhance its flavor before being simmered in a mixture that includes a combination of the marinade and bay leaves. This process transforms the pork into a melt-in-your-mouth delicacy.

Serving Suggestions

Pork Pata Humba is typically served with fluffy white rice, making it a hearty meal. The rice serves as the perfect accompaniment, soaking up the rich sauce and complementing the pork beautifully.

Garnishing with vibrant chopped green onions adds a pop of color and freshness, elevating the dish both visually and flavor-wise. The combination of textures and flavors makes for a truly satisfying dining experience.

Perfect for Any Occasion

This dish is ideal for family gatherings, special occasions, or even a cozy meal at home. Its comforting nature and rich flavor profile make it a favorite among many.

Whether you’re looking to impress guests or enjoy a comforting meal, Pork Pata Humba is sure to deliver satisfaction and delight. Its appeal goes beyond just taste—it’s a dish that brings people together around the table.

A Culinary Delight Worth Sharing

Pork Pata Humba is not just a meal; it’s a celebration of culture and tradition. Sharing this dish with friends and family fosters connections and creates lasting memories around the dining table.

As you enjoy this savory dish, you’ll appreciate the rich flavors that define Filipino cuisine. It serves as a reminder of the joy that home-cooked meals can bring, uniting loved ones over a shared experience of flavor and comfort.

The Ultimate Pork Pata Humba Recipe

A bowl of savory Pork Pata Humba with tender pork hocks in rich sauce, garnished with green onions, served with rice.

Pork Pata Humba is a Filipino classic known for its rich, savory, and slightly sweet flavors. The dish features tender pork hocks stewed slowly until juicy and melt-in-your-mouth, infused with a flavorful sauce made from soy sauce, vinegar, garlic, and spices.

Ingredients

  • 2 lbs pork hocks (pata), cleaned and cut into pieces
  • 1/2 cup soy sauce
  • 1/4 cup vinegar
  • 1 cup water
  • 1 medium onion, chopped
  • 4 cloves garlic, minced
  • 1 teaspoon black peppercorns
  • 2 bay leaves
  • 1/4 cup brown sugar
  • 2 tablespoons cooking oil
  • Salt to taste
  • Chopped green onions for garnish

Instructions

  1. Marinate the Pork: In a bowl, combine the pork hocks with soy sauce, vinegar, minced garlic, and black peppercorns. Let it marinate for at least 30 minutes.
  2. Sauté Aromatics: In a large pot, heat cooking oil over medium heat. Add chopped onions and sauté until translucent.
  3. Brown the Pork: Add the marinated pork hocks to the pot and sear until browned on all sides.
  4. Simmer: Pour in the marinade, water, and add bay leaves. Bring to a boil, then reduce the heat to low. Cover and let it simmer for about 1.5 to 2 hours or until the pork is tender.
  5. Add Sweetness: Once the pork is tender, stir in the brown sugar and adjust seasoning with salt as needed. Let it simmer for an additional 10-15 minutes to thicken the sauce.
  6. Serve: Transfer the Pork Pata Humba to a serving dish, garnish with chopped green onions, and enjoy with steamed rice.

Cook and Prep Times

  • Prep Time: 40 minutes
  • Cook Time: 2 hours
  • Total Time: 2 hours 40 minutes

Nutrition Information

  • Servings: 4-6 servings
  • Calories: 480kcal
  • Fat: 30g
  • Protein: 36g
  • Carbohydrates: 10g

Crispy Lumpiang Shanghai Recipe

If you’re looking for a fun and delicious appetizer, look no further than Lumpiang Shanghai. This Filipino spring roll is perfect for gatherings, parties, or even just a cozy night in with friends. It’s crispy, savory, and bursting with flavor, making it a favorite at any table.

Lumpiang Shanghai is a delightful treat filled with ground pork, vegetables, and a medley of spices, all wrapped in a delicate spring roll skin. These crispy rolls are incredibly versatile – you can serve them with sweet and sour sauce, vinegar, or even soy sauce for dipping.

Get ready to impress your guests with this easy-to-follow recipe that will have everyone asking for seconds.

Delightful Presentation of Lumpiang Shanghai

A plate of Lumpiang Shanghai creates an inviting scene that can elevate any meal. The golden brown spring rolls are carefully arranged, showcasing their crispy exterior, which immediately tempts the appetite.

Accompanying these delicious rolls is a small bowl of sweet and sour sauce, perfect for dipping. The vibrant color of the sauce contrasts beautifully with the golden spring rolls, making the dish not just appetizing but also visually appealing.

Fresh herbs garnishing the plate add a touch of color and a hint of freshness, enhancing the overall presentation while inviting guests to indulge in this delightful appetizer. The rustic wooden table provides a warm backdrop, creating a cozy atmosphere for sharing food with family and friends.

The Savory Filling of Lumpiang Shanghai

What makes Lumpiang Shanghai truly special is its savory filling. Ground pork combines with a medley of vegetables, including grated carrots and minced green beans, creating a harmonious blend of textures and flavors.

The filling is seasoned with garlic, onion, soy sauce, and a touch of salt and pepper, ensuring that every bite bursts with savory goodness. This combination not only tantalizes the taste buds but also provides a satisfying crunch when enveloped in a crisp wrapper.

Each roll is filled to perfection, ensuring that every spring roll delivers that signature crunch paired with a tender and flavorful filling, making them an irresistible snack or appetizer.

Perfecting the Crunch

The key to achieving perfectly crispy Lumpiang Shanghai lies in the frying process. The oil must be hot enough for frying but not so hot that the rolls burn before cooking through.

Frying the rolls in small batches allows for even cooking and ensures that each spring roll gets that gorgeous golden-brown color. The satisfying crunch that results from this technique is what makes these spring rolls a favorite among many.

Once they are ready, letting them drain on paper towels helps to remove excess oil, keeping each roll light and crispy for serving.

Serving Suggestions for a Flavorful Experience

Serving Lumpiang Shanghai alongside various dipping sauces can enhance the flavor experience. While sweet and sour sauce is a popular choice, other options such as vinegar or soy sauce can also complement the crispy rolls beautifully.

Pairing these rolls with a refreshing salad or a side of steamed rice can complete the meal, making it a versatile choice for any occasion. Whether it’s a festive gathering, a casual dinner, or a party, Lumpiang Shanghai shines as a crowd-pleaser.

Offering guests a choice of sauces allows for a fun and interactive dining experience, where they can customize each bite to their liking.

Versatility and Occasions

Lumpiang Shanghai is not just an appetizer; it fits perfectly into various dining occasions. From festive celebrations to simple family dinners, these crispy rolls cater to a wide range of tastes.

Being easy to prepare makes them a great option for gatherings. Preparing a large batch means there’s enough to share, and the enticing aroma will draw guests to the table.

Whether served at a birthday party, holiday gathering, or just a cozy night in, the crispy, savory goodness of Lumpiang Shanghai will always be a hit, leaving everyone asking for more.

Conclusion: A Must-Try Appetizer

Incorporating Lumpiang Shanghai into your meal plans is a delightful way to impress family and friends. With their crispy texture and savory filling, these spring rolls are sure to become a favorite.

The combination of flavors, textures, and the option to choose dipping sauces creates a culinary experience that’s enjoyable for everyone involved. So, gather your ingredients and get ready to share this delicious Filipino treat with your loved ones!

The Best Crispy Lumpiang Shanghai Recipe

Crispy Lumpiang Shanghai spring rolls on a plate with sweet and sour sauce.

These crispy Lumpiang Shanghai spring rolls are golden brown and crunchy on the outside, while the filling is tender and packed with seasoned meat and vegetables. Each bite delivers a satisfying crunch followed by a burst of savory goodness that will keep you coming back for more.

Ingredients

  • 1 pound ground pork
  • 1 cup grated carrots
  • 1 cup minced green beans
  • 1/2 cup minced onion
  • 2 cloves garlic, minced
  • 1/4 cup soy sauce
  • 1 teaspoon ground black pepper
  • 1 teaspoon salt
  • 1 package spring roll wrappers
  • Oil for frying

Instructions

  1. Prepare the Filling: In a large bowl, combine ground pork, grated carrots, minced green beans, minced onion, garlic, soy sauce, black pepper, and salt. Mix until well combined.
  2. Wrap the Rolls: Take a spring roll wrapper and place about a tablespoon of the filling near one corner. Fold the corner over the filling, then fold the sides in, and roll tightly.
  3. Heat the Oil: In a deep frying pan, heat oil over medium heat until hot enough for frying.
  4. Fry the Rolls: Carefully add the spring rolls to the hot oil, frying in batches until golden brown and crispy, about 3-5 minutes per side.
  5. Drain and Serve: Remove the spring rolls from the oil and let them drain on paper towels. Serve hot with your choice of dipping sauce.

Cook and Prep Times

  • Prep Time: 20 minutes
  • Cook Time: 30 minutes
  • Total Time: 50 minutes

Nutrition Information

  • Servings: 4-6 servings
  • Calories: 300kcal
  • Fat: 18g
  • Protein: 12g
  • Carbohydrates: 30g

Crispy Kanto-Style Fried Chicken Recipe

Ever had a craving for fried chicken that’s seasoned to perfection with a Japanese twist? This Kanto-style fried chicken recipe is your answer! Known for its crispy texture and rich flavors, this chicken is perfect for any meal or snack time. Whether you’re hosting a gathering or just enjoying a cozy night in, this dish will surely impress.

Imagine biting into succulent, juicy chicken coated in a light, crispy crust that crunches with every bite. This recipe combines traditional Japanese spices and techniques, making it not just a meal, but a delightful experience. Serve it with rice, salads, or even as a standalone snack for that satisfying crunch.

With easy-to-follow steps and simple ingredients, you’ll be able to create this delicious dish at home in no time. Get ready to bring the taste of Japan right to your kitchen!

The Charm of Kanto-Style Fried Chicken

Kanto-style fried chicken brings a delightful twist to a beloved classic. Known for its exceptional crunch and unique flavor profile, this dish elevates any dining experience.

The secret lies in marinating the chicken with a mix of soy sauce, sake, garlic, and ginger. This infusion of flavors ensures that each bite is not only crispy but also bursting with savory notes that tantalize the palate.

Perfecting the Crunch

The crispy exterior is achieved through a well-balanced coating made of all-purpose flour and cornstarch. This combination creates a texture that’s light yet firm, allowing for a satisfying crunch upon biting.

Using baking powder in the mix contributes to a fluffier crust, making each piece of chicken a delightful experience. It’s this contrast of textures that makes Kanto-style fried chicken truly stand out.

Serving Suggestions

This fried chicken is not just a meal; it’s versatile enough to be served in various ways. Pair it with fluffy white rice for a comforting meal, or serve it alongside fresh salads for a refreshing balance.

Dipping saucescan enhance the experience further. Whether you prefer a tangy, spicy, or sweet sauce, the options are endless. The chicken’s crispy texture complements any sauce beautifully.

Nutritional Value

This dish serves four, making it a suitable option for family meals or gatherings. Each serving offers around 400 calories, with a hearty amount of protein to keep you satisfied.

While it contains 22 grams of fat, the joy of enjoying a crispy fried chicken experience can be well worth it. Balance it with lighter sides for a wholesome meal.

Preparation Tips

Starting with high-quality chicken thighs can significantly enhance the final dish. Boneless and skinless options work best for frying, ensuring they cook evenly.

Don’t rush the marinating process; allowing the chicken to soak in the flavors for at least 30 minutes will yield the best results. Patience here leads to a more flavorful outcome.

Cooking Techniques

When frying, maintaining the right oil temperature is crucial. Too hot, and the exterior will burn before the inside cooks; too cool, and the chicken can become greasy. Aim for around 350°F (175°C) for perfect frying.

Frying in batches prevents overcrowding, ensuring each piece gets the attention it deserves for that perfect golden-brown color. Drain the fried chicken on paper towels to remove excess oil before serving.

The Ultimate Kanto Fried Chicken Recipe

Crispy Kanto-style fried chicken served on a red plate with parsley and dipping sauce.

This Kanto-style fried chicken is a delightful fusion of textures and flavors. The chicken is marinated in a blend of soy sauce, sake, and garlic, then coated with a crispy batter for an irresistible crunch. Each bite reveals not only a satisfying crunch but also a burst of savory umami that leaves you wanting more.

Ingredients

  • 2 lbs chicken thighs, boneless and skinless
  • 1/4 cup soy sauce
  • 2 tablespoons sake
  • 2 cloves garlic, minced
  • 1 teaspoon ginger, grated
  • 1 cup all-purpose flour
  • 1/2 cup cornstarch
  • 1 teaspoon baking powder
  • Salt and pepper to taste
  • Vegetable oil for frying

Instructions

  1. Marinate the Chicken: In a bowl, combine soy sauce, sake, garlic, and ginger. Add chicken thighs and let marinate for at least 30 minutes.
  2. Prepare the Coating: In another bowl, mix flour, cornstarch, baking powder, salt, and pepper.
  3. Coat the Chicken: Remove chicken from the marinade and let excess drip off. Dredge each piece in the flour mixture, ensuring it’s well-coated.
  4. Heat the Oil: In a deep pan, heat vegetable oil over medium-high heat until hot (about 350°F or 175°C).
  5. Fry the Chicken: Carefully add the chicken pieces to the hot oil in batches. Fry until golden brown and cooked through, about 5-7 minutes. Remove and drain on paper towels.
  6. Serve: Enjoy hot with your favorite dipping sauce or alongside rice and vegetables.

Cook and Prep Times

  • Prep Time: 10 minutes
  • Marinating Time: 30 minutes
  • Cook Time: 20 minutes
  • Total Time: 1 hour

Nutrition Information

  • Servings: 4 servings
  • Calories: 400kcal
  • Fat: 22g
  • Protein: 30g
  • Carbohydrates: 20g

Delicious Ginataang Mackerel Sardines Recipe

Looking for a seafood dish that is both comforting and full of flavor? This Ginataang Mackerel Sardines recipe is just what you need. With its rich coconut milk base and tender mackerel, it’s a delightful combination that brings a taste of the Philippines right to your table.

Picture this: succulent mackerel swimming in a creamy coconut sauce, infused with spices that dance on your palate. This dish not only warms you up but also satisfies your cravings for something unique and delicious. Plus, it’s simple enough to whip up any night of the week!

Authentic Filipino Ginataang Mackerel Sardines

Ginataang Mackerel Sardines offers a comforting embrace of flavors that exemplifies Filipino cuisine. This dish features tender pieces of mackerel simmered in a rich, creamy coconut milk sauce, creating a delightful combination of textures and tastes.

The coconut milk serves as the perfect complement to the savory mackerel, elevating the natural flavors of the fish while adding depth and richness. Spices and aromatics contribute an inviting fragrance that beckons you to indulge in every bite.

Simple Ingredients for a Wholesome Meal

The beauty of Ginataang Mackerel Sardines lies in its simplicity. A few key ingredients come together to create a meal that is both nutritious and satisfying. Mackerel sardines, canned and convenient, are combined with coconut milk, garlic, onions, and chili peppers to bring forth the essence of traditional Filipino cooking.

The use of fresh garnishes, such as green onions or cilantro, adds a pop of color, enhancing both the presentation and flavor. It’s an ideal dish for those seeking a quick yet wholesome meal, perfect for any night of the week.

Aromatic Preparation Steps

Preparing Ginataang Mackerel Sardines is a straightforward process. It begins with sautéing sliced onions and minced garlic until they release their aromatic essence, setting the tone for the dish.

Next, the canned mackerel is added to the pot, followed by the creamy coconut milk and sliced green chili peppers. This mixture is gently stirred, allowing the flavors to meld together in a harmonious blend.

Seasoning for Flavor Balance

The finishing touch comes with seasoning. A dash of fish sauce, salt, and pepper helps to enhance the overall flavor profile, ensuring that the dish is well-balanced and rich in taste.

Allow the mixture to simmer, letting the ingredients infuse their flavors into one another. This process transforms simple components into a comforting bowl of warmth, perfect for sharing with family or friends.

Perfect Pairing with Steamed Rice

To complete the meal, serve Ginataang Mackerel Sardines alongside a steaming bowl of rice. This combination not only makes for a hearty meal but also enhances the experience, as the rice absorbs the luscious coconut sauce.

Each spoonful promises a delightful burst of flavor, making it a dish that is both satisfying and nourishing. Whether it’s for a family gathering or a cozy dinner at home, this dish is sure to please everyone at the table.

Nutrition and Serving Suggestions

This comforting dish serves four and is relatively low in calories, making it a healthy option for seafood lovers. Each serving provides a good balance of protein and healthy fats, ensuring a wholesome meal.

Whether you’re serving it for lunch or dinner, Ginataang Mackerel Sardines offers a unique taste of the Philippines that is both satisfying and comforting. Enjoy it with loved ones and make memories over this delicious homemade meal.

Authentic Filipino Ginataang Mackerel Sardines

A bowl of Ginataang Mackerel Sardines in coconut milk, garnished with green onions, served with rice.

This Ginataang Mackerel Sardines is a creamy and savory dish made with mackerel fish simmered in coconut milk, combined with aromatic spices and vegetables. The taste is a beautiful balance of rich coconut creaminess and the natural flavor of the mackerel, making each bite a delightful experience.

Ingredients

  • 2 cans of mackerel sardines in tomato sauce
  • 1 cup coconut milk
  • 1 onion, sliced
  • 3 cloves garlic, minced
  • 1-2 green chili peppers, sliced
  • 1 tablespoon fish sauce
  • Salt and pepper to taste
  • Chopped green onions or cilantro for garnish

Instructions

  1. Sauté Aromatics: In a pot, heat a little oil over medium heat. Add the sliced onion and minced garlic, sauté until fragrant.
  2. Add Mackerel: Pour in the canned mackerel sardines with the tomato sauce and gently stir to combine.
  3. Incorporate Coconut Milk: Add the coconut milk and green chili peppers. Stir well to mix everything together.
  4. Season: Add fish sauce, salt, and pepper to taste. Allow the mixture to simmer for about 10-15 minutes, letting the flavors meld.
  5. Serve: Garnish with chopped green onions or cilantro and serve hot with steamed rice.

Cook and Prep Times

  • Prep Time: 5 minutes
  • Cook Time: 20 minutes
  • Total Time: 25 minutes

Nutrition Information

  • Servings: 4 servings
  • Calories: 280kcal
  • Fat: 20g
  • Protein: 18g
  • Carbohydrates: 6g

Creamy Garlic Mushroom Chicken Recipe

If you’re searching for a comforting dish that seamlessly combines tender chicken, earthy mushrooms, and a rich, creamy sauce, look no further. This creamy garlic mushroom chicken is a delightful choice for a family dinner or a special occasion. The best part? It’s simple enough to whip up on a weeknight yet impressive enough to serve guests.

This recipe will have you savoring every bite. The sauce is packed with flavor, thanks to garlic and herbs, making each mouthful a delicious experience. Plus, the combination of garlic and mushrooms creates a savory medley that pairs perfectly with the chicken.

Delicious Creamy Garlic Mushroom Chicken

This creamy garlic mushroom chicken showcases succulent chicken breasts elevated by a rich and flavorful mushroom sauce. The combination of tender chicken and the earthy taste of mushrooms creates a mouthwatering dish that’s both comforting and sophisticated.

The luscious sauce, infused with garlic and herbs, brings a depth of flavor that transforms a simple meal into a culinary delight. Each bite offers a delightful medley of tastes, making it perfect for family dinners or special occasions.

Ingredients That Shine

The beauty of this dish lies in its straightforward yet high-quality ingredients. You’ll need boneless, skinless chicken breasts for tenderness, along with fresh mushrooms that add an earthy note. Garlic plays a pivotal role, imparting a warm aroma that enhances the overall experience.

A rich combination of heavy cream and chicken broth creates the sauce’s creamy texture, while dried thyme adds a subtle herbal flavor. Fresh parsley serves as a lovely garnish, bringing a pop of color and freshness to the plate.

Cooking Method: Step by Step

Start by pan-searing the chicken in olive oil until golden brown. This step is crucial for developing flavor and ensuring a juicy texture. Once cooked, set the chicken aside and turn your attention to the mushrooms.

In the same skillet, sauté the sliced mushrooms until browned, then introduce minced garlic. This sequence allows the flavors to meld beautifully. Next, deglaze the pan with chicken broth, scraping up any delicious bits stuck to the bottom.

The Creamy Sauce Transformation

Add heavy cream and dried thyme to the skillet, allowing the mixture to simmer until it thickens slightly. This step is where the magic happens—transforming simple ingredients into a rich, velvety sauce that envelops the chicken.

Once the sauce reaches the desired consistency, return the chicken to the pan, ensuring each piece is generously coated. A brief cooking time will allow the chicken to absorb the flavors of the sauce.

A Beautiful Presentation

To serve, plate the creamy garlic mushroom chicken with a sprinkle of fresh parsley on top for a burst of color. This dish pairs wonderfully with sides like steamed vegetables or rice, making for a balanced meal.

Imagine enjoying this dish at a beautifully set table, complete with a glass of white wine. The rustic wooden table adds a warm touch, creating an inviting dining experience that is sure to impress your guests.

Nutritional Information

This creamy garlic mushroom chicken offers a satisfying meal with approximately 450 calories per serving. It’s packed with 32 grams of protein and 30 grams of fat, along with just 8 grams of carbohydrates, making it a well-rounded choice for a hearty dinner.

This dish not only fills the stomach but also warms the heart, making it a beloved recipe for any occasion. Whether it’s a family gathering or a romantic dinner, it’s sure to leave a lasting impression.

Delicious Creamy Garlic Mushroom Chicken

Creamy garlic mushroom chicken with mushroom sauce, garnished with parsley, served with vegetables on a rustic table.

This creamy garlic mushroom chicken features juicy, pan-seared chicken breasts coated in a luscious garlic and mushroom sauce. The sauce is creamy and rich, with a hint of garlic that elevates the dish to new heights, making it utterly irresistible.

Ingredients

  • 4 boneless, skinless chicken breasts
  • 2 tablespoons olive oil
  • 8 ounces mushrooms, sliced
  • 4 cloves garlic, minced
  • 1 cup heavy cream
  • 1/2 cup chicken broth
  • 1/2 teaspoon dried thyme
  • Salt and pepper to taste
  • Fresh parsley for garnish

Instructions

  1. Cook the Chicken: In a large skillet, heat olive oil over medium heat. Season chicken breasts with salt and pepper, then add to the skillet. Cook for 6-7 minutes on each side or until golden brown and cooked through. Remove from the skillet and set aside.
  2. Sauté the Mushrooms: In the same skillet, add sliced mushrooms and cook until browned, about 5 minutes. Add minced garlic and sauté for an additional minute until fragrant.
  3. Make the Sauce: Pour in the chicken broth and scrape up any browned bits from the bottom of the skillet. Stir in the heavy cream and thyme, and let simmer for 5 minutes until slightly thickened.
  4. Combine: Return the chicken to the skillet, coating it with the sauce. Cook for an additional 2-3 minutes until heated through.
  5. Serve: Garnish with fresh parsley and serve hot with your choice of sides, such as rice or vegetables.

Cook and Prep Times

  • Prep Time: 10 minutes
  • Cook Time: 25 minutes
  • Total Time: 35 minutes

Nutrition Information

  • Servings: 4 servings
  • Calories: 450kcal
  • Fat: 30g
  • Protein: 32g
  • Carbohydrates: 8g

Delicious Tokwa Sisig Recipe

Tokwa Sisig is a delightful twist on the traditional Filipino sisig, substituting crispy tofu for pork, making it a perfect dish for vegetarians or those looking to enjoy a lighter meal. This dish combines the crunchiness of fried tofu with a medley of flavors that will tantalize your taste buds.

Imagine biting into a generous serving of this savory dish, bursting with umami flavors from soy sauce and calamansi, paired beautifully with the warmth of onions and chili. It’s not just a meal – it’s a celebration of textures and tastes that evoke the essence of Filipino cuisine.

A Flavorful Take on Filipino Sisig

Tokwa Sisig offers a delightful twist on the classic Filipino dish. By replacing traditional pork with crispy tofu, it caters to vegetarians and those seeking lighter meal options.

The golden fried tofu cubes bring a satisfying crunch, soaking up the zesty sauce that elevates the dish. Each mouthful bursts with umami flavors, enhanced by the warmth of sautéed onions and the spicy kick from bird’s eye chilies.

Texture and Taste Harmony

This dish showcases a beautiful balance of textures and flavors. The crispy tofu contrasts wonderfully with the tender onions and crunchy chilies, creating a symphony of sensations in every bite.

The incorporation of soy sauce and calamansi juice adds a tangy depth, making Tokwa Sisig not just a meal, but a celebration of Filipino culinary heritage. It’s a popular choice for family gatherings, potlucks, or any occasion where a crowd-pleasing dish is needed.

Ingredients That Shine

At the heart of Tokwa Sisig is firm tofu, which is pressed and cubed for optimal texture. The frying process transforms these cubes into golden morsels that are incredibly satisfying.

Other key ingredients include finely chopped onions and vibrant bird’s eye chilies. These aromatics infuse the dish with fragrance and heat, while soy sauce and calamansi juice harmonize the flavors beautifully.

Cooking Process

The cooking method is straightforward, making this dish accessible even for novice cooks. Start by frying the pressed tofu until golden and crispy, then sauté the onions and chilies until fragrant.

Mix everything together in the same pan, allowing the tofu to absorb the rich flavors of the sauce. This simple technique ensures that each bite is bursting with flavor.

Perfect Serving Suggestions

Tokwa Sisig shines when served hot, garnished with fresh green onions for a touch of color and flavor. Pair it with steamed rice for a complete meal, and consider serving it alongside a small bowl of soy sauce for those who enjoy an extra dip.

The rustic presentation on a wooden table adds to the inviting aspect of the dish, making it perfect for sharing with family and friends. Whether it’s for a casual dinner or a festive gathering, this dish is sure to impress.

Nutritional Insights

This flavorful dish is not only satisfying but also relatively light, with around 180 calories per serving. It provides a balanced mix of protein from the tofu and healthy fats, making it a nutritious choice.

With its low carbohydrate content, the Tokwa Sisig can fit well into various dietary plans, allowing everyone to indulge in its delightful flavors without guilt.

A Flavorful Take on Filipino Sisig

A plate of Tokwa Sisig with crispy tofu, onions, and chilies, served with rice.

This Tokwa Sisig is both crispy and savory, featuring golden fried tofu that perfectly absorbs the zesty sauce. Each bite is a delightful combination of textures and flavors, making it a popular choice for any meal or gathering.

Ingredients

  • 400g firm tofu, pressed and cubed
  • 1 medium onion, finely chopped
  • 2-3 bird’s eye chilies, chopped (adjust to taste)
  • 3 tablespoons soy sauce
  • 3 tablespoons calamansi juice (or lemon juice)
  • 1 tablespoon mayonnaise (optional)
  • Salt and pepper to taste
  • Vegetable oil for frying
  • Chopped green onions for garnish

Instructions

  1. Prepare the Tofu: Press the tofu to remove excess moisture, then cut it into cubes.
  2. Fry the Tofu: In a pan, heat vegetable oil over medium-high heat. Fry the tofu cubes until golden brown and crispy on all sides. Remove and drain on paper towels.
  3. Sauté Aromatics: In the same pan, sauté the chopped onion and chilies until fragrant.
  4. Combine Ingredients: Add the fried tofu back to the pan. Pour in the soy sauce and calamansi juice, mixing well. Adjust seasoning with salt and pepper, and stir in mayonnaise if using.
  5. Serve: Transfer the Tokwa Sisig to a serving plate and garnish with chopped green onions. Serve hot, preferably with steamed rice.

Cook and Prep Times

  • Prep Time: 15 minutes
  • Cook Time: 20 minutes
  • Total Time: 35 minutes

Nutrition Information

  • Servings: 4
  • Calories: 180kcal
  • Fat: 12g
  • Protein: 10g
  • Carbohydrates: 8g

Comforting Lugaw Dilaw (Filipino Rice Porridge) Recipe

Are you in need of a warm and soothing dish that brings back memories of home? Lugaw Dilaw is a traditional Filipino rice porridge that delivers just that. This dish is not only simple to prepare but also incredibly comforting, making it perfect for those chilly nights or whenever you’re feeling under the weather.

The star of this recipe is the addition of turmeric, giving it that distinct yellow hue and a hint of warm earthiness. Each spoonful is creamy with a slight chew from the rice, and the flavors meld together beautifully, making it a delightful experience for your taste buds.

Comforting Essence of Lugaw Dilaw

This Filipino rice porridge serves as a warm hug on chilly days or a remedy for when you’re feeling under the weather.

With a beautiful yellow hue, the dish brightens up any table and invites you to take a seat and savor its warmth.

The infusion of turmeric not only gives Lugaw Dilaw its signature color but also provides a subtle earthiness that enhances the overall flavor profile.

A Hearty and Nourishing Dish

Lugaw Dilaw is not just a dish; it’s an experience rooted in tradition.

The porridge is made with simple ingredients like rice, chicken, and aromatic spices, making it both nourishing and fulfilling.

Each spoonful promises a creamy texture, often enhanced by a hint of ginger, which warms both the heart and body.

Ingredients that Sing Together

The beauty of this recipe lies in its simplicity.

A handful of ingredients come together to create a delightful dish.

The jasmine rice forms the base, while the spices elevate its flavor, making it comforting yet exciting to eat.

Perfectly Paired Garnishes

No bowl of Lugaw Dilaw is complete without its garnishes.

Chopped green onions add a fresh crunch, while crispy fried garlic introduces a depth of flavor that complements the creamy porridge beautifully.

A slice of lemon or calamansi on the side allows for an optional zesty twist, enhancing the dish’s bright character.

Cooking Methods for a Cozy Meal

Preparing Lugaw Dilaw is a straightforward process, perfect for cooks of all skill levels.

Start by sautéing aromatics until fragrant, then incorporate the chicken if desired.

As the rice cooks, the aromas fill the air, creating an inviting atmosphere that sets the stage for a comforting meal.

Serving Suggestions and Enjoyment

When ready to serve, ladle the steaming hot porridge into bowls and sprinkle with your chosen garnishes.

Pair it with a slice of lemon to squeeze over the top for an extra pop of flavor.

Not only is this dish warm and filling, but it also serves as a reminder of home, making it a beloved classic in many Filipino households.

Delicious and Nourishing Lugaw Dilaw Recipe

A bowl of Lugaw Dilaw with green onions and fried garlic on a wooden table, accompanied by a lemon slice.

This easy Lugaw Dilaw is a hearty, nourishing dish made with rice, chicken, and aromatic spices. It’s thick, creamy, and full of flavor, making it a go-to recipe for a quick meal or a comforting treat.

Ingredients

  • 1 cup jasmine rice, rinsed
  • 6 cups water or chicken broth
  • 1 tablespoon turmeric powder
  • 1 medium onion, chopped
  • 3 cloves garlic, minced
  • 2 tablespoons ginger, minced
  • 1 pound chicken, cut into pieces (optional)
  • Salt to taste
  • Chopped green onions or fried garlic for garnish
  • Lemon or calamansi for serving (optional)

Instructions

  1. Prepare the Ingredients: Rinse the jasmine rice under cold water until the water runs clear.
  2. Sauté Aromatics: In a large pot, heat a bit of oil over medium heat. Add the chopped onion, garlic, and ginger, and sauté until fragrant.
  3. Cook the Chicken: If using chicken, add it to the pot and cook until lightly browned. Pour in the water or chicken broth, and bring to a boil.
  4. Add Rice and Turmeric: Stir in the rinsed rice and turmeric powder. Reduce the heat to low, cover, and simmer for about 30-40 minutes, stirring occasionally, until the rice is soft and the porridge has thickened.
  5. Season: Add salt to taste and adjust the consistency with more water or broth if needed.
  6. Serve: Ladle the lugaw into bowls and top with chopped green onions or fried garlic. Serve with lemon or calamansi on the side for a zesty touch.

Cook and Prep Times

  • Prep Time: 10 minutes
  • Cook Time: 40 minutes
  • Total Time: 50 minutes

Nutrition Information

  • Servings: 6 bowls
  • Calories: 180kcal
  • Fat: 4g
  • Protein: 8g
  • Carbohydrates: 28g

Korean Garlic Cheese Bread (Filipino Style) Recipe

Introduction to Korean Garlic Cheese Bread

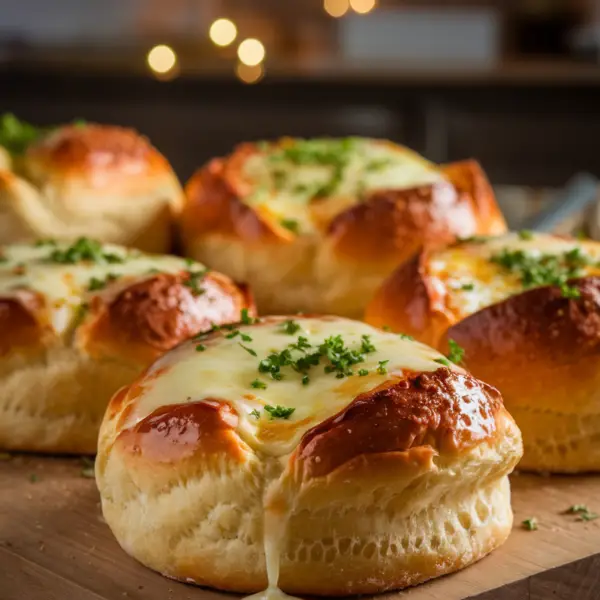
Korean Garlic Cheese Bread, often referred to as “Korean cheese bread,” has gained substantial popularity in the Philippines, becoming a delightful treat cherished by many. Its origins trace back to South Korea, where it enjoyed a favorable reception as a street food item. The dish typically comprises a soft, fluffy bread filled with a rich, flavorful garlic butter and gooey cheese, encapsulating a perfect balance of savory and sweet flavors that appeal to a wide audience. As Korean culture has flourished globally, so too has this unique culinary creation, evolving with local adaptations that cater to the Filipino palate.

The growing fascination with Korean cuisine in the Philippines can be attributed to the wider K-drama and K-pop trends that have captivated audiences. These influences have led to an increased curiosity about Korean dishes, with the Korean Garlic Cheese Bread standing out due to its unique combination of textures and tastes. The bread’s flaky crust alongside a buttery, fragrant garlic infusion provides an enticing experience that is hard to resist. Additionally, the melted cheese adds a creamy layer that complements the bread’s spongy interior, making each bite a harmonious blend of flavor.

Culturally, Korean Garlic Cheese Bread serves as a bridge between Korean and Filipino food traditions. In the Philippines, bread products hold a special place in everyday meals and celebrations, and the introduction of this Korean twist emphasizes the evolving nature of culinary practices within various cultures. The dish’s accessibility and flavorful profile undoubtedly contribute to its sustained appeal, illustrating how food can foster cross-cultural connections while also showcasing each culture’s unique identity. As both nations continue to engage in culinary exchange, Korean Garlic Cheese Bread will likely remain a beloved staple for years to come.

Ingredients You Will Need

To prepare Korean Garlic Cheese Bread in Filipino style, a variety of fresh ingredients are essential to achieve the desired flavor and texture. Here is a detailed list of the key components needed for this delectable recipe.

1. Bread Rolls: The base of this dish is soft, fluffy bread rolls. Ideally, using Filipino pandesal is recommended due to its light and airy texture. Alternatively, you can use any soft, sweet bread rolls available at your local bakery. Look for options with a slightly crusty exterior and a warm, soft inside.

2. Garlic: Fresh garlic is vital for imparting the rich aromatic flavor that makes this recipe stand out. About 4-6 cloves, minced finely, should suffice. If fresh garlic is not accessible, garlic powder can be a substitute, but use it sparingly. Filipino markets often sell locally grown garlic, which tends to be more pungent and flavorful.

3. Butter: Unsalted butter is preferred for this recipe to control the salt levels. It provides moisture and richness that complements the garlic flavor. If vegan options are necessary, substitute with coconut oil or a plant-based butter available in local stores.

4. Cheese: For the cheesy filling, a blend of mozzarella and cheddar cheese is suggested. Mozzarella provides the stretchiness while cheddar enhances the flavor. Local cheeses such as quick-melt cheese can also be used as a budget-friendly option without compromising taste.

5. Parsley: Fresh parsley is used for garnishing and adding a hint of freshness. If fresh parsley is difficult to find, dried parsley can be used in a pinch, but the flavor will vary slightly.

Each of these ingredients plays a crucial role in creating Korean Garlic Cheese Bread, Filipino style. Providing diverse substitutes ensures that the recipe can be adapted to meet specific preferences and ingredient availability.

Preparation Equipment

To create the delicious Korean Garlic Cheese Bread in a Filipino style, having the right kitchen equipment is essential for achieving optimal results. Firstly, a sturdy mixing bowl is fundamental for combining ingredients such as flour, sugar, and yeast. It is advisable to use a large bowl to allow enough space for kneading and mixing, ensuring the consistency of the dough is smooth and uniform.

A reliable measuring set (including cups and spoons) is crucial for measuring ingredients accurately. Precision in measuring flour, butter, and garlic ensures the flavor profile and texture of the bread align perfectly with the recipe. For kneading the dough, a clean, flat surface or a silicone baking mat is highly beneficial, providing a non-stick area to work on.

In addition to standard tools, a stand mixer or a hand mixer may be advantageous for efficiently mixing the dough, especially when incorporating sticky ingredients. A dough scraper can also assist in managing the sticky mixture and is helpful for portioning dough into equal pieces. Furthermore, a baking sheet lined with parchment paper is recommended for easy transfer of the shaped dough and to prevent it from sticking during the baking process.

Other items that may enhance your baking experience are a food processor for quickly mincing garlic and a rolling pin for shaping the bread. It is also important to use an oven thermometer to ensure your oven is at the right temperature for baking, as this directly impacts the bread’s rise and texture.

When using these kitchen tools, proper maintenance and safety precautions are essential. Regularly inspect your measuring cups and spoons for any wear and ensure surfaces are kept clean to avoid cross-contamination. Always handle sharp tools with care, and store your equipment in a designated area to prolong its lifespan. With the right preparation equipment, making Korean Garlic Cheese Bread can be a rewarding and enjoyable experience.

Step-by-Step Recipe Instructions

To create Korean Garlic Cheese Bread with a Filipino twist, one must follow a carefully constructed process that merges technique and flavor. Below are the detailed steps to guide you through this culinary journey.

Step 1: Prepare the Dough
Begin by combining 2 cups of all-purpose flour, 1 tablespoon of sugar, 1 teaspoon of salt, and 1 packet of instant yeast in a large mixing bowl. Mix these dry ingredients thoroughly. In a separate bowl, warm ¾ cup of milk and melt 3 tablespoons of unsalted butter. Gradually add the milk mixture to the dry ingredients, stirring until it forms a dough. Knead the dough on a floured surface for about 10 minutes until smooth and elastic.

Step 2: First Rise
Once kneaded, place the dough in a greased bowl, cover it with a clean cloth, and let it rise in a warm place for approximately 1 hour, or until it doubles in size. This fermentation process is critical, as it enhances the flavor and texture of the bread.

Step 3: Prepare the Garlic Cheese Filling
While the dough is rising, prepare the garlic cheese filling. In a bowl, mix ½ cup of softened cream cheese, 1 cup of grated cheese (preferably a combination of cheddar and mozzarella), 4 cloves of minced garlic, and 2 tablespoons of finely chopped parsley. This mixture should be creamy and fragrant, characteristic of traditional Filipino flavors.

Step 4: Forming the Bread
After the dough has risen, punch it down and divide it into small balls, about the size of a golf ball. Flatten each ball and place a generous spoonful of the garlic cheese filling in the center. Fold the sides over the filling and shape it into a round bun. Ensure that the filling is enclosed to prevent it from leaking during baking.

Step 5: Second Rise
Arrange the formed buns on a lined baking tray, cover them again, and let them rise for another 30 minutes. This step is essential for achieving a light and airy texture.

Step 6: Baking
Preheat the oven to 350°F (175°C). Once the buns have completed their second rise, bake them for 15-20 minutes, or until they attain a golden brown color. The aroma of garlic and cheese will fill your kitchen, signaling that they are almost ready.

Step 7: Serve
Once baked, allow the buns to cool slightly before serving. Enjoy your Korean Garlic Cheese Bread, garnished with additional parsley if desired. This Filipino-inspired version is sure to delight those who appreciate savory and cheesy breads.

Tips for the Perfect Garlic Cheese Bread

Achieving the ideal Korean Garlic Cheese Bread requires attention to detail in various stages of preparation, from dough handling to baking techniques. The first step to perfecting this recipe is in the kneading process. It is vital to knead the dough for an adequate duration, typically around 10-15 minutes, ensuring that it becomes smooth and elastic. This elasticity enables the dough to rise properly and achieve the desired fluffy texture.

Proofing is another critical aspect that can greatly affect the final product. After kneading, allow the dough to rest in a warm, draft-free area until it doubles in size, which generally takes about an hour. This process enhances the bread’s flavor and contributes to its airy consistency. For optimal results, consider using a damp cloth to cover the dough during proofing, preventing it from drying out.

When it comes to flavor, the quality of the garlic and cheese plays a crucial role. Fresh garlic, minced finely, imparts a robust taste that complements the bread perfectly. Avoid using garlic powder, as it may not provide the same flavor depth. Pairing this with high-quality cheese, such as mozzarella or cream cheese, will not only enhance the dish’s richness but also create that desirable gooey texture you seek in Korean Garlic Cheese Bread. Ensure the cheese is at room temperature before incorporating it into the dough to facilitate even melting during baking.

Finally, for an appealing presentation, consider brushing the top of the bread with a garlic butter mixture before baking. This not only adds flavor but creates a golden brown crust that is visually enticing. Optionally, garnish with chopped parsley or chili flakes to provide a pop of color and enhance the culinary experience. Following these expert tips will ensure that your Korean Garlic Cheese Bread is consistently delicious and visually appealing.

Serving Suggestions and Variations

Korean Garlic Cheese Bread is a delightful treat that can be enjoyed in various ways, making it a versatile addition to any dining experience. This appetizing bread is not only suitable as a satisfying snack but can also serve as a dessert or star in a more substantial meal. Its rich garlic and cheese flavor profile pairs well with an array of beverages, such as iced tea, coffee, or even a refreshing fruit shake, providing a complementary experience that enhances the dish’s appeal.

When serving Korean Garlic Cheese Bread, consider adding a side of fresh salad or sautéed vegetables to balance its richness. For a unique twist, integrating traditional Filipino elements can deepen the flavor experience. For instance, pairing the bread with a spicy vinegar dip, like sawsawan, can offer a contrasting tanginess that accentuates the flavors of the garlic and cheese. Additionally, serving it alongside a hearty dish, such as spaghetti or adobo, can transform it into a delightful accompaniment that enriches the overall meal.

Exploration of variations can further enhance this culinary delight, catering specifically to Filipino tastes. Different types of cheese, such as kesong puti or cheddar, can be used to alter the flavor profile while retaining its cheesy essence. Likewise, incorporating ingredients like diced bell peppers or jalapeños can add a delightful kick to each bite. Another creative option is to spread a layer of ube halaya on the bread before applying the garlic and cheese mixture, resulting in a visually appealing and serendipitous flavor combination that resonates well with Filipino preferences.

Ultimately, Korean Garlic Cheese Bread is not just a single recipe but a canvas for creativity. By incorporating these various serving suggestions and thoughtful variations, it can flourish as a beloved staple, adaptable to any occasion and suitable for diverse palates.

Storage and Reheating Tips

Korean Garlic Cheese Bread, a delightful fusion of flavors, is best enjoyed fresh. However, should you have leftovers, proper storage methods can help maintain its quality and taste. Ideally, it is recommended to store the bread in an airtight container to prevent it from becoming stale. For short-term storage, the bread can be placed in the refrigerator, where it typically remains fresh for up to three days. Ensure that the container is sealed tightly to protect the bread from moisture and odors.

If you plan to keep the Korean Garlic Cheese Bread for a more extended period, freezing is an effective option. Wrap the bread in plastic wrap or aluminum foil, and then place it in a freezer-safe bag. This double-wrapping method offers a protective barrier against freezer burn, allowing the bread to be stored for up to three months without significant quality loss. It is advisable to label the packaging with the date to ensure you consume it within the recommended timeframe.

When it comes to reheating, the best method to restore the bread’s original texture and flavor is by using an oven or toaster oven. Preheat the oven to 350°F (175°C) and reheat the bread for about 10-15 minutes. This method helps maintain its crispy exterior and gooey cheese filling while preventing it from drying out. Alternatively, you can microwave the bread for about 20-30 seconds, but be cautious as this may result in a chewier texture. Always check for signs of spoilage before consumption, such as an off smell or unusual color, to ensure food safety. Proper storage and reheating techniques can significantly enhance your experience of this delicious treat.

Cultural Context and Popularity in the Philippines

Korean Garlic Cheese Bread has seen a notable surge in popularity in the Philippines, particularly among the younger generation. This rise can be attributed to the increasing interest in Korean culture, largely fueled by the Korean Wave (Hallyu), which encompasses K-pop, K-dramas, and Korean cuisine. The infusion of this delectable bread into the local food scene represents a fascinating blend of culinary traditions, where Filipino flavors harmoniously intersect with Korean influences.

The allure of Korean Garlic Cheese Bread lies in its unique combination of ingredients: a soft, fluffy bread filled with a rich garlic butter spread and a gooey cheese centre. This fusion of flavors resonates well with the Filipino palate, which is known for appreciating savory and cheesy snacks. The bread’s texture and taste have made it a highly sought-after treat, particularly in local bakeries. Many bakers have customized their recipes to incorporate local ingredients, making it a versatile option that appeals to a wider audience.

Moreover, the social significance of Korean Garlic Cheese Bread cannot be understated. It has become a popular treat during gatherings, celebrations, and even casual meet-ups among friends and family. The act of sharing this delightful snack often strengthens social bonds, making it more than just a food item; it embodies a shared experience. Social media further amplifies its appeal, with many posts showcasing beautifully toasted pieces, leading to an engaging community focused on food discovery.

The growing trend of Korean Garlic Cheese Bread in the Philippines is a testament to the country’s openness to culinary experimentation. As Filipino adaptations emerge and flavors are personalized, this flavorful bread is likely to secure a lasting spot in the hearts and taste buds of many Filipinos. Its cultural impact illustrates a broader narrative of globalization within the food industry, where traditional boundaries are continually being redefined.

Conclusion and Final Thoughts

In summary, making Korean Garlic Cheese Bread (Filipino Style) at home offers a delightful culinary experience that combines the creamy richness of cheese with the aromatic flavors of garlic, resulting in a truly memorable dish. Throughout this recipe, we explored the carefully selected ingredients, which include fluffy bread, melty cheese, and a savory garlic butter spread. The preparation steps highlighted the importance of allowing the bread to rise properly and achieving a golden-brown finish, ensuring an inviting texture and taste.

The unique twist of infusing Filipino flavors into a popular Korean treat showcases the versatility of this dish. Each step in the recipe brings you closer to a warm, comforting loaf that is perfect for sharing during family gatherings or casual brunches. I personally recall preparing this recipe during a festive occasion with friends; the aroma wafting through the kitchen ignited excitement and anticipation. Watching everyone gather around the table, I realized that this dish is more than just a scrumptious treat; it is a medium for connection and joy.

I encourage each of you to try your hand at making Korean Garlic Cheese Bread in your own kitchens. Embrace the process, experiment with variations, and personalize the recipe to suit your tastes. Whether you choose to add spices, explore different types of cheese, or even incorporate local ingredients, your culinary creativity will undoubtedly yield a delicious result.

As you embark on this culinary journey, I invite you to share your experiences, feedback, or any variations you create. Join the community of food lovers who appreciate the harmony of flavors and the happiness that comes from homemade delights. Your contributions can inspire others to try this inviting and flavorful bread.