Author Archives: mytourguide.ph

About mytourguide.ph

Author

Best Budget Travel Phones 2025: Top Picks Under ₱10,000 from Compsia PH

Introduction: The Importance of Choosing the Right Travel Phone

When it comes to embarking on travels, the selection of an appropriate mobile device becomes a pivotal aspect, especially for budget-conscious travelers. A travel phone serves not only as a communication tool but also as a navigation device, a camera for capturing memories, and a reliable means to stay connected with family and friends. Thus, recognizing the essential features that make a phone suitable for travel can significantly enhance the overall travel experience.

One of the foremost considerations is durability. Travelers often find themselves in varied environments, from bustling city streets to remote natural landscapes. A phone that can withstand the rigors of travel, including drops and water exposure, is invaluable. Options that boast rugged designs or are equipped with protective cases can lend peace of mind when exploring unfamiliar territories.

Battery life stands out as another critical feature. Extended periods away from power sources necessitate a phone with a battery that can endure throughout the day, especially during long excursions or day trips. Selecting a device with efficient power management capabilities ensures that the phone remains operational when most needed, preventing disruptions during important moments of travel.

The quality of the camera is equally vital for those who cherish documenting their adventures. A phone that offers superior camera capabilities can make a significant difference in capturing stunning landscapes, significant moments, and vibrant local cultures. Furthermore, robust connectivity options, including reliable internet access and compatibility with various networks, empower travelers to share their experiences in real-time.

In conclusion, prioritizing these features when selecting travel phones, especially within a budget of ₱10,000, ensures that travelers are well-equipped to navigate their adventures while maximizing value. A thoughtful approach to choosing the right device not only enhances convenience but also enriches the travel experience.

Key Features to Consider When Buying a Travel Phone

When selecting a budget travel phone, several essential features should be carefully evaluated to ensure a seamless travel experience. Battery life is perhaps the most critical consideration. A phone that can last a full day or more on a single charge is indispensable for travelers, especially in situations where charging options may not be readily available. Look for devices that offer at least 4,000mAh battery capacity, as they are more likely to meet the demands of a full day of navigation, communication, and photography.

Another vital factor is storage capacity. A phone with expandable storage options is ideal for travelers who need to store numerous photos and videos without purchasing cloud storage. Models that support microSD cards will save users from worrying about filling up the internal storage quickly during their adventures. Aim for a phone with a minimum of 64GB of internal storage to have ample room for all your travel essentials.

Durability also plays a significant role, especially for those who lead an active lifestyle. Look for devices with water and dust resistance ratings, such as IP67 or IP68. These features can provide peace of mind when encountering adverse weather or rugged terrain. Furthermore, the camera capabilities of the phone can greatly enhance the travel experience; consider models with good low-light performance and multiple lenses for versatile photography. Travelers will appreciate devices that allow for high-quality photos without requiring an additional camera.

Lastly, ensuring compatibility with various networks is essential for staying connected abroad. Researching whether a phone supports multiple bands, especially in the regions you plan to visit, can minimize connectivity issues. By focusing on these key features—battery life, storage capacity, durability, camera capabilities, and network compatibility—travelers can confidently select a budget phone that meets their unique needs.

Why CompAsia PH is the Best Choice for Travelers

CompAsia isn’t your ordinary refurbished phone seller. It’s a trusted Southeast Asian brand with a reputation for:

1. Huge Savings Without Compromising Quality

  • Save up to 50% off flagship devices compared to buying brand new.
  • Prices start below ₱10,000, making it budget-friendly for frequent travelers.

2. 32-Step Quality Check Process

Every device undergoes rigorous multi-point testing, including battery health, screen quality, software stability, and water damage inspection.

3. Warranty & Buyer Protection

  • Comes with a free 1-month warranty.
  • Options to extend up to 12 months for extra peace of mind.
  • Returns and replacements are hassle-free.

4. Flexible Payment Options

Traveling soon but tight on budget? CompAsia supports:

  • GCash GGives
  • BillEase Installments
  • MetroBank Credit Plans
  • Up to 0% Interest on selected offers.

5. Nationwide Delivery

Get your phone shipped anywhere in the Philippines—whether you’re in Manila, Cebu, Siargao, Baguio, or off exploring hidden island gems.


Top Travel-Friendly Smartphones Under ₱10,000

Here’s a curated list of the best-performing phones for travelers in 2025:

ModelPriceWhy It’s Great for Travel
Huawei P30 Pro₱8,450Excellent camera for beach shots + long-lasting battery for day trips.
Samsung Galaxy A73 5G₱7,950Fast connectivity with 5G + wide AMOLED display for maps and Netflix.
iPhone XR₱9,500iOS reliability, good low-light photos, perfect for city travel.
Xiaomi Redmi Note 11 Pro₱7,300108MP camera + fast charging—ideal for content creators on the move.
Realme 9 Pro+₱8,999AI-enhanced photography + smooth gaming performance for downtime.

💡 Pro Tip: For travelers, battery life + camera quality are your top priorities.


Tips for Choosing the Right Travel Phone

1. Prioritize Battery Life

When you’re on the road, charging ports aren’t always nearby. Aim for 4,000mAh+ batteries.

2. Check Camera Versatility

For travelers, wide-angle + night photography matter most. Pick phones with triple-lens setups.

3. Ensure 5G or Strong LTE Support

Reliable connectivity keeps you on track when navigating unknown streets or using translation apps.

4. Pick the Right Device Grade (Important for CompAsia Buyers)

CompAsia categorizes phones into:

  • Like New → Perfect, barely used condition.
  • Excellent → Minor scratches, no major issues.
  • Good → Light wear, fully functional.
  • Fair → Visible wear, budget-friendly.

For travelers, aim for Like New or Excellent to avoid unexpected issues abroad


Why These Phones Are Perfect for Travel

  • Compact & Lightweight: Fits perfectly in sling bags or pockets.
  • Great Cameras: Capture breathtaking shots of sunsets, beaches, and food.
  • Durability: With CompAsia’s quality checks, your phone can handle rugged adventures.
  • Affordable: Keep your flagship at home and bring a travel-friendly backup device.


How to Maximize Savings with CompAsia

  1. Watch for Flash Sales
    CompAsia often runs exclusive time-limited discounts on popular models.
  2. Use Installment Plans
    Split payments via GCash GGives or BillEase.
  3. Sign Up for the Newsletter
    Get first dibs on price drops, seasonal promos, and limited-stock offers.

Conclusion

Traveling shouldn’t drain your wallet. With CompAsia Philippines, you can score top-quality smartphones under ₱10,000—perfect for exploring, capturing, and staying connected.

Don’t wait—hot deals sell out fast!

👉 Browse CompAsia’s Best Deals Now

Top Budget Travel Phones Under ₱10,000 in 2025

As we step into 2025, the market offers an impressive array of budget travel phones, particularly those priced under ₱10,000. These devices are designed to cater to a variety of travel needs, whether you are a digital nomad, a casual traveler, or simply someone who wants to stay connected on a budget. Below, we highlight some of the most outstanding options available this year, along with their features, specifications, and ideal use cases.

One of the notable choices is the Samsung Galaxy A04. With its large 6.5-inch display, it provides a stunning viewing experience for photos and videos. The device boasts a dual-camera setup featuring a 50MP primary camera, ideal for capturing high-quality images on your travels. Its robust battery capacity of 5000mAh ensures that you can browse, take pictures, and navigate without constantly needing a recharge. However, it may fall short in terms of processing speed with its entry-level chipset.

Next on the list is the Xiaomi Redmi 10, which offers exceptional value with its quad-camera system, including an impressive 50MP main lens, catering to photography enthusiasts. The phone also features an expansive 6.7-inch screen, making it suitable for viewing maps or streaming entertainment during long journeys. The notable drawback here is its availability of RAM, which could impact performance under heavy multitasking.

For those valuing long-lasting battery life, the realme C15 stands out with its 6000mAh battery. This model excels in providing prolonged usage, perfect for those traveling to remote areas. On the downside, while it offers decent performance for daily tasks, heavy gaming may not be its strong suit.

In summary, selecting the best budget travel phone under ₱10,000 in 2025 greatly depends on your specific travel needs, be it photography, battery longevity, or processing capabilities. Each of these models brings unique strengths that can significantly enhance your travel experience.

Conclusion: Making the Right Choice for Your Travels

Choosing the right budget travel phone is an essential decision for any traveler in 2025. As discussed throughout the blog post, a budget-friendly phone can offer the necessary features, performance, and durability without putting a strain on your finances. The options highlighted demonstrate that travelers can access reliable devices under ₱10,000 that cater to a variety of needs, whether it’s for navigation, photography, or staying connected with loved ones during their adventures.

When evaluating your travel habits, consider what you value most in a phone. For frequent travelers who rely heavily on navigation apps, a device with a reliable GPS feature and long battery life becomes a priority. If sharing moments on social media is fundamental, prioritizing a phone with a capable camera can dramatically enhance your travel experience. Moreover, the quality of customer service and warranty are other factors to ponder when choosing a phone that can accompany you on your journeys.

As you reflect on your travel preferences, take time to assess which of the budget travel phones fits your requirements. Each phone selection has its strengths, making it crucial for you to align them with your specific travel goals. Optimizing your travel experience involves selecting a device that not only provides functionality but also enhances your enjoyment and minimizes stress during trips.

We encourage readers to share their experiences or additional tips regarding budget travel phones. Engaging with the community can uncover new insights and recommendations that further assist fellow travelers in making informed choices. Whether you’ve recently traveled with a budget phone that exceeded your expectations or encountered challenges worth discussing, your feedback is invaluable to the collective knowledge of budget-conscious travelers.

Solo Travel in the Philippines: Best Destinations for First-Timers

Solo Travel in the Philippines: Best Destinations for First-Timers

Solo Travel in the Philippines: Best Destinations for First-Timers

Why Choose the Philippines for Solo Travel?

The Philippines is an exceptional choice for solo travel, offering a unique blend of stunning landscapes, rich culture, and warm hospitality that is often hard to find in other destinations. With more than 7,000 islands, each boasting its own distinct charm, solo travelers can explore tranquil beaches, vibrant cities, and serene mountain ranges, providing endless opportunities for adventure as well as relaxation. The diverse geography of the Philippines allows for a myriad of activities, from snorkeling in the crystal-clear waters of Palawan to trekking in the lush rice terraces of Banaue.

Safety is a critical consideration for anyone traveling alone, and the Philippines has made substantial progress in ensuring a secure environment for solo adventurers. Many regions are known for their welcoming locals, who often go out of their way to ensure visitors feel at home. The communal lifestyle of the Filipinos fosters a sense of safety, making it easier for solo travelers to connect with others. Additionally, the affordability of travel in the Philippines is a significant factor; budget accommodations, inexpensive local cuisine, and reasonably priced transportation enable solo travelers to experience a wealth of activities while managing their expenses effectively.

Cultural immersion is another remarkable benefit of solo travel in this archipelago. The Philippines has a rich history influenced by various cultures, evident in its festivals, traditional crafts, and culinary delights. Engaging with the local communities can lead to personal growth, as travelers gain insights and create lasting memories through meaningful interactions. The freedom that comes with solo travel allows individuals to navigate their journeys at their own pace, whether by venturing into unexplored territories or taking time for self-reflection amidst natural beauty. Ultimately, exploring the Philippines alone offers a distinct opportunity to grow, learn, and experience the warm embrace of a diverse culture.

Top Destinations for First-Time Solo Travelers

The Philippines, with its stunning landscapes and vibrant culture, stands out as an ideal destination for first-time solo travelers. Among the many islands and regions, three destinations—Palawan, Cebu, and Siargao—emerge as top choices for those embarking on a solo adventure.

Palawan is often dubbed the “last frontier” and is famed for its breathtaking seascapes and abundant marine life. The jewel of this region, El Nido, offers spectacular limestone cliffs and turquoise waters, perfect for island-hopping tours. Solo travelers can explore the lagoons and beaches during the day, and return to the town center in the evening to relish local delicacies, such as fresh seafood and traditional Filipino dishes. Accommodation options range from budget-friendly hostels to upscale resorts, making it accessible for travelers of all preferences.

Cebu is another excellent choice, known for its blend of urban attractions and natural wonders. The vibrant city of Cebu City features historical sites such as Magellan’s Cross and Fort San Pedro, allowing solo travelers to immerse themselves in the local history. Beyond the city, the nearby beaches and waterfalls, such as Kawasan Falls, offer thrilling adventures like canyoneering. Solo travelers can enjoy local food in eateries lining the streets, renowned for its lechon and various local chow. Accommodations vary, ensuring suitability for any type of travelers.

Lastly, Siargao has gained popularity as a surfer’s paradise and a haven for nature lovers. It boasts pristine beaches, palm-fringed coastlines, and the famous Cloud 9 surf break. First-time solo adventurers can partake in surfing lessons, island-hopping, or simply relax in the laid-back atmosphere. The island’s burgeoning food scene serves a range of international and local cuisine, ensuring a delightful culinary experience. With a host of accommodations available, from affordable hostels to luxurious villas, Siargao is well-equipped to cater to solo travelers.

Safety Tips for Solo Travelers in the Philippines

When embarking on a solo journey through the Philippines, safety should be a prime consideration. This beautiful archipelago is known for its warm hospitality, yet like any travel destination, it poses unique challenges that solo travelers should be mindful of. One of the fundamental aspects of staying safe is to remain vigilant and aware of your surroundings. This includes paying attention to the people around you, securing your belongings, and avoiding distractions when in crowded areas. Being cautious can significantly mitigate risks and enhance your travel experience.

Utilizing reputable transportation options is another critical factor in ensuring your safety. It is advisable to use well-known taxi services or rideshare applications to avoid any potential issues with unreliable transport. Always verify that the vehicle you are getting into matches the driver’s details provided by the app or company. Furthermore, planning routes in advance and familiarizing yourself with local transportation systems can provide an extra layer of security.

Avoiding poorly lit or isolated areas, especially at nighttime, is crucial for solo travelers. It is recommended to research neighborhoods before visiting and stick to popular tourist spots where assistance or help is readily available. Engaging with locals can also be beneficial; they often possess valuable insights about safety and can recommend safe neighborhoods or hidden gems worth exploring.

Moreover, having a reliable communication method is essential. Purchase a local SIM card to ensure you remain connected, allowing easy access to maps and essential services. Additionally, consider travel insurance that covers theft or loss of personal belongings, medical emergencies, and other travel-related incidents. Lastly, make copies of important documents, such as your passport and identification, and store them separately from the originals to facilitate quick processes if needed. By adhering to these safety tips, solo travelers can enjoy a memorable and secure experience in the Philippines.

Cultural Etiquette When Traveling Solo in the Philippines

Traveling solo in the Philippines offers an enriching experience, particularly when one respects and adheres to local cultural etiquette. As a first-time visitor, understanding the significance of local traditions is crucial. The Filipino culture is deeply rooted in family values, hospitality, and respect. Engaging with locals by acknowledging and participating in their customs can enhance your journey. A simple smile, a polite greeting, or even joining in local festivities can foster meaningful connections with the community.

Learning some basic Filipino phrases can significantly improve interactions with locals, as it demonstrates genuine interest and effort. Common greetings such as “Magandang araw” meaning “Good day” or “Salamat” for “Thank you” can go a long way. These small gestures often lead to welcoming exchanges and can even result in locals willing to share their stories or provide valuable recommendations for your travels.

Understanding appropriate dress codes is also important, especially when visiting religious sites such as churches or temples. Modesty is highly valued, and wearing clothing that covers shoulders and knees is encouraged. This not only reflects respect for the sacredness of the location but also aligns with local norms, making solo travelers more approachable to residents.

Moreover, it is essential to be mindful of behavior in religious settings. Speaking softly, refraining from taking photos where prohibited, and showing reverence during ceremonies are key points of cultural sensitivity. Additionally, avoiding common tourist behaviors such as loud talking or intrusive questions can help maintain a respectful atmosphere. Engaging authentically and exhibiting humility are vital aspects of integrating into the local community and enjoying an enriching solo travel experience in the Philippines.

You Won’t Believe How Delicious This Humba Recipe Is — Filipino Secret Revealed!

Introduction to Humba: A Culinary Treasure of the Philippines

Humba, a classic dish from the Philippines, stands as a testament to the rich tapestry of Filipino culinary arts. With its roots tracing back to the Visayas region, specifically in Cebu, this delicious dish has gained significant popularity across the archipelago. Humba is often distinguished by its savory-sweet flavor profile, achieved through a harmony of ingredients such as soy sauce, vinegar, sugar, and various spices. This unique combination creates a delicacy that is both satisfying and deeply aromatic.

The term ‘humba’ derives from a Cebuano word meaning “to braise,” which aptly describes its preparation method. Traditionally, it is made with pork, often stewed slowly to ensure tender meat that absorbs the intricate blend of flavors. The dish finds itself celebrated during special occasions, family gatherings, and even daily meals, making it a staple in Filipino households. Beyond its mouthwatering taste, humba’s significance is steeped in cultural traditions, often prepared and enjoyed as a symbol of hospitality and warmth.

Historical accounts suggest that humba may have been influenced by both Chinese and Spanish cuisines, showcasing the country’s eclectic culinary heritage. The Spanish colonial era introduced various cooking techniques and ingredients, which were creatively adapted into local cooking practices, giving rise to dishes like humba. Over the years, regional variations have emerged, with each province adding its special touch and secret ingredients to the basic recipe, further demonstrating the diversity that characterizes Filipino food culture.

As you delve deeper into this culinary treasure, you will discover not only an exceptional recipe but also a story that reflects the heart of Filipino hospitality and culinary innovation. Humba, with its aromatic allure and rich history, is not merely a dish but an experience that encapsulates the essence of the Philippine Islands.

Ingredients: The Key Components of a Flavorful Humba

To create an authentic and flavorful Humba, a traditional Filipino dish, it is essential to gather specific ingredients that contribute to its distinctive taste and texture. At the heart of this dish lies the pork, typically using pork belly or shoulder, which provides a rich and tender foundation. The quality of the meat is paramount, as well-marbled cuts render a succulent end result.

Alongside pork, soy sauce is a key ingredient that imparts the savory umami flavor essential to Humba. The use of dark soy sauce adds depth and a hint of sweetness, enhancing the overall flavor profile. In addition to soy sauce, vinegar—usually cane vinegar—serves to balance the dish, introducing a tangy note that cuts through the richness of the meat.

Another vital component is the addition of sugar, which is often brown sugar or a local variation. The sweetness provides a contrast to the savory and sour elements, creating a well-rounded taste. Furthermore, garlic and onions create a fragrant base, contributing layers of flavor that accentuate the richness of the pork.

Humba is often enriched with spices and aromatics, including black pepper, bay leaves, and even a touch of pineapple or hard-boiled eggs for added texture and flavor. These ingredients bring complexity and depth to the dish, showcasing the harmonious blend of flavors that Filipino cuisine is known for.

For those looking for variations, incorporating regional substitutes can introduce new twists without compromising the integrity of the dish. For instance, using coconut milk can offer a creamy texture while still adhering to authentic Humba roots. Ultimately, paying close attention to the quality and characteristics of each ingredient is crucial for achieving that flavorful Humba that has garnered appreciation worldwide.

Step-by-Step Cooking Instructions: Unveiling the Secret to Perfect Humba

To achieve the perfect Humba, the process begins with gathering high-quality ingredients, which include pork belly, soy sauce, vinegar, garlic, onions, and spices. Start by cutting the pork belly into manageable cubes, about 1 to 2 inches in size. This size is crucial as it ensures even cooking and optimal tenderness. Rinse the pork under cold water then pat it dry with a paper towel to prepare it for marinating.

In a mixing bowl, combine the pork with soy sauce, vinegar, minced garlic, sliced onions, and black pepper. Let this marinate for at least 30 minutes. While marinating, preheat your cooking pot or Dutch oven over medium heat. Once the pot is adequately heated, add a tablespoon of oil. Sear the marinated pork cubes until they are browned on all sides, which typically takes about 5–7 minutes. This step adds depth of flavor to the dish.

After browning the meat, add the remaining marinade to the pot. Incorporate bay leaves, and introduce a small amount of water if necessary to prevent sticking. Bring the mixture to a gentle simmer, cover, and allow it to cook for approximately one hour. It is essential to check occasionally, stirring to ensure nothing sticks to the bottom of the pot.

As the cooking progresses, you may wish to taste and adjust seasoning, keeping balance in mind—too much soy sauce could overpower the dish. A common mistake is overcooking the pork, which results in toughness; thus, focus on maintaining a consistent simmer using a lid to trap steam and preserve moisture. For an authentic touch, consider adding hard-boiled eggs or potatoes during the last 20 minutes of cooking to infuse additional flavor into the Humba. When the meat is fork-tender, your Humba is ready to serve. This process will yield a rich, flavorful dish that exemplifies Filipino culinary traditions.

Serving Suggestions and Traditional Pairings: Enjoying Humba the Filipino Way

Humba, a flavorful Filipino dish, is not only a culinary delight but also a central part of Filipino social gatherings. Traditionally, Humba is served as a main course, often accompanied by a generous serving of fluffy white rice, which acts as a perfect canvas for the rich sauce. The combination of the tender pork, sweet and savory sauce, and the simplicity of rice creates a harmonious balance that is highly regarded in Filipino cuisine.

In addition to rice, Humba is frequently complemented by a variety of vegetable side dishes. Common pairings include stir-fried or steamed vegetables such as bok choy, green beans, and eggplant. These add a refreshing contrast to the richness of the Humba and contribute to a well-rounded meal. The inclusion of these vegetables not only enhances the nutritional value of the dish but also aligns with the Filipino practice of balancing flavors and textures on the dining table.

For those who enjoy a bit of heat, serving Humba with spicy condiments, such as Sili, a type of chili pepper, can elevate the dining experience. Some people enjoy mixing vinegar with chopped chili as a dipping sauce, adding an exciting kick that complements the umami flavors of the dish. This encourages a communal atmosphere, where diners can share and customize their plates to their liking.

When it comes to presentation, serving Humba in a large communal bowl brings an element of togetherness, allowing family and friends to gather around and share the dish. Sharing Humba during family gatherings or celebrations, such as birthdays and holidays, is a common practice that underscores its significance in Filipino culture. It fosters interaction, conversation, and a sense of community, truly enriching the dining experience. Through these traditions, Humba is not simply a meal; it is a way to connect with loved ones and embrace the rich tapestry of Filipino culinary heritage.

50 Ulam Ideas Every Pinoy Should Try: Easy, Budget-Friendly, and Delicious

50 Ulam Ideas Every Pinoy Should Try: Easy, Budget-Friendly, and Delicious

50 Tipid Ulam Ideas: Mga Budget-Friendly Meals para sa Linggo

50 Ulam Ideas Every Pinoy Should Try: Easy, Budget-Friendly, and Delicious

If you grew up in the Philippines, chances are you’ve heard your mom or lola ask the classic question: “Anong ulam natin?” — What’s our viand today? For Filipinos, ulam isn’t just food. It’s a reflection of culture, comfort, and creativity in the kitchen. Whether you’re looking for easy-to-cook ulam recipes, tipid ulam ideas, or just want inspiration for your weekly meal plan, this guide has you covered.

In this article, we’ll explore 50 ulam ideas — from everyday budget-friendly meals to all-time Filipino favorites. Plus, we’ll share tips to stretch your budget and a sample weekly plan to make cooking hassle-free.


Why “Ulam” Matters in Every Filipino Home

In Filipino dining, rice is always the centerpiece. But the ulam is what makes each meal unique — it could be a simple fried egg with toyo (soy sauce), a hearty adobo simmered for hours, or a festive kare-kare with bagoong.

What’s beautiful about ulam is its versatility. With limited ingredients, Pinoys can whip up something filling and flavorful. That’s why “ulam ideas” are so searched online — everyone’s on the hunt for affordable, easy, and satisfying recipes.


Classic Filipino Ulam Ideas

These dishes are the staples you’ll find in almost every Pinoy home:

  1. Adobo – The unofficial national dish, cooked with soy sauce, vinegar, garlic, and bay leaf.
  2. Sinigang na Baboy – A tangy tamarind-based soup perfect for rainy days.
  3. Tinola – Chicken soup with green papaya and malunggay leaves.
  4. Kare-Kare – Peanut-based oxtail stew served with bagoong.
  5. Afritada – Chicken or pork cooked in tomato sauce with potatoes and bell peppers.
  6. Menudo – Pork stew with carrots, potatoes, and liver.
  7. Caldereta – A rich beef stew often cooked for special occasions.
  8. Bistek Tagalog – Filipino beef steak marinated in soy sauce and calamansi.
  9. Paksiw na Isda – Fish simmered in vinegar, garlic, and ginger.
  10. Ginataang Gulay – Vegetables cooked in coconut milk.

Easy-to-Cook Ulam Ideas (Perfect for Busy Days)

Not every day calls for slow-cooked meals. Here are quick but satisfying ulams:

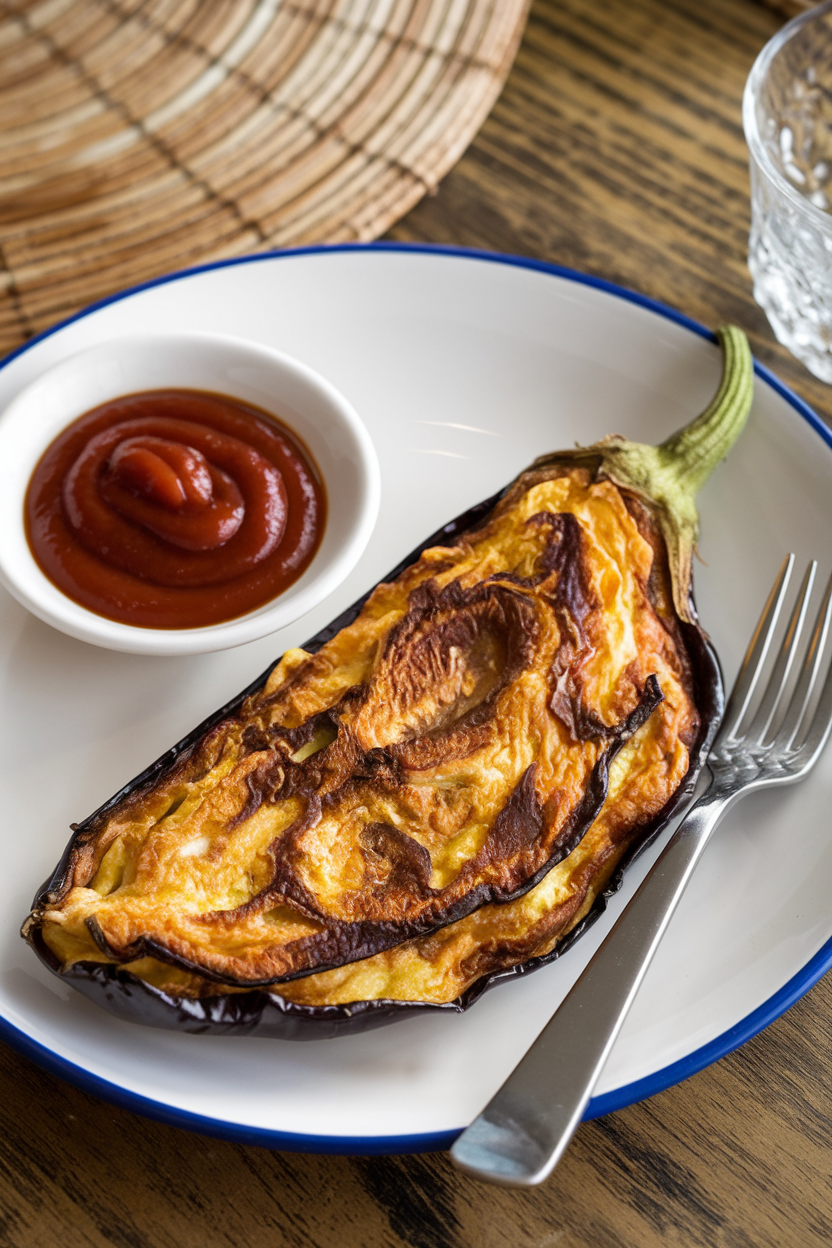
  1. Tortang Talong – Eggplant omelet, best served with ketchup.
  2. Ginisang Ampalaya – Bitter gourd sautéed with egg.
  3. Daing na Bangus – Fried marinated milkfish.
  4. Fried Galunggong – The ultimate budget-friendly fried fish.
  5. Longganisa – Sweet or garlicky Filipino sausages.
  6. Hotdog and Egg – A classic breakfast ulam that works anytime.
  7. Spam with Rice – Quick and easy, especially for students.
  8. Tuyo with Kamatis – Dried fish paired with tomatoes.
  9. Corned Beef Guisado – Sautéed with onions and potatoes.
  10. Fried Tilapia – Simple but satisfying with toyomansi.

Tipid Ulam Ideas (Budget-Friendly Meals Under ₱100)

When the budget is tight, Filipinos still find a way to put food on the table. Here are cheap but tasty ulam ideas:

  1. Ginisang Sardinas – Canned sardines sautéed with garlic and onions.
  2. Munggo Guisado – Mongo beans with ampalaya and chicharon.
  3. Tokwa’t Baboy – Tofu and pork in vinegar-soy sauce dressing.
  4. Giniling na Baboy – Ground pork sautéed with vegetables.
  5. Fried Egg and Kamatis – The ultimate pang-masa ulam.
  6. Lumpiang Togue – Bean sprout spring rolls.
  7. Ginisang Pechay – Sautéed pechay with garlic.
  8. Chopsuey with Leftover Meat – Stir-fried veggies with whatever’s available.
  9. Tortang Giniling – Ground pork omelet.
  10. Kangkong with Bagoong – Water spinach stir-fry with shrimp paste.

Seafood Ulam Ideas

Living in an archipelago means fresh seafood is always within reach:

  1. Sinigang na Hipon – Shrimp in sour tamarind broth.
  2. Rellenong Bangus – Stuffed milkfish.
  3. Adobong Pusit – Squid simmered in vinegar and soy sauce.
  4. Kinilaw na Isda – Filipino-style ceviche.
  5. Grilled Tilapia – With stuffing of tomatoes and onions.
  6. Inihaw na Pusit – Grilled squid.
  7. Escabecheng Isda – Sweet and sour fish.
  8. Seafood Kare-Kare – A twist on the classic with shrimp and crab.
  9. Fish Fillet with Sweet Chili Sauce – Easy and kid-friendly.
  10. Tahong in Ginger Soup (Tinolang Tahong) – Mussels in clear broth.

Special Occasion Ulam Ideas

When there’s a fiesta, birthday, or handaan, these ulams shine on the table:

  1. Lechon Kawali – Crispy pork belly.
  2. Crispy Pata – Deep-fried pork leg.
  3. Bulalo – Beef marrow soup.
  4. Pochero – Spanish-influenced beef stew with bananas and chorizo.
  5. Paella – Spanish rice dish with seafood and chicken.
  6. Embutido – Filipino-style meatloaf.
  7. Laing – Taro leaves cooked in coconut milk.
  8. Pininyahang Manok – Chicken with pineapple.
  9. Callos – Spanish-Filipino tripe stew.
  10. Inihaw na Liempo – Grilled pork belly, perfect with sawsawan.

Sample Weekly Ulam Meal Plan

Here’s a simple 7-day ulam plan you can try:

  • Monday: Ginisang Munggo with Fried Galunggong
  • Tuesday: Adobo with Ginisang Pechay
  • Wednesday: Tinola with Daing na Bangus
  • Thursday: Giniling na Baboy with Tortang Talong
  • Friday: Sinigang na Baboy with Kangkong
  • Saturday: Kare-Kare with Inihaw na Liempo
  • Sunday: Bulalo with Lumpiang Togue

Final Thoughts

For Filipinos, ulam is more than food — it’s family, culture, and comfort on a plate. From humble sardines to festive lechon, every dish tells a story. Whether you’re living in the Philippines or abroad, these ulam ideas will bring you closer to home, one meal at a time.

So the next time someone asks, “Anong ulam natin?” you’ll have 50 delicious answers ready.

Navigating Manila: A Stress-Free Guide to Getting Around the City

Navigating Manila: A Stress-Free Guide to Getting Around the City

Understanding Manila’s Transportation Options

Manila, the bustling capital of the Philippines, offers a diverse array of transportation options catering to the needs of its residents and visitors alike. When navigating this vibrant city, understanding the various modes of transport is essential to ensure a smooth and stress-free experience.

One of the most common forms of transportation in Manila is the taxi service. Taxis are widely available and can be hailed on the street or booked through mobile apps. They provide a comfortable ride, especially for travelers with baggage or those seeking a direct route. However, the cost can be higher than other options, particularly during peak hours when traffic congestion is prevalent. Fares are metered, and it’s crucial for passengers to ensure the meter is activated upon entering.

Another popular mode of transport is the jeepney, a colorful and iconic vehicle unique to the Philippines. Jeepneys are known for their affordability, serving as a budget-friendly public transport choice. They operate on fixed routes, and while they can be a fun way to experience local culture, they may not always provide the most efficient means of travel due to frequent stops and limited space. Passengers should be prepared for a potentially crowded ride, particularly during rush hours.

For those looking for faster alternatives, Manila’s MRT (Metro Rail Transit) and LRT (Light Rail Transit) systems present efficient ways to traverse the city. These rail systems can help avoid road traffic, allowing travelers to reach their destinations more quickly. However, they can become quite congested, especially during peak times. The ticket prices are reasonable, and the convenience of stops in major areas makes it an excellent option for commuters.

Lastly, ride-sharing services like Grab have gained immense popularity in Manila, offering a modern solution to urban transportation. These services provide the ease of booking rides through mobile apps, often resulting in quicker and more reliable travel experiences. While the costs may vary, they usually provide a more comfortable and private experience compared to public transport, making them suitable for families or those preferring convenience.

By understanding each transport option’s pros and cons, travelers can select the most suitable mode for their journey through Manila, effectively navigating the city’s vibrant landscape.

Planning Your Route: Tools and Resources

To navigate Manila effectively, travelers must leverage various tools and resources available for route planning. The advent of technology has made it increasingly easier to determine the best paths through the bustling city. Two popular navigation applications, Google Maps and Waze, are foundational for this purpose. Google Maps provides detailed directions for walking, driving, or riding public transportation, while Waze emphasizes real-time traffic updates, enabling users to evade congested areas efficiently. These features are particularly beneficial in a city renowned for its heavy traffic conditions.

In addition to global options, local applications like Grab and Angkas are indispensable for Manila’s urban transport ecosystem. Grab, primarily a ride-hailing service, allows users to book personal vehicles, share rides, or even arrange deliveries. This platform has become integral for those who prefer a more direct and comfortable mode of travel. Angkas, on the other hand, specializes in motorcycle ride-sharing, offering a faster alternative to maneuver through heavy traffic—an ever-present aspect of commuting in Manila.

Aside from apps, the importance of local maps cannot be overstated. Familiarizing oneself with the city’s layout, including districts and key landmarks, can significantly enhance navigation. Travelers should also consider understanding Manila’s traffic patterns. Peak hours generally occur during weekdays, particularly in the mornings and late afternoons, with routes to and from business districts often being most affected. By planning trips during off-peak times and using these digital resources, visitors can optimize their routes, minimize delays, and reduce the potential for confusion. Ultimately, informed planning is key to a smoother journey through Manila’s vibrant streets.

Avoiding Peak Hours and Traffic Tips

Manila is renowned for its vibrant culture and bustling city life; however, this also comes with the downside of notorious traffic congestion. To navigate the streets of Manila more smoothly, it is pivotal to identify and avoid peak hours. These peak hours typically occur during the morning (7 AM to 9 AM) and evening (5 PM to 8 PM) rush hours when commuters flock to work or return home. By planning travel outside these periods, travelers can significantly reduce their time spent in traffic.

Furthermore, utilizing alternative modes of transportation can effectively mitigate the stress associated with Manila’s heavy traffic. Public transport options, such as the Light Rail Transit (LRT) and Metro Rail Transit (MRT), often provide a quicker solution to navigating the city. However, it is crucial to familiarize oneself with their schedules and live updates, as they can also experience peak hours. Buses and jeepneys are additional alternatives that can traverse different routes, complementing the metro system and providing a more efficient travel experience.

Moreover, having a basic understanding of Manila’s road network can be beneficial. Utilizing mobile applications for navigation can assist in avoiding congested routes, allowing for a more leisurely journey. Additionally, maintaining patience and adopting a calm demeanor while on the road should be emphasized. The experience of navigating Manila can be enjoyable when approached with an open mind. Being prepared with snacks or entertainment can further ease the stress of waiting in traffic.

Emphasizing the importance of planning one’s travel in Manila not only enhances the overall experience but also fosters a sense of control amid the city’s chaos. By implementing these traffic tips, visitors can enjoy a more relaxed and stress-free journey in this vibrant metropolis.

Cultural Considerations and Safety Tips

Navigating Manila requires an awareness of the local culture and adherence to safety practices to ensure a smooth and enjoyable experience. The Philippines is renowned for its hospitality, and understanding the social customs can enhance interactions with local drivers and residents. When hiring a taxi or a ride-sharing service, it is advisable to greet the driver with a friendly “Magandang araw” (Good day). This small gesture fosters goodwill and promotes a more positive engagement.

Moreover, it is important to observe local road customs. For instance, drivers in Manila often display tolerance and are accustomed to congested traffic. Motorists may honk their horns not merely as a warning, but as a gentle reminder of their presence. Pedestrians must navigate crosswalks cautiously, as vehicles may not always yield the right of way. Therefore, being alert and confident while crossing streets is essential for personal safety.

Using public transport can be a convenient and economical way to get around Manila, but safety must be a priority. Always be aware of your surroundings, especially in crowded areas such as jeepneys and buses, where pickpockets may operate. Keep your belongings secure and consider using crossbody bags or pouches that can be easily monitored. It is advisable to avoid displaying valuable items, which may attract unwanted attention.

For those exploring Manila on foot, choose well-lit areas and travel in groups when possible, especially in the evening. Understanding these cultural nuances and safety protocols will not only empower travelers in navigating the city but also foster respectful interactions with the locals. Embracing these tips fosters a more enriching travel experience in Manila, allowing individuals to appreciate its vibrant culture while ensuring their own safety.

Beat the Baguio Traffic: The Best Time to Visit Burnham Park, Mines View, and Session Road in One Day

Beat the Baguio Traffic: The Best Time to Visit Burnham Park, Mines View, and Session Road in One Day

Introduction to Baguio City Traffic

Baguio City, often referred to as the “Summer Capital of the Philippines,” is renowned for its refreshing climate, vibrant culture, and picturesque landscapes. Nestled in the Cordillera Mountains, this elevated city attracts thousands of tourists each year seeking respite from the tropical heat of other regions. Among its many attractions, Burnham Park, Mines View, and Session Road stand out as popular destinations for both locals and visitors alike. However, with the influx of tourists, navigating through the city’s streets can become increasingly challenging, particularly during peak tourist seasons.

The unique topography of Baguio City, characterized by winding roads and steep inclines, contributes to the traffic congestion, which can quickly escalate to frustrating levels during weekends, holidays, and the summer months. Popular events and festivals, such as the Panagbenga Flower Festival, further exacerbate the situation. As a result, it is essential for tourists to plan their visits strategically to maximize their experience within a limited timeframe.

In order to appreciate the beauty and charm of Baguio City without the stress of traffic delays, creating an efficient itinerary is crucial. Understanding the typical traffic patterns, popular tourist hours, and possible detours can significantly enhance a visitor’s experience. To navigate through Baguio with ease, it is advisable to prioritize destinations based on their proximity to one another while factoring in the time of day. By doing so, travelers will have the opportunity to fully immerse themselves in the rich offerings of Baguio City while minimizing the frustrations associated with heavy traffic.

Understanding the Best Times to Visit Baguio

Baguio, often termed the “Summer Capital of the Philippines,” experiences varying tourist traffic throughout the year. Understanding the best times to visit is crucial for a more enjoyable experience at popular attractions like Burnham Park, Mines View, and Session Road. The city is particularly crowded during peak tourist seasons, which typically occur during the months of December through February and during the Holy Week in March or April. During these periods, visitors flock to the cooler climate of Baguio, leading to significant traffic congestion.

To mitigate the inconvenience of heavy traffic, travelers are urged to consider visiting during the off-peak months, such as June to October, when the influx of tourists considerably decreases. These months generally coincide with the rainy season, which, while less favorable for outdoor activities, can provide a quieter atmosphere for exploring the park, scenic views, and local shops. Additionally, weekdays often present a better opportunity to navigate the city with less hassle, as many local tourists tend to visit on weekends.

It is also worth noting that the timing of your visit can greatly impact your overall experience. Early mornings on weekdays are often the most optimal for visiting popular sites, as families and tourists are still settling into their daily routines. Conversely, late afternoons, especially on weekends, may lead to heavy traffic as day trippers head back to nearby provinces. Planning your itinerary based on these insights can significantly enhance your visit and allow you to fully enjoy what Baguio has to offer, reducing the likelihood of being caught in congestion during your travels.

Early Morning at Burnham Park

Starting the day early at Burnham Park presents a multitude of advantages that can significantly enhance the overall experience for visitors. This iconic park, a focal point of Baguio City, is renowned for its lush greenery and vibrant scenery. Arriving in the early morning allows guests to immerse themselves in the tranquil atmosphere, unhindered by the crowds that typically gather later in the day. The serene environment is particularly appealing for families and individuals seeking a peaceful retreat from the busyness of urban life.

One of the major attractions at Burnham Park is the boating experience on the picturesque man-made lake. Early morning visitors can relish the calming effect of gliding across the water while taking in the fresh air and stunning surroundings. Additionally, the park offers biking amenities, which allow guests to explore its expansive area while enjoying the crisp morning breeze. With fewer people around, one can comfortably cycle around the winding paths and scenic spots, making it an ideal time for a leisurely ride.

As the sun rises above the horizon, Burnham Park transforms into a canvas of vibrant colors—making it a perfect location for photographers and nature enthusiasts. Suggested viewing spots include the area near the lake’s edge, where the reflection of the surrounding trees on the water creates breathtaking visuals. The elevated sections of the park also provide magnificent panoramic views of the city awakening beneath you. Engaging in these activities and appreciating the natural beauty at dawn undoubtedly makes an early morning visit to Burnham Park a memorable and enriching experience.

Mid-Morning Exploration of Mines View

After an invigorating morning stroll in Burnham Park, the next destination on your journey in Baguio is the renowned Mines View Park. Travelers typically find that the optimal time to commute from Burnham Park to Mines View is around 9:30 AM to 10:30 AM. This time allows for a smooth transition between the two attractions while also ensuring that you arrive before the midday crowd gathers. The journey itself takes approximately 15 to 30 minutes, depending on traffic conditions.

Upon arriving at Mines View Park, visitors are greeted with breathtaking panoramic views of the Cordillera mountains, which serve as a stunning backdrop for photo opportunities. The vantage point offers not only a picturesque landscape but also a sense of tranquility that is quintessential to Baguio’s charm. Various appealing attractions await guests here, including the chance to engage with local culture through small souvenir shops that offer handcrafted items and keepsakes specific to the region, celebrating the rich heritage of the mountain province.

In addition to the scenic views and shopping experiences, Mines View Park also features local food stalls where you can savor traditional Filipino delicacies. This culinary offering enhances the overall experience at the park and allows visitors to relish the taste of local flavors. Savory snacks and refreshments typically available at these stalls provide a perfect complement to a leisurely morning exploration.

By planning your visit to Mines View Park in the mid-morning, you can fully enjoy its attractions without the overwhelming crowds that typically build up later in the day. This strategic timing not only enriches your experience but also lets you immerse in the serene beauty that Mines View has to offer.

Lunch Break: Local Flavors Near Mines View

When exploring the beautiful sights near Mines View Park, taking a break for lunch can significantly enhance the experience. The area is rich with dining options that highlight the culinary delights of Baguio, making it a wonderful opportunity to savor local flavors. Among the best establishments to consider is the well-known Good Taste, which is favored for its affordable yet delicious local dishes. Visitors can enjoy a variety of meals, from classic Pinoy favorites like adobo, sinigang, and the unique Baguio rice, all served in generous portions.

Another notable eatery is Cafe by the Ruins, where guests are treated to a charming ambiance along with a menu that features traditional Baguio cuisine. Special dishes to try include the famous strawberry taho, a delightful twist on the classic dessert, as well as fresh vegetable salads made from locally sourced produce. This cafe not only offers a taste of local flavors but also allows diners to soak in the artistic vibe that Baguio is known for.

What’s more, if you are inclined to explore street food, various vendors near the park serve up delicious treats like pinakbet empanada and longganisa. These quick bites are not only authentic but perfect for those who are pressed for time. It is recommended to time your lunch appropriately to avoid long waits, particularly on weekends when the influx of tourists is at its peak. Ideally, dining before noon or after the traditional lunch hour can lead to a more pleasant experience.

Overall, taking the time to enjoy a meal composed of local flavors not only fuels your body for the adventures ahead but also connects you to the cultural essence of Baguio. Planning your lunch break well ensures that you can resume your exploration of Mines View and other attractions without unnecessary delays.

Afternoon Stroll on Session Road

Session Road stands as a vibrant central thoroughfare in Baguio City, renowned for its unique blend of shopping, dining, and cultural experiences. As the afternoon sun casts a warm glow over the area, the atmosphere becomes increasingly lively, inviting visitors to immerse themselves in the local culture. This bustling street is lined with a variety of boutiques showcasing handmade crafts, clothing, and unique souvenirs, making it an ideal destination for those seeking to bring home a piece of Baguio’s charm.

Visitors can explore the array of local shops, each offering distinctive products crafted by local artisans. These boutiques provide an excellent opportunity to purchase one-of-a-kind items such as traditional weavings, wood carvings, and other handmade goods that reflect the rich heritage of the Cordillera region. In addition to shopping, art galleries dotting the street provide insight into the creativity and talent of local artists, often featuring stunning pieces that highlight the cultural landscape of the area.

Cafes and eateries along Session Road add to the charm of a leisurely afternoon stroll. These establishments range from cozy coffee shops to casual restaurants, offering a diverse menu that caters to different tastes. Enjoying a cup of local coffee or sampling traditional dishes while people-watching can enhance the experience. The vibrant atmosphere encourages not just shopping but also relaxing and engaging in conversations with locals and fellow tourists alike.

Overall, an afternoon spent on Session Road provides the perfect opportunity to discover the essence of Baguio City’s lively spirit. The blend of shopping, art, and culinary delights creates an action-packed yet relaxing environment that truly captures the heart of this captivating destination. One cannot overlook the charm and vibrancy that Session Road offers, making it a must-visit location during any trip to Baguio.

Traffic Tips for a Smooth Journey

Navigating through Baguio’s traffic can be daunting, particularly during peak tourist seasons. To ensure a smooth journey while visiting popular attractions such as Burnham Park, Mines View, and Session Road in one day, it is imperative to be well-prepared and flexible. One efficient way to traverse the city is by using public transportation, specifically the jeepneys and buses, which are both economical and immerse visitors in the local culture. These forms of transport have specific routes connecting major points of interest, providing both convenience and an authentic experience.

For those preferring private transport, it is advisable to either use a personal vehicle or arrange for rideshare services. However, travelers should take note of the best routes. Starting your day at Burnham Park is ideal due to its central location. From there, proceed to Mines View Park, ideally via the Shortest Route: take the Asin Road, which, while more scenic, can sometimes be less congested. Following your visit to Mines View, you can head back toward Session Road, utilizing the main thoroughfares such as the Malcolm Square side, which introduces more direct access to commercial areas.

Awareness of peak traffic times is crucial. Typically, late mornings and weekends see an uptick in vehicular activity, with numerous locals and tourists vying for the same spots. Early mornings or later afternoons tend to be less congested, presenting a more enjoyable experience. It is also advisable to check for local events or public holidays that may impact travel plans. Patience and flexibility are essential as traffic conditions can change unexpectedly. Having an alternative route in mind or adjusting your schedule slightly can lead to a more pleasant experience while exploring Baguio’s extraordinary landscapes.

Additional Attractions if Time Permits

When planning a visit to Baguio City, particularly to popular destinations such as Burnham Park, Mines View, and Session Road, it is beneficial to fill any extra time with additional attractions that this vibrant locale offers. These additional spots not only enhance the overall experience but also provide a deeper immersion into the culture and natural beauty of Baguio.

One notable attraction is the Baguio Botanical Garden, a serene oasis located just a short drive from the city center. This garden boasts a stunning collection of native plants, flowers, and towering pine trees, offering a tranquil escape from the busyness of urban life. Visitors can stroll along winding pathways and enjoy the diverse flora, making it a perfect spot for relaxation or photography. The ambiance of the Botanical Garden serves as a reminder of Baguio’s unique ecology and is a wonderful complement to the earlier attractions.

Wright Park, often recognized for its iconic Pool of Pines, represents another enriching detour on your Baguio itinerary. This park is not only a haven for horseback riding enthusiasts but also showcases the grandeur of Baguio’s natural surroundings. Families or couples can enjoy leisurely walks while taking in the sight of tall pines and the gentle sounds of nature. Engaging with local vendors and enjoying snacks from nearby stalls can further enhance your visit.

Finally, the Baguio Cathedral, with its stunning architecture and panoramic views, is a must-visit if time allows. Known as Our Lady of the Atonement Cathedral, this religious site provides an opportunity for reflection and appreciation of the city’s historical significance. Its striking façade and serene interior offer a peaceful atmosphere for visitors of all backgrounds. By adding these locations to your itinerary, you can create a well-rounded experience, ensuring that your day in Baguio is unforgettable.

Conclusion: Making the Most of Your Baguio Day Trip

Visiting Baguio offers a plethora of experiences that spotlight the city’s unique charm and rich cultural heritage. To ensure a rewarding day trip, it is essential to comprehend the timing and location choices discussed throughout the blog. First and foremost, one should plan to arrive early in the day, ideally before the bulk of traffic sets in. This strategy allows one to fully appreciate the serene beauty of Burnham Park, take leisurely strolls through its well-maintained pathways, and engage in recreational activities before crowds arrive.

Next, a visit to Mines View Park should be strategically timed to align with the pristine morning light or the pleasant early afternoon. The breathtaking vistas of the mountains and the chance to purchase souvenirs from local vendors become particularly enjoyable when one is not rushed. Furthermore, ensuring that this visit occurs outside the peak hours of local tourism helps avoid congested roads and enhances the overall experience.

Finally, Session Road should be traversed during the late afternoon when the hustle of the earlier hours dissipates. This vibrant thoroughfare is not only a gastronomic delight but also a cultural hub where one can sense the local atmosphere. By timing your visit appropriately, visitors can maximize their time and engagement with each location, making the most of their Baguio day trip.

While exploring the captivating sights of Burnham Park, Mines View Park, and Session Road, it is crucial to remain mindful of traffic patterns. Embracing the natural beauty and cultural touchstones of Baguio will undoubtedly culminate in an enriching experience, making the day trip memorable for all visitors.

21 Delicious Ways to Cook Filipino Adobo

Filipino adobo is a beloved dish, showcasing a delightful balance of savory and tangy flavors that are sure to please your taste buds. With countless variations across the Philippines, this guide brings you 21 unique cooking methods to whip up this classic meal at home. From traditional to creative twists, there’s something for everyone to enjoy!

Adobo Flakes Tacos

Delicious adobo flakes tacos topped with cilantro and onions, served with lime wedges.

Adobo flakes tacos are a delicious twist on the classic Filipino dish. They feature tender, flavorful adobo, shredded and crisped to perfection, tucked into warm tortillas. The combination of savory and slightly tangy flavors makes every bite a treat!

This recipe is simple to follow, perfect for weeknight meals or casual get-togethers. With just a few ingredients, you can whip up tasty tacos that everyone will love.

Ingredients

  • 2 cups adobo-flavored meat (chicken or pork), shredded
  • 1 tablespoon oil
  • 8 small corn tortillas
  • 1/2 cup onions, thinly sliced
  • 1/2 cup fresh cilantro, chopped
  • 1 lime, cut into wedges
  • Optional: hot sauce for a spicy kick

Instructions

  1. Heat the oil in a pan over medium heat. Add the shredded adobo and cook until crispy, stirring occasionally.
  2. Warm the tortillas in a separate skillet or microwave until pliable.
  3. Assemble the tacos by placing a portion of the crispy adobo on each tortilla.
  4. Add sliced onions and chopped cilantro on top.
  5. Squeeze fresh lime juice over the tacos and add hot sauce if desired. Serve immediately and enjoy!

Pork Adobo with Coconut Milk
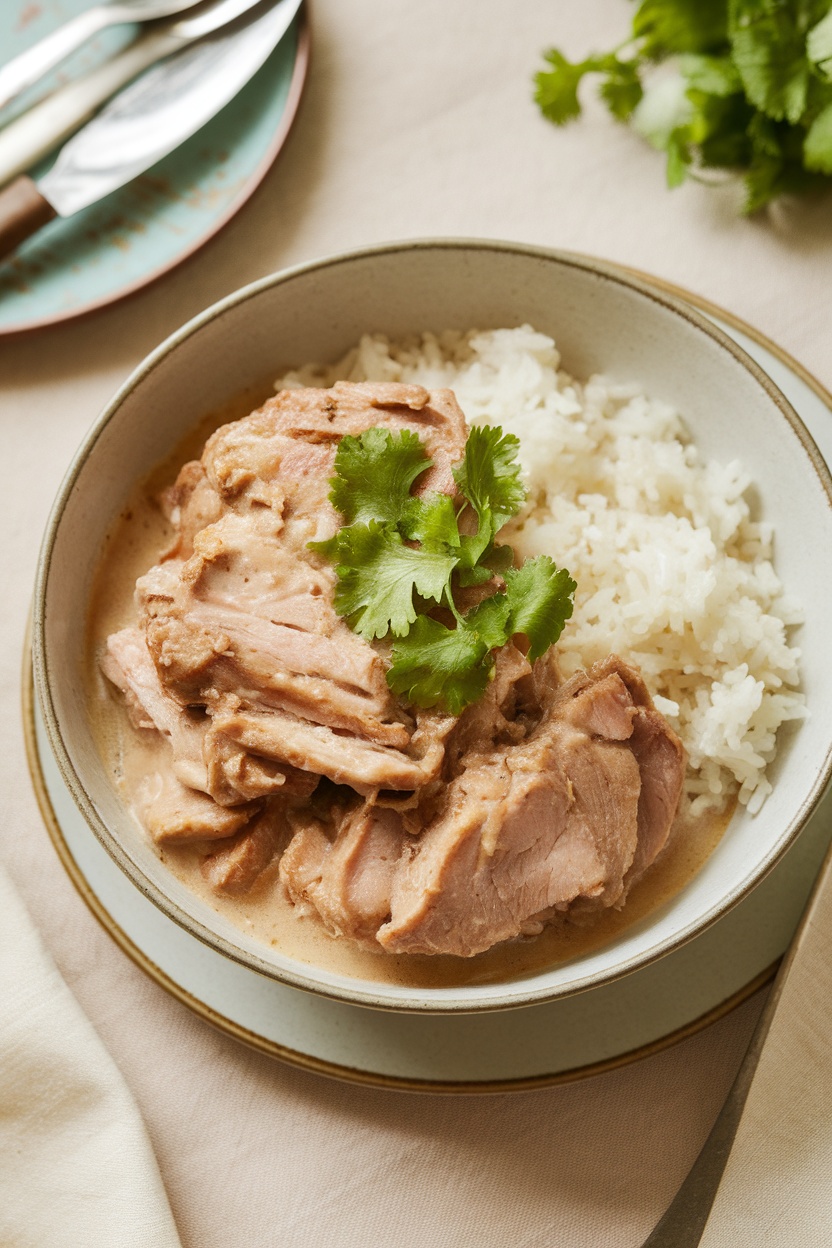
A bowl of Pork Adobo with Coconut Milk served with rice and garnished with cilantro.

Pork Adobo with Coconut Milk is a delightful twist on the classic Filipino dish. The succulent pork melts in your mouth, while the rich coconut milk adds a creamy texture that complements the traditional adobo flavors beautifully. This recipe is simple to make, perfect for both novice cooks and seasoned chefs.

The combination of savory soy sauce, tangy vinegar, and aromatic spices creates a mouthwatering taste that will have everyone coming back for seconds. Serve it over a bed of fluffy rice, and you’ll have a comforting meal that’s sure to impress.

Ingredients

  • 2 lbs pork shoulder, cut into chunks
  • 1 cup coconut milk
  • 1/2 cup soy sauce
  • 1/2 cup vinegar
  • 1 onion, chopped
  • 6 cloves garlic, minced
  • 2 bay leaves
  • 1 tablespoon black peppercorns
  • Salt and pepper to taste
  • 1 tablespoon cooking oil
  • Cilantro for garnish

Instructions

  1. Heat cooking oil in a large pot over medium heat. Add chopped onions and minced garlic, sautéing until fragrant.
  2. Add the pork chunks and brown on all sides, about 5-7 minutes.
  3. Pour in the soy sauce and vinegar, and add bay leaves and black peppercorns. Let it simmer for 5 minutes without stirring.
  4. Stir everything together, then cover and cook on low heat for about 40 minutes, stirring occasionally.
  5. Pour in the coconut milk and continue to simmer for another 20 minutes or until the pork is tender. Season with salt and pepper to taste.
  6. Serve hot, garnished with cilantro, over steamed rice.

Adobo Fried Rice

A plate of Adobo Fried Rice topped with green onions and an egg.

Adobo Fried Rice is a fantastic dish that brings together the savory and tangy flavors of traditional Filipino adobo with the comforting texture of fried rice. It’s a simple yet satisfying recipe that transforms leftover adobo into a whole new meal. The rich taste of marinated meat combined with perfectly cooked rice makes it a hit for any occasion.

This dish is not only easy to whip up, but it also allows for creativity. You can toss in your favorite vegetables or even add an egg on top for extra protein. It’s perfect for a quick lunch or dinner, and you’ll love how it brightens up your plate with a pop of color and flavor.

Ingredients

  • 2 cups cooked rice (preferably day-old)
  • 1 cup leftover adobo (chicken or pork)
  • 1 tablespoon vegetable oil
  • 1 small onion, chopped
  • 1 bell pepper, diced
  • 1 carrot, diced
  • 2 green onions, sliced
  • 2 cloves garlic, minced
  • 1 tablespoon soy sauce
  • 1 egg (optional)

Instructions

  1. Heat the oil in a large skillet over medium heat. Sauté the onion and garlic until fragrant.
  2. Add the bell pepper and carrot, cooking until softened.
  3. Stir in the leftover adobo, breaking it apart as needed.
  4. Add the cooked rice, soy sauce, and mix everything well. Fry until heated through.
  5. If using, push the rice to the side of the pan and scramble the egg in the empty space until cooked. Mix it into the rice.
  6. Garnish with green onions before serving. Enjoy!

Traditional Chicken Adobo
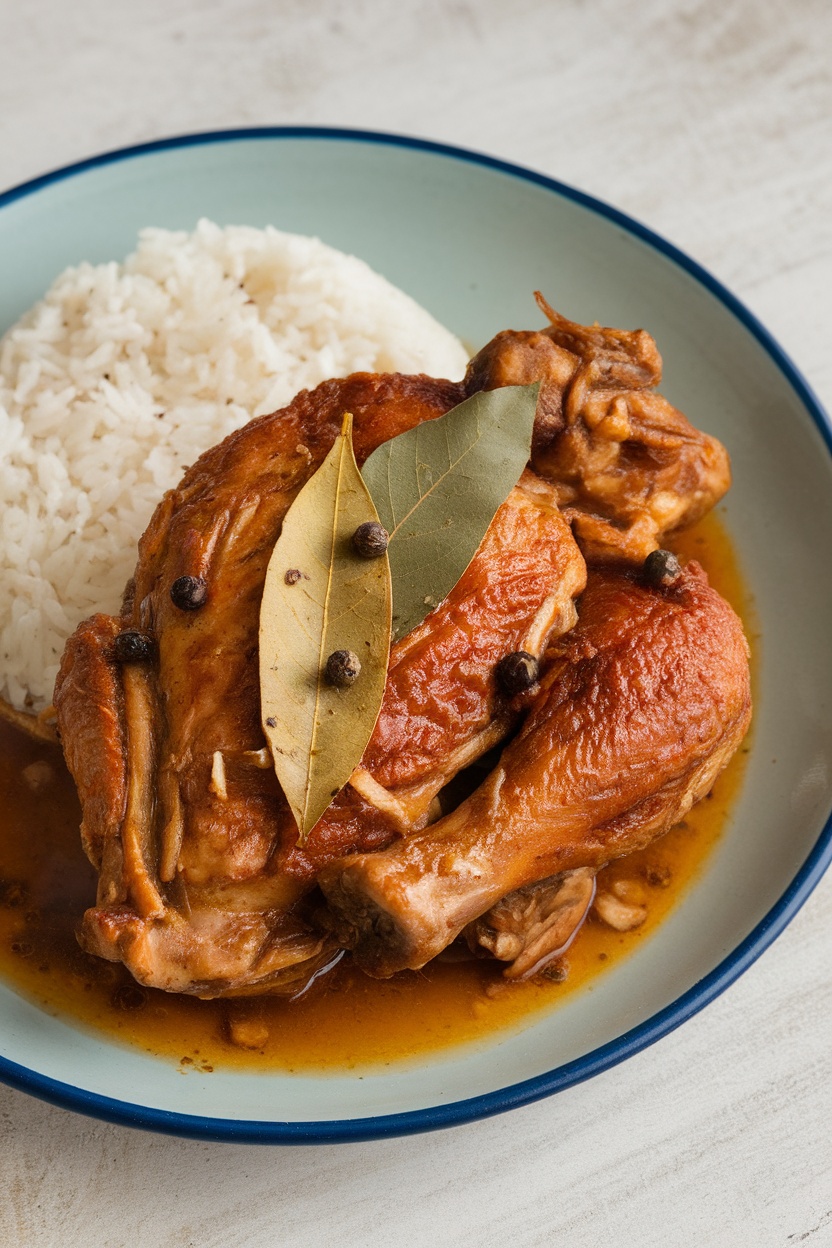
A plate of traditional Chicken Adobo served with rice.

Traditional Chicken Adobo is a beloved Filipino dish known for its savory and tangy flavors. The combination of vinegar, soy sauce, garlic, and spices creates a rich, aromatic sauce that beautifully coats the tender chicken. This dish is not only delicious but also simple to prepare, making it a staple in many Filipino households.

Cooking Chicken Adobo is all about balancing the ingredients. The vinegar adds a nice tang, while the soy sauce brings depth. Simmering the chicken in this mixture allows it to absorb all those wonderful flavors. Serve it over steamed rice to soak up every bit of the sauce, and you’ve got a meal that’s sure to impress.

Ingredients

  • 2 pounds chicken, cut into pieces
  • 1/2 cup soy sauce
  • 1/2 cup vinegar
  • 1 head garlic, minced
  • 1 onion, sliced
  • 2-3 bay leaves
  • 1 teaspoon black peppercorns
  • 2 tablespoons cooking oil
  • 1/2 cup water
  • Salt to taste

Instructions

  1. Marinate the chicken: In a bowl, combine chicken pieces, soy sauce, minced garlic, and bay leaves. Let it marinate for at least 30 minutes.
  2. Heat the oil: In a large pot, heat the cooking oil over medium heat. Add the sliced onion and sauté until translucent.
  3. Brown the chicken: Add the marinated chicken to the pot, including the marinade. Cook until the chicken is browned on all sides.
  4. Add vinegar: Pour in the vinegar and let it simmer without stirring for about 5 minutes to cook off the strong vinegar taste.
  5. Simmer: Add water and black peppercorns, then cover and simmer for about 30 minutes, or until the chicken is tender. Season with salt to taste.
  6. Serve: Once cooked, serve the Chicken Adobo hot over steamed rice. Enjoy!

Seafood Adobo with Shrimp
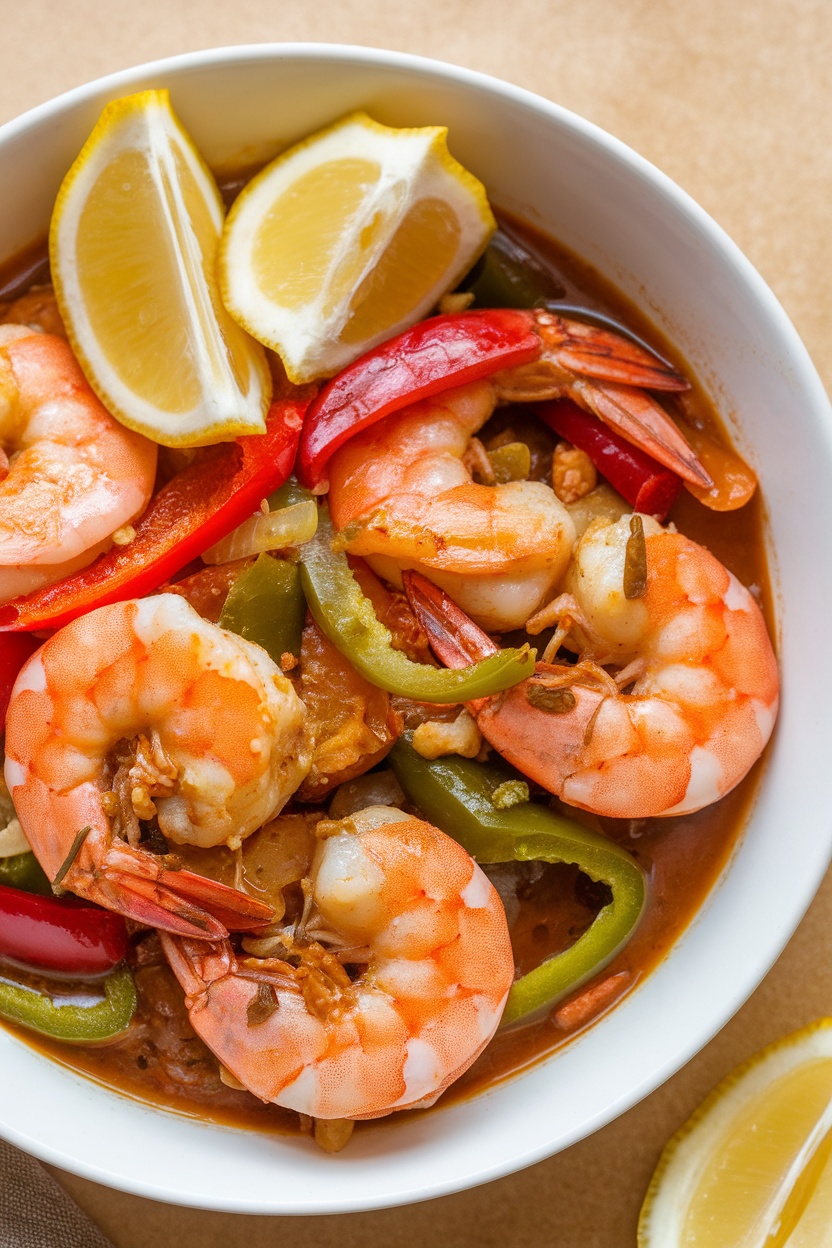
A bowl of shrimp adobo with bell peppers and lemon slices

Seafood adobo with shrimp is a delightful twist on the classic Filipino dish. This version combines the savory flavors of shrimp with a tangy, slightly sweet sauce, making each bite a burst of taste. The combination of soy sauce, vinegar, and spices creates a rich, umami-packed sauce that beautifully complements the seafood.

Preparing this dish is straightforward and perfect for both seafood lovers and those looking to try something new. With fresh ingredients and a few simple steps, you can whip up a meal that’s sure to impress family and friends. Plus, it’s a great way to enjoy shrimp in a different light!

Ingredients

  • 1 pound large shrimp, peeled and deveined
  • 2 tablespoons vegetable oil
  • 1 medium onion, sliced
  • 3 cloves garlic, minced
  • 1 bell pepper, sliced (green or red)
  • 1 cup water
  • 1/2 cup soy sauce
  • 1/4 cup vinegar
  • 1 tablespoon brown sugar
  • 1 teaspoon black peppercorns
  • 2-3 bay leaves
  • Salt to taste
  • Lemon wedges for serving

Instructions

  1. Heat the vegetable oil in a large pan over medium heat. Sauté the onions and garlic until fragrant.
  2. Add the shrimp and cook until they turn pink, about 2-3 minutes.
  3. Stir in the bell pepper, and cook for another minute.
  4. Pour in the water, soy sauce, vinegar, and add the brown sugar, peppercorns, and bay leaves. Bring to a boil.
  5. Reduce heat and let it simmer for about 10-15 minutes. Adjust seasoning with salt if needed.
  6. Serve warm with lemon wedges on the side.

Adobo Pasta with Garlic
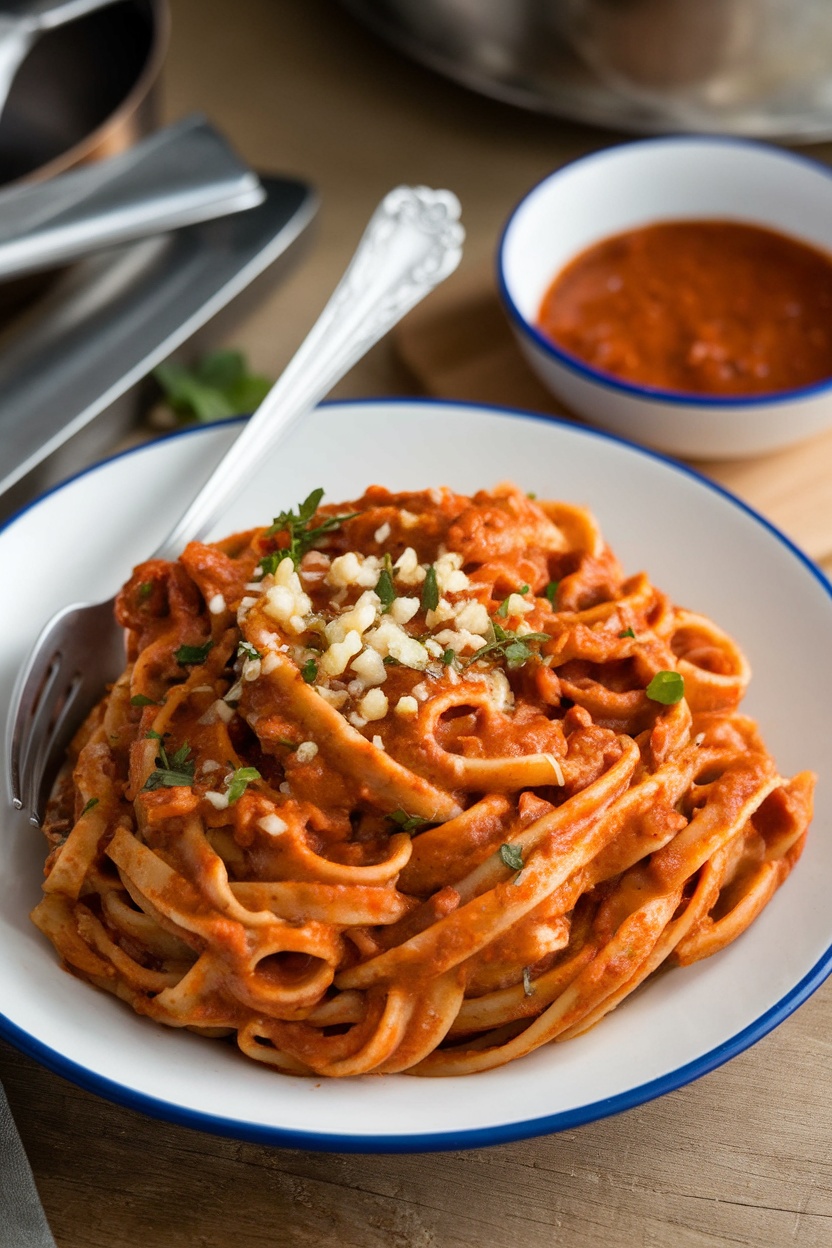
A delicious plate of Adobo Pasta with Garlic, featuring fettuccine coated in a savory sauce, garnished with parsley and cheese.

Adobo Pasta with Garlic combines the rich and savory flavors of traditional Filipino adobo with the comforting appeal of pasta. This dish offers a unique twist, blending tender noodles with a sauce that is both tangy and aromatic, thanks to the garlic and soy sauce. It’s super simple to whip up, making it a fantastic option for a quick weeknight dinner or a cozy weekend meal.

The taste is a delightful fusion of umami from the adobo and the garlicky goodness that coats every strand of pasta. You’ll find that this recipe not only satisfies your cravings but also impresses your family and friends with its bold flavors!

Ingredients

  • 8 oz fettuccine or your choice of pasta
  • 1 cup cooked chicken or pork adobo, shredded
  • 2 tablespoons olive oil
  • 6 cloves garlic, minced
  • 1/2 cup onion, diced
  • 1 cup tomato sauce
  • 1 tablespoon soy sauce
  • Salt and pepper to taste
  • Fresh parsley, chopped (for garnish)
  • Grated cheese (optional)

Instructions

  1. Cook the Pasta: In a large pot, bring salted water to a boil. Add the pasta and cook according to package instructions until al dente. Drain and set aside.
  2. Sauté Garlic and Onion: In a large skillet, heat olive oil over medium heat. Add minced garlic and diced onion. Sauté until the onion is translucent and the garlic is fragrant.
  3. Add Adobo and Sauce: Stir in the shredded adobo, tomato sauce, and soy sauce. Allow the mixture to simmer for about 5 minutes, letting the flavors meld together. Season with salt and pepper to taste.
  4. Combine with Pasta: Add the cooked pasta to the skillet, tossing to coat the noodles with the sauce. Cook for an additional 2-3 minutes to heat through.
  5. Serve: Plate the pasta and garnish with chopped parsley and grated cheese, if desired. Enjoy your delicious Adobo Pasta with Garlic!

Beef Adobo with Pineapple
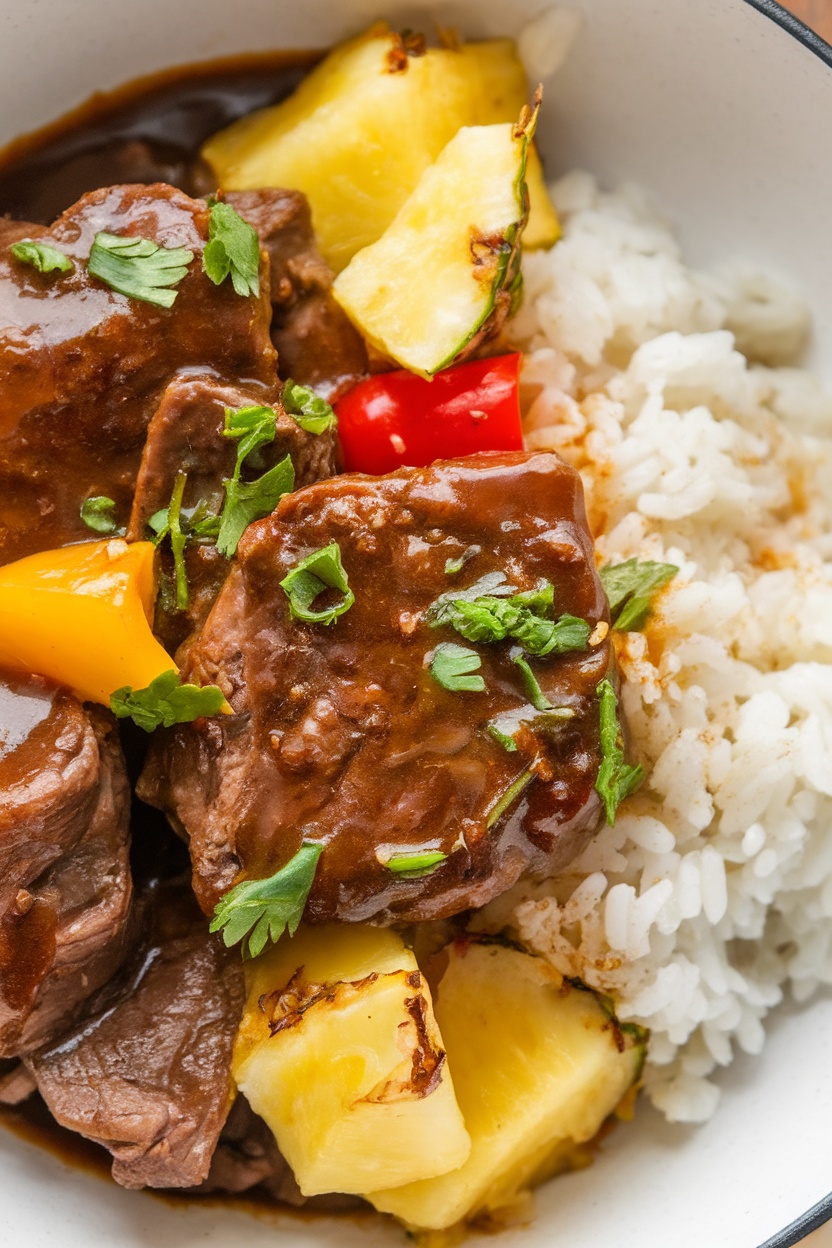
A bowl of Beef Adobo with Pineapple served with rice and garnished with cilantro.

This Beef Adobo with Pineapple is a delightful twist on the traditional Filipino dish, blending savory, tangy, and sweet flavors. The beef becomes tender and infused with a rich soy sauce base, while the pineapple adds a refreshing sweetness that balances the dish perfectly. It’s an easy recipe that’s sure to impress, making it a great choice for family dinners or special occasions.

The combination of the juicy beef and caramelized pineapple creates a mouthwatering flavor that pairs wonderfully with steamed rice. Whether you’re a seasoned cook or trying your hand at Filipino cuisine for the first time, this recipe is simple yet satisfying.

Ingredients

  • 2 pounds beef chuck, cut into cubes
  • 1 cup soy sauce
  • 1/2 cup vinegar
  • 1 cup pineapple chunks (fresh or canned)
  • 1 onion, sliced
  • 4 cloves garlic, minced
  • 2 bay leaves
  • 1 teaspoon black pepper
  • 1 tablespoon sugar
  • 1 tablespoon cooking oil
  • 1 cup water
  • Chopped cilantro for garnish

Instructions

  1. Marinate the Beef: In a bowl, combine the beef, soy sauce, vinegar, minced garlic, and bay leaves. Let it marinate for at least 30 minutes, or up to overnight in the fridge for more flavor.
  2. Cook the Beef: In a large pot, heat cooking oil over medium heat. Add the sliced onions and sauté until translucent. Add the marinated beef (reserve the marinade) and cook until browned on all sides.
  3. Add Liquids: Pour in the reserved marinade, pineapple chunks, sugar, black pepper, and water. Stir well and bring to a boil.
  4. Simmer: Reduce heat to low, cover, and let it simmer for about 1.5 hours, or until the beef is tender. You can add more water if necessary to prevent burning.
  5. Finish: Once the beef is tender, taste and adjust seasoning if needed. Serve hot over steamed rice and garnish with chopped cilantro.

Vegetarian Adobo with Tofu

A delicious vegetarian adobo with tofu and colorful vegetables.

Vegetarian Adobo with Tofu is a delightful twist on the classic Filipino dish. This version combines the savory flavors of soy sauce, vinegar, and garlic with tender pieces of tofu and vibrant vegetables, creating a dish that is both hearty and satisfying. It’s a wonderful option for those looking to enjoy a meat-free meal while still indulging in the rich taste that adobo is known for.

This recipe is simple to make, making it perfect for weeknight dinners or meal prep. The tofu absorbs the flavors beautifully, and the colorful veggies add a nice crunch. Serve it over rice for a complete meal that everyone will love.

Ingredients

  • 1 block firm tofu, drained and pressed
  • 2 tablespoons soy sauce
  • 1/4 cup vinegar (cane or rice vinegar works well)
  • 4 cloves garlic, minced
  • 1 onion, sliced
  • 1 red bell pepper, sliced
  • 1 green bell pepper, sliced
  • 1 carrot, julienned
  • 1 tablespoon vegetable oil
  • 1 teaspoon black pepper
  • 1 bay leaf
  • 1 cup water
  • Cooked rice, for serving

Instructions

  1. Prepare the Tofu: Cut the pressed tofu into cubes. In a bowl, marinate the tofu with soy sauce, garlic, and black pepper for about 15 minutes.
  2. Sauté the Vegetables: In a large pan, heat the vegetable oil over medium heat. Add the onion and sauté until translucent. Add the marinated tofu and cook until golden brown on all sides.
  3. Add Other Ingredients: Once the tofu is cooked, add the sliced bell peppers, carrot, vinegar, bay leaf, and water. Stir everything together and bring to a boil.
  4. Simmer: Lower the heat and let it simmer for about 15-20 minutes, allowing the flavors to meld and the sauce to slightly thicken.
  5. Serve: Remove the bay leaf before serving. Serve the vegetarian adobo hot over a bed of rice.

Adobo Potatoes

Deliciously cooked adobo potatoes with herbs.

Adobo potatoes are a delightful twist on the classic Filipino adobo, merging the rich, tangy flavors of the sauce with tender, creamy potatoes. This dish is simple to prepare and makes for a comforting side that pairs beautifully with rice or can be enjoyed on its own. The warmth of soy sauce and vinegar blend perfectly with the natural sweetness of the potatoes, creating a flavor that is both savory and satisfying.

Cooking adobo potatoes is a breeze, making it a great option for weeknight dinners or special occasions. The ingredients are straightforward, and you can have this dish ready in no time, filling your home with mouthwatering aromas that invite everyone to the table.

Ingredients

  • 1.5 pounds small potatoes, halved
  • 1 cup soy sauce
  • 1/2 cup vinegar (white or cane)
  • 1 onion, sliced
  • 5 cloves garlic, minced
  • 2 bay leaves
  • 1 tablespoon brown sugar
  • 1/2 teaspoon black pepper
  • 1 tablespoon cooking oil
  • Fresh parsley, chopped (for garnish)

Instructions

  1. Prepare the Potatoes: In a pot of boiling salted water, cook the halved potatoes until just tender, about 10-12 minutes. Drain and set aside.
  2. Make the Sauce: In a large pan, heat the cooking oil over medium heat. Sauté the onions and garlic until fragrant and translucent.
  3. Add the Ingredients: Stir in the soy sauce, vinegar, bay leaves, brown sugar, and black pepper. Bring the mixture to a gentle simmer.
  4. Combine: Add the boiled potatoes to the pan and stir to coat them well in the sauce. Let it simmer on low heat for about 15-20 minutes, allowing the potatoes to absorb the flavors.
  5. Serve: Garnish with chopped parsley before serving. Enjoy your adobo potatoes warm, either as a side dish or a main attraction!

Crispy Adobo Wings

Plate of crispy adobo wings served with dipping sauce and celery sticks.

Crispy Adobo Wings combine the rich, savory flavors of traditional Filipino adobo with the satisfying crunch of perfectly fried chicken wings. The marinade, which includes soy sauce, vinegar, and a blend of spices, infuses the wings with a delightful taste that keeps you coming back for more. This recipe is not only simple to make but also a crowd-pleaser at any gathering.

These wings are marinated to perfection, then fried until golden brown, offering a crispy exterior that contrasts beautifully with the tender meat inside. Pair them with your favorite dipping sauce for an irresistible snack or appetizer!

Ingredients

  • 2 lbs chicken wings
  • 1/2 cup soy sauce
  • 1/4 cup vinegar (white or cane vinegar)
  • 5 cloves garlic, minced
  • 1 teaspoon black pepper
  • 1 teaspoon paprika
  • 1 tablespoon brown sugar
  • 1/2 teaspoon salt
  • Oil for frying

Instructions

  1. Marinate the Wings: In a large bowl, combine soy sauce, vinegar, minced garlic, black pepper, paprika, brown sugar, and salt. Add the chicken wings and ensure they are well coated. Cover and marinate in the refrigerator for at least 1 hour, or overnight for deeper flavor.
  2. Prepare for Frying: Heat oil in a deep pan over medium heat. Make sure there’s enough oil to fully submerge the wings.
  3. Fry the Wings: Remove the wings from the marinade and let any excess liquid drip off. Carefully place the wings in the hot oil, frying in batches to avoid overcrowding. Cook for about 8-10 minutes or until golden brown and crispy, flipping halfway through.
  4. Drain and Serve: Once cooked, remove the wings from the oil and place them on a paper towel-lined plate to drain excess oil. Serve hot with your favorite dipping sauce, like garlic mayo or spicy vinegar.

Adobo Quinoa Salad

Colorful quinoa salad with chicken, tomatoes, and avocado

Adobo Quinoa Salad is a refreshing twist on the classic Filipino dish. This salad combines the savory flavors of adobo with the nutty texture of quinoa, making it a satisfying and nutritious meal. It’s perfect for lunch or as a side dish at dinner.

The salad is easy to prepare and packed with vibrant ingredients like cherry tomatoes and creamy avocado. The blend of spices from the adobo enhances the quinoa, giving every bite a burst of flavor. Whether you’re looking for a hearty meal or a light treat, this salad hits the spot.

Ingredients

  • 1 cup quinoa
  • 2 cups water
  • 1 lb chicken thighs, cooked and shredded
  • 1/2 cup cherry tomatoes, halved
  • 1 avocado, diced
  • 1 cup fresh spinach, chopped
  • 2 tablespoons soy sauce
  • 1 tablespoon vinegar
  • 1 tablespoon olive oil
  • 1 teaspoon garlic powder
  • Salt and pepper to taste

Instructions

  1. Rinse the quinoa under cold water. In a saucepan, bring water to a boil and add the quinoa. Reduce heat, cover, and simmer for 15 minutes or until water is absorbed. Fluff with a fork and let cool.
  2. In a large bowl, combine the shredded chicken with soy sauce, vinegar, garlic powder, salt, and pepper. Toss until chicken is evenly coated.
  3. Once the quinoa has cooled, add it to the bowl with the chicken mixture. Stir in cherry tomatoes, avocado, and spinach.
  4. Drizzle with olive oil, toss gently, and adjust seasoning if needed. Serve chilled or at room temperature.

Adobo Soup with Vegetables
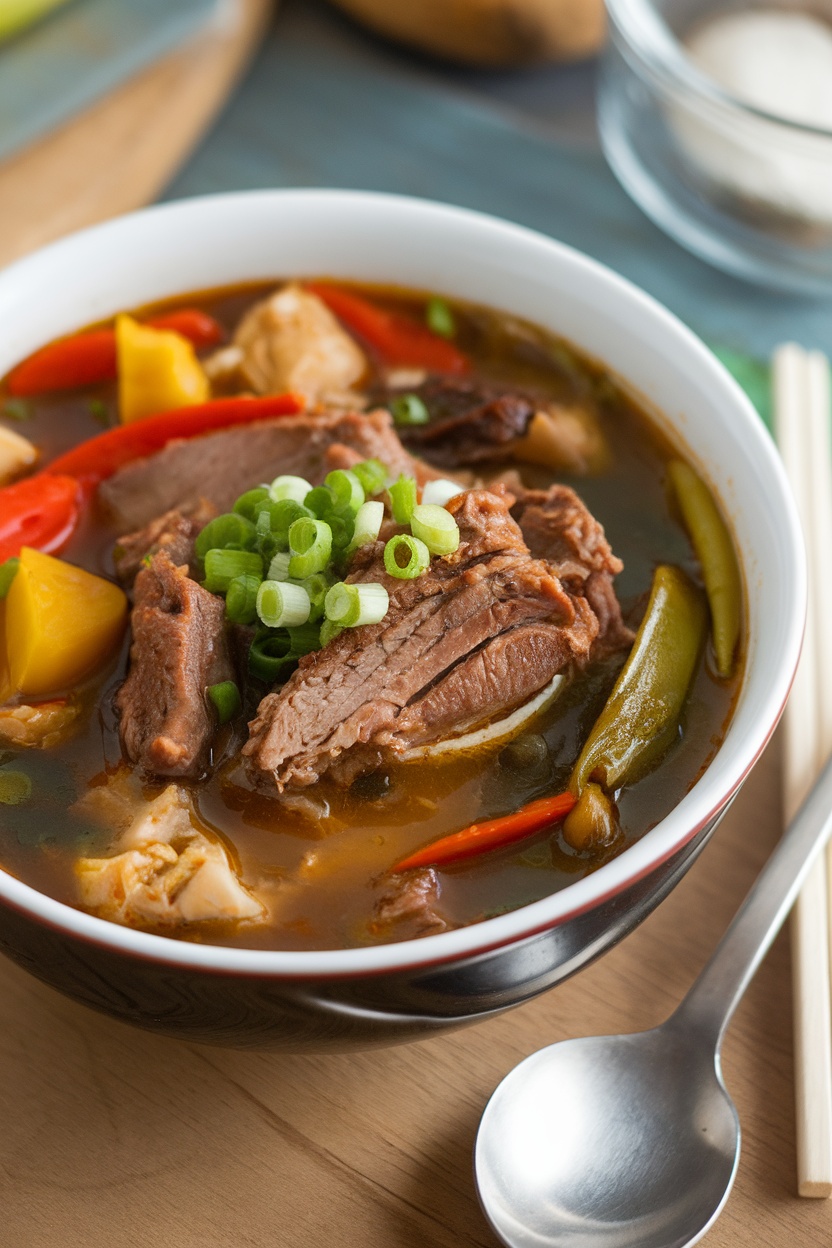
A bowl of adobo soup with chicken and vegetables

Adobo soup with vegetables is a comforting dish that combines the rich, savory flavors of traditional Filipino adobo with a light and nourishing broth. It’s a delightful twist on the classic adobo, perfect for warming you up on a chilly day. The tender meat, combined with fresh vegetables, creates a wholesome meal that is both satisfying and easy to prepare.

This recipe is simple enough for anyone to tackle, making it an excellent option for a weeknight dinner. The blend of soy sauce, vinegar, and spices gives the soup a delicious tang, while the veggies add color and nutrients. Once you try this version of adobo, you might find yourself craving it regularly!

Ingredients

  • 1 lb chicken thighs, bone-in
  • 4 cups chicken broth
  • 1 medium onion, chopped
  • 4 cloves garlic, minced
  • 1 cup potatoes, diced
  • 1 cup bell peppers, sliced
  • 1 cup green beans, trimmed
  • 1/4 cup soy sauce
  • 1/4 cup vinegar
  • 2 tablespoons cooking oil
  • 1 teaspoon black pepper
  • 2 green onions, chopped (for garnish)

Instructions

  1. In a large pot, heat the cooking oil over medium heat. Sauté the onion and garlic until fragrant.
  2. Add the chicken thighs and cook until browned on all sides.
  3. Pour in the soy sauce, vinegar, and black pepper. Allow it to simmer for about 5 minutes.
  4. Add the chicken broth and potatoes. Bring to a boil, then reduce heat to low and cover. Cook for 20 minutes.
  5. Add the bell peppers and green beans. Continue to simmer for another 10 minutes, or until the vegetables are tender.
  6. Serve hot, garnished with chopped green onions.

Adobo Pizza with Fresh Basil

Adobo pizza topped with shredded chicken and fresh basil

Adobo pizza combines two beloved cuisines into a delicious and satisfying dish. The savory flavors of Filipino adobo, typically made with marinated meat, meld beautifully with the cheese and tomato base of a classic pizza. This recipe is not only full of flavor but also simple enough to make for a weeknight dinner or a fun gathering with friends.

The smoky, tangy taste of the adobo sauce pairs perfectly with the gooey cheese and a hint of freshness from the basil. You’ll love how the familiar flavors of adobo give a unique twist to pizza, making it a hit for everyone at the table.

Ingredients

  • 1 pre-made pizza crust
  • 1 cup cooked adobo chicken, shredded
  • 1 cup pizza sauce
  • 1 1/2 cups mozzarella cheese, shredded
  • 1/4 cup fresh basil leaves
  • 1 tablespoon olive oil
  • Salt and pepper to taste

Instructions

  1. Preheat your oven to 475°F (245°C).
  2. Roll out the pizza crust on a floured surface and transfer to a baking sheet or pizza stone.
  3. Spread the pizza sauce evenly over the crust.
  4. Top with shredded mozzarella cheese, leaving some edges for the crust.
  5. Add the shredded adobo chicken on top of the cheese.
  6. Drizzle olive oil over the pizza and season with salt and pepper.
  7. Bake in the preheated oven for about 12-15 minutes, or until the cheese is bubbly and the crust is golden brown.
  8. Remove from the oven and sprinkle fresh basil leaves on top before slicing and serving.

Adobo Stuffed Bell Peppers

Colorful adobo stuffed bell peppers topped with cheese on a plate.

Adobo stuffed bell peppers bring a delightful twist to the classic Filipino dish. This recipe combines the rich, savory flavors of adobo with the freshness of bell peppers, creating a colorful and satisfying meal. It’s an easy dish to prepare, making it perfect for a weeknight dinner or a special occasion.

The peppers are filled with a mixture of marinated meat, rice, and spices, then topped with cheese for that extra layer of goodness. Each bite offers a burst of flavor and texture that highlights the essence of adobo while being both fun and visually appealing.

Ingredients

  • 4 large bell peppers (any color)
  • 1 lb chicken or pork, cubed
  • 1 cup cooked rice
  • 1/4 cup soy sauce
  • 1/4 cup vinegar
  • 4 cloves garlic, minced
  • 1 onion, chopped
  • 1 teaspoon black pepper
  • 1 teaspoon bay leaves, crushed
  • 1 cup shredded cheese (cheddar or mozzarella)
  • 2 tablespoons olive oil
  • Salt to taste

Instructions

  1. Preheat the oven to 375°F (190°C).
  2. In a bowl, combine the meat with soy sauce, vinegar, garlic, onion, pepper, and bay leaves. Marinate for at least 30 minutes.
  3. In a skillet, heat olive oil over medium heat. Sauté the marinated meat until cooked through, about 10-15 minutes. Add cooked rice and mix well.
  4. Cut the tops off the bell peppers and remove the seeds. Stuff each pepper with the adobo rice mixture.
  5. Place the stuffed peppers in a baking dish. Sprinkle cheese on top of each pepper.
  6. Bake for 25-30 minutes until the peppers are tender and the cheese is melted and bubbly.
  7. Let cool slightly before serving. Enjoy your adobo stuffed bell peppers!

Adobo Casserole with Cheese

A hearty Adobo casserole topped with melted cheese and garnished with green onions.

This Adobo Casserole with Cheese combines the classic flavors of Filipino adobo with the comforting layers of a casserole. The tangy and savory taste of the adobo pairs perfectly with melted cheese, making it a delightful dish that appeals to both traditionalists and those looking for something new. Plus, it’s pretty straightforward to make, making it ideal for a family dinner or a potluck.

The casserole is loaded with tender chicken, rich sauce, and gooey cheese, creating a harmonious blend of flavors that everyone will love. It’s a simple one-pan meal that you can prepare ahead of time and bake when you’re ready to serve, which is a real bonus for busy weeknights!

Ingredients

  • 2 lbs chicken thighs, cut into pieces
  • 1/2 cup soy sauce
  • 1/2 cup vinegar
  • 1 head of garlic, minced
  • 1 onion, chopped
  • 2 bay leaves
  • 1 teaspoon black pepper
  • 1 cup chicken broth
  • 3 cups cooked pasta (penne or macaroni)
  • 2 cups shredded cheese (cheddar and mozzarella mix)
  • 1/4 cup chopped green onions for garnish

Instructions

  1. Marinate the Chicken: In a large bowl, combine chicken, soy sauce, vinegar, minced garlic, onion, bay leaves, and black pepper. Let it marinate for at least 30 minutes.
  2. Cook the Chicken: In a large skillet, cook the marinated chicken over medium heat until browned. Add chicken broth and simmer for about 30 minutes until the chicken is tender.
  3. Prepare the Casserole: Preheat your oven to 350°F (175°C). In a baking dish, mix the cooked pasta with the chicken and sauce until well combined.
  4. Add Cheese: Top the pasta mixture with shredded cheese, ensuring it’s evenly spread.
  5. Bake: Place the casserole in the preheated oven and bake for 20-25 minutes, or until the cheese is melted and bubbly.
  6. Garnish: Remove from the oven and sprinkle with chopped green onions before serving.

Adobo Burger with Garlic Aioli

Adobo burger served with lettuce and garlic aioli on a plate.

This Adobo Burger with Garlic Aioli brings a delightful twist to the classic burger. The savory flavors of Filipino adobo are infused into a juicy burger patty, creating a unique and satisfying meal. The garlic aioli adds a creamy kick that complements the rich taste of the adobo, making each bite extra special.

What’s great about this recipe is that it’s easy to prepare and perfect for any cook, whether you’re just starting out or you’re a kitchen pro. With simple ingredients and straightforward steps, you’ll have a delicious burger that’s sure to impress your friends and family.

Ingredients

  • 1 lb ground beef
  • 2 tablespoons soy sauce
  • 2 tablespoons vinegar
  • 4 cloves garlic, minced
  • 1 teaspoon black pepper
  • 1 tablespoon olive oil
  • 4 burger buns
  • 1 cup lettuce leaves
  • 1/2 cup mayonnaise
  • 1 tablespoon lemon juice
  • 1 teaspoon garlic powder

Instructions

  1. In a bowl, combine the ground beef, soy sauce, vinegar, minced garlic, and black pepper. Mix until well incorporated.
  2. Form the mixture into four equal patties.
  3. Heat olive oil in a skillet over medium heat. Cook the patties for about 5-6 minutes on each side or until they reach your desired doneness.
  4. While the burgers cook, prepare the garlic aioli by mixing mayonnaise, lemon juice, and garlic powder in a small bowl.
  5. Once the patties are cooked, toast the burger buns lightly in the skillet or oven.
  6. Assemble the burgers by placing a lettuce leaf on the bottom bun, followed by the cooked patty and a generous dollop of garlic aioli. Top with the other half of the bun and serve immediately.

Adobo Salad with Avocado Dressing

A vibrant adobo salad topped with creamy avocado dressing.

This Adobo Salad with Avocado Dressing is a fresh and vibrant twist on a classic Filipino dish. Combining tender adobo chicken with crisp greens and a creamy avocado dressing, this salad is both satisfying and nutritious. It’s simple to whip up, making it perfect for a quick lunch or a light dinner.

The blend of flavors is delightful, with the savory adobo complementing the creamy, zesty dressing. Whether you’re an adobo fan or new to the dish, this salad is sure to impress. It’s not just a meal; it’s an experience that highlights the essence of Filipino cuisine.

Ingredients

  • 2 cups mixed salad greens
  • 1 cup cooked chicken adobo, sliced
  • 1 avocado, sliced
  • 1/2 cup cherry tomatoes, halved
  • 2 green onions, chopped
  • 1/4 cup cilantro leaves
  • 1/4 cup Greek yogurt
  • 1 ripe avocado
  • 1 tablespoon lime juice
  • 1 teaspoon garlic powder
  • Salt and pepper to taste

Instructions

  1. Prepare the Dressing: In a blender, combine Greek yogurt, ripe avocado, lime juice, garlic powder, salt, and pepper. Blend until smooth and creamy. Adjust seasoning to taste.
  2. Assemble the Salad: On a large plate, arrange the mixed greens. Top with sliced adobo chicken, avocado slices, cherry tomatoes, and chopped green onions.
  3. Dress the Salad: Drizzle the avocado dressing generously over the salad. Garnish with cilantro leaves.
  4. Serve: Enjoy immediately while fresh!

Adobo Nachos with Cheese Sauce

Delicious adobo nachos topped with cheese sauce and jalapeño slices

Adobo nachos bring a delightful twist to a classic dish, combining the rich flavors of Filipino adobo with the crunchy goodness of tortilla chips. The tangy, savory taste of marinated meat layered over crispy chips creates a satisfying snack or appetizer that’s sure to please any crowd. Plus, the melty cheese sauce adds an extra creaminess that elevates the entire experience.

This recipe is simple to make, perfect for gatherings or a cozy movie night at home. With just a few ingredients and steps, you can whip up a batch of these scrumptious nachos in no time. Get ready for a flavor explosion!

Ingredients

  • 2 cups cooked adobo meat, shredded
  • 1 bag tortilla chips
  • 1 cup shredded cheese (cheddar or your choice)
  • 1 cup cheese sauce
  • 1 jalapeño, sliced (optional)
  • Fresh cilantro, chopped (for garnish)

Instructions

  1. Prepare the Oven: Preheat your oven to 350°F (175°C).
  2. Layer the Chips: Spread the tortilla chips evenly on a baking sheet lined with parchment paper.
  3. Add Adobo: Evenly distribute the shredded adobo meat over the chips.
  4. Top with Cheese: Sprinkle the shredded cheese generously over the top of the nachos.
  5. Bake: Place the baking sheet in the oven and bake for about 10-15 minutes, or until the cheese is melted and bubbly.
  6. Finish Up: Once done, remove from the oven and drizzle with cheese sauce. Top with sliced jalapeños and chopped cilantro.
  7. Serve: Enjoy your flavorful adobo nachos hot and fresh!

Slow Cooker Adobo
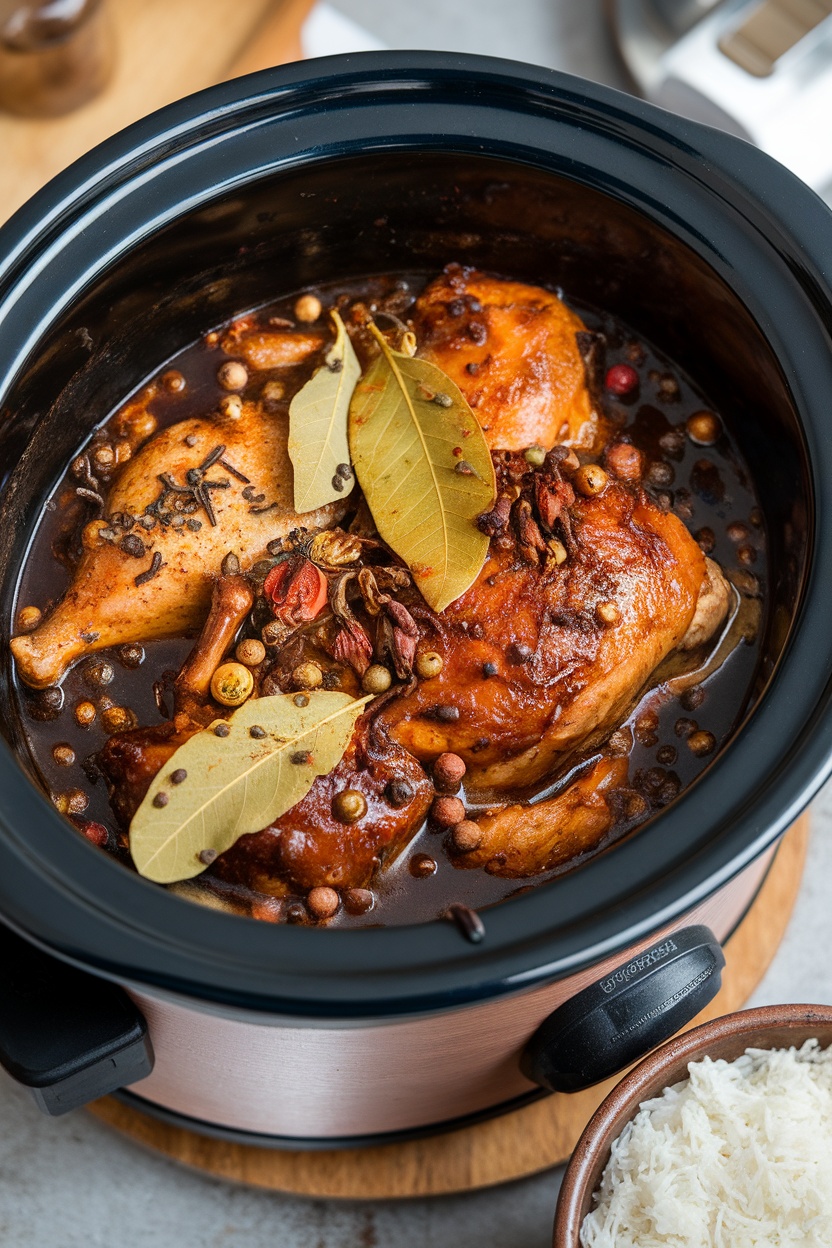
Delicious slow cooker adobo with chicken and spices.

Slow Cooker Adobo is a delightful and easy way to enjoy the rich flavors of this classic Filipino dish. Tender meat is simmered in a savory mix of soy sauce, vinegar, garlic, and spices, creating a dish that’s both tangy and aromatic. The slow cooker makes it simple, allowing all the flavors to meld together beautifully while you go about your day.

This recipe is perfect for busy weeknights or weekend gatherings. Just toss the ingredients in the slow cooker, set it, and let it do the work. The result is a comforting meal that’s sure to please everyone at the table.

Ingredients

  • 2 lbs chicken thighs, skinless
  • 1/2 cup soy sauce
  • 1/4 cup vinegar (preferably cane vinegar)
  • 1 onion, sliced
  • 6 cloves garlic, minced
  • 2 bay leaves
  • 1 teaspoon black peppercorns
  • 1 tablespoon brown sugar
  • 1 cup water
  • Salt and pepper to taste

Instructions

  1. Prepare the Ingredients: In a bowl, combine soy sauce, vinegar, minced garlic, brown sugar, and black peppercorns.
  2. Mix and Marinate: Place the chicken thighs in the slow cooker. Pour the marinade over the chicken, then add the sliced onions and bay leaves on top.
  3. Add Water: Pour in the water to ensure the chicken is submerged. Season with salt and pepper to taste.
  4. Cook: Cover and set the slow cooker on low for 6-8 hours or high for 3-4 hours, until the chicken is tender.
  5. Serve: Once done, remove the bay leaves. Serve the adobo with steamed rice to soak up the delicious sauce.

Grilled Adobo Skewers

Delicious grilled adobo skewers with colorful bell peppers on wooden plate.

Grilled Adobo Skewers bring a fun twist to the classic Filipino dish. Marinated pieces of chicken, infused with the tangy and savory flavors of soy sauce, vinegar, and garlic, are skewered with vibrant bell peppers for a delicious, smoky finish. This dish is perfect for barbecues and gatherings, offering a delightful blend of taste and ease.

Not only are these skewers simple to make, but they’re also a great way to impress your friends and family. The combination of tender chicken and grilled vegetables creates a satisfying meal that packs a flavor punch. Perfect for any occasion, these skewers can be served with rice or enjoyed on their own!

Ingredients

  • 1 lb chicken thighs, cut into bite-sized pieces
  • 1/4 cup soy sauce
  • 1/4 cup vinegar
  • 4 cloves garlic, minced
  • 1 tablespoon brown sugar
  • 1/2 teaspoon black pepper
  • 1 bell pepper (red, green, or yellow), cut into chunks
  • 1 onion, cut into wedges
  • Skewers (soaked in water if wooden)

Instructions

  1. Marinate the Chicken: In a bowl, combine soy sauce, vinegar, minced garlic, brown sugar, and black pepper. Add the chicken pieces and mix well. Cover and marinate in the refrigerator for at least 30 minutes.
  2. Prepare the Skewers: Thread marinated chicken, bell pepper chunks, and onion wedges onto the skewers, alternating between ingredients.
  3. Grill the Skewers: Preheat the grill to medium-high heat. Place the skewers on the grill and cook for about 10-15 minutes, turning occasionally until the chicken is cooked through and has nice grill marks.
  4. Serve: Remove from the grill and let cool slightly before serving. Enjoy your grilled adobo skewers hot with a side of rice or your favorite dipping sauce!

Adobo Lentil Stew
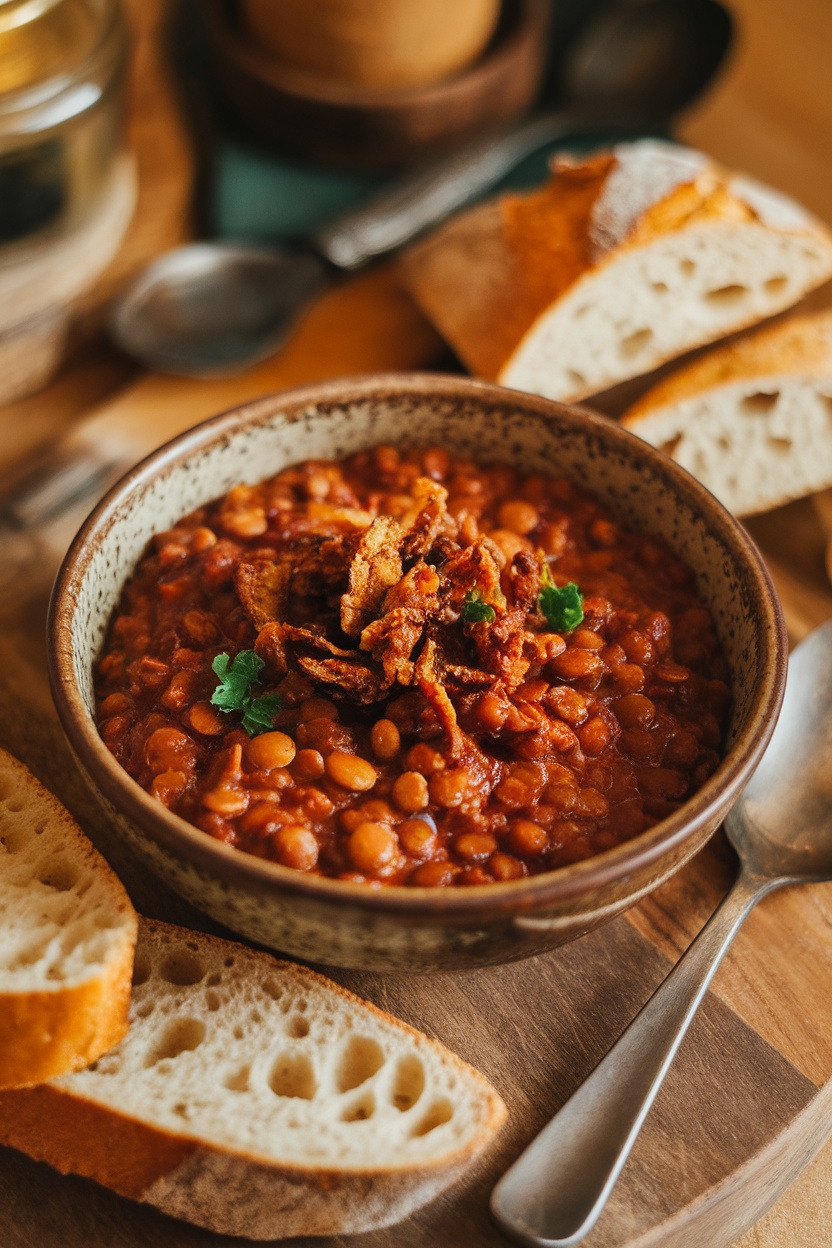
Bowl of Adobo Lentil Stew garnished with fried onions and served with slices of bread.

Adobo Lentil Stew is a hearty dish that combines the rich flavors of traditional Filipino adobo with the wholesome goodness of lentils. This stew is both savory and slightly tangy, making it a comforting choice for any meal. Its simple preparation makes it perfect for a weeknight dinner, and it’s packed with nutrition.

The recipe is easy to follow and can be made in under an hour, allowing you to enjoy a delicious homemade meal without the fuss. Serve this stew with crusty bread for a delightful experience that warms both the body and soul.

Ingredients

  • 1 cup lentils, rinsed
  • 1 tablespoon cooking oil
  • 1 onion, chopped
  • 4 cloves garlic, minced
  • 2 medium tomatoes, diced
  • 1/4 cup soy sauce
  • 1/4 cup vinegar
  • 2 cups vegetable broth
  • 1 teaspoon bay leaves
  • 1 teaspoon black pepper
  • 1/2 teaspoon paprika
  • Salt to taste
  • Fried onions for garnish

Instructions

  1. In a large pot, heat the cooking oil over medium heat. Add the chopped onion and garlic, sautéing until fragrant and the onions are translucent.
  2. Add the diced tomatoes and cook until softened.
  3. Stir in the rinsed lentils, soy sauce, vinegar, vegetable broth, bay leaves, black pepper, and paprika. Bring to a boil.
  4. Reduce the heat, cover, and let simmer for about 30 minutes, or until the lentils are tender. Stir occasionally, adding more broth if necessary.
  5. Season with salt to taste before serving. Top with fried onions for an extra crunch and flavor.

Corned Beef Sinigang – A Tangy, Meaty Twist on a Classic!

📌 Prep Time: 15 mins | Cook Time: 45 mins | Servings: 4

🛒 Ingredients

✔️ 500g canned corned beef (chunky style works best)
✔️ 8 cups water
✔️ 1 medium onion, quartered
✔️ 2 medium tomatoes, quartered
✔️ 1 radish (labanos), sliced
✔️ 10 string beans (sitaw), cut into 2-inch pieces
✔️ 1 medium eggplant, sliced
✔️ 1 small taro (gabi), peeled and quartered
✔️ 1 bunch water spinach (kangkong), leaves and tender stems only
✔️ 2-3 pieces green chili (siling haba)
✔️ 2 tbsp fish sauce (patis)
✔️ 1 pack (22g) sinigang mix (tamarind-based) or fresh tamarind extract
✔️ Salt and pepper to taste

🔥 Directions

Step 1: Prepare the Broth

1️⃣ In a large pot, bring 8 cups of water to a boil.
2️⃣ Add onions, tomatoes, and taro. Simmer for 10 minutes until the taro softens.

Step 2: Add the Corned Beef & Vegetables

3️⃣ Stir in the corned beef, breaking it into chunks. Simmer for another 10 minutes.
4️⃣ Add radish, eggplant, and string beans. Let cook for 5 minutes.

Step 3: Season & Add Greens

5️⃣ Pour in the sinigang mix (or tamarind extract) and stir well. Adjust the sourness to taste.
6️⃣ Season with fish sauce, salt, and pepper. Add the green chilies.
7️⃣ Lastly, add the kangkong and turn off the heat. Let the residual heat wilt the leaves.

Step 4: Serve & Enjoy!

🥄 Serve hot with steamed rice and enjoy this hearty, tangy sinigang twist!


🍽️ What to Pair with Corned Beef Sinigang

This rich and tangy dish pairs perfectly with Tortang Talong for a satisfying balance of smoky and sour flavors.


🛒 Best Ingredient Brands to Use

✔️ Corned Beef: Purefoods Chunky Corned Beef or Delimondo Ranch Style for the best texture
✔️ Sinigang Mix: Knorr Sinigang sa Sampalok for a well-balanced sourness
✔️ Fish Sauce: Rufina or Datu Puti for an authentic umami kick


📜 The Story Behind Corned Beef Sinigang

Corned Beef Sinigang is a creative twist on the traditional sinigang, swapping out fresh meat for the convenience and bold flavor of corned beef. This dish is perfect for those who love sinigang but want a quicker, richer version. It’s a fusion of comfort food and Filipino ingenuity, often enjoyed on rainy days or when you’re craving something both hearty and tangy.

Alfredo with Grilled Chicken – Creamy & Flavorful Pasta!

Prep Time: 15 mins | Cook Time: 30 mins | Total Time: 45 mins | Servings: 4

🛒 Ingredients

For the Grilled Chicken:

✔️ 2 boneless, skinless chicken breasts
✔️ 1 tbsp olive oil
✔️ 1 tsp garlic powder
✔️ ½ tsp salt & ½ tsp black pepper
✔️ ½ tsp paprika (for color & smoky flavor)

For the Alfredo Sauce:

✔️ 2 tbsp butter
✔️ 3 cloves garlic, minced
✔️ 1 ½ cups heavy cream
✔️ 1 cup grated Parmesan cheese
✔️ ½ tsp salt & ¼ tsp black pepper
✔️ ¼ tsp nutmeg (optional, for depth of flavor)

For the Pasta:

✔️ 250g fettuccine or spaghetti pasta
✔️ 4 cups water (for boiling)
✔️ 1 tsp salt

For Garnish:

✔️ 2 tbsp chopped parsley
✔️ Extra Parmesan cheese for topping


🔥 Directions

Step 1: Grill the Chicken

1️⃣ Rub chicken breasts with olive oil, garlic powder, salt, black pepper, and paprika.
2️⃣ Heat a grill pan over medium-high heat and cook for 5-7 minutes per side until golden brown and cooked through.
3️⃣ Let rest for 5 minutes, then slice into strips.

Step 2: Cook the Pasta

4️⃣ Boil fettuccine or spaghetti pasta in salted water until al dente (about 10-12 minutes). Drain and set aside.

Step 3: Make the Alfredo Sauce

5️⃣ In a pan over medium heat, melt butter and sauté garlic until fragrant.
6️⃣ Pour in heavy cream and let it simmer for 2 minutes.
7️⃣ Stir in Parmesan cheese, salt, black pepper, and nutmeg. Mix until smooth.

Step 4: Combine Everything

8️⃣ Toss the cooked pasta into the Alfredo sauce, coating evenly.
9️⃣ Plate the pasta, top with sliced grilled chicken, and sprinkle with parsley and extra Parmesan.

Step 5: Serve & Enjoy!

🔹 Serve hot with garlic bread on the side!


🔎 Tips for the Best Alfredo with Grilled Chicken

✔️ Use freshly grated Parmesan for a smooth and creamy sauce.
✔️ Don’t overcook the chicken—keep it juicy by letting it rest before slicing.
✔️ Toss the pasta in the sauce while it’s hot to help it absorb the flavors.
✔️ A pinch of nutmeg enhances the richness of the Alfredo sauce.


🍽️ What to Pair with Alfredo with Grilled Chicken

Enjoy this creamy pasta with Caesar Salad for a refreshing contrast or Garlic Butter Mushrooms for an extra umami boost.


📜 The Story Behind Alfredo with Grilled Chicken

Fettuccine Alfredo is an Italian-inspired comfort dish, but it has become a Filipino favorite for its rich, creamy texture and simple yet indulgent flavors. The addition of grilled chicken brings a smoky depth, making it heartier and more satisfying. In the Philippines, this dish is often served in celebrations and pasta buffets, loved for its balance of savory, cheesy, and garlicky goodness.


🛒 Best Ingredient Brands to Use

✔️ Pasta: Del Monte or Barilla for high-quality, firm fettuccine or spaghetti
✔️ Cheese: Magnolia or Emborg Parmesan for authentic creamy flavor
✔️ Cream: Nestlé All-Purpose Cream for a smooth and rich Alfredo sauce
✔️ Butter: Anchor or Elle & Vire for a creamy, high-quality base
✔️ Olive Oil: Borges or Filippo Berio for the best grilled chicken flavor

Hotdog Cheese Bun Overload – The Ultimate Snack!

Prep Time: 10 mins | Cook Time: 10 mins | Total Time: 20 mins | Servings: 4


🛒 Ingredients

✔️ 4 hotdog buns
✔️ 4 jumbo red hotdogs (Filipino-style)
✔️ 1 cup shredded quick-melt cheese
✔️ 4 lettuce leaves
✔️ ¼ cup mayonnaise
✔️ ¼ cup banana ketchup
✔️ 2 tbsp butter (for toasting)
✔️ 1 tsp sugar (optional, for a sweet-savory touch)


🔥 Directions

Step 1: Cook the Hotdogs

1️⃣ In a pan over medium heat, fry the hotdogs until slightly charred, about 5 minutes. You can also grill them for extra smoky flavor.

Step 2: Toast the Buns

2️⃣ Spread butter inside the hotdog buns and toast them in a pan until golden brown.

Step 3: Assemble the Overload Bun

3️⃣ Spread a layer of mayonnaise and banana ketchup inside each bun.
4️⃣ Place a lettuce leaf inside each bun, followed by the hotdog.
5️⃣ Generously top with shredded cheese. Keeping it shredded adds a rich, creamy bite.

Step 4: Serve & Enjoy!

6️⃣ Serve immediately while the cheese is fresh and the buns are still warm!


🔎 Tips for the Best Hotdog Cheese Bun Overload

✔️ Use jumbo or premium red hotdogs for that signature Filipino taste.
✔️ Toast the buns with butter for extra flavor and crunch.
✔️ Lettuce adds a fresh bite that balances the richness of the cheese and hotdog.
✔️ Go all out with toppings! Try adding crispy fried onions or pickle relish for an extra kick.


🍽️ What to Pair with Hotdog Cheese Bun Overload

This overloaded hotdog bun is perfect with Pritong Kamote Fries for a crunchy side or Sago’t Gulaman for a refreshing drink.


🛒 Best Ingredient Brands to Use

✔️ Hotdog: Tender Juicy or King Sue for the juiciest, most flavorful hotdogs
✔️ Cheese: Eden or Che-Vital for that creamy, slightly salty shredded goodness
✔️ Buns: Gardenia Hotdog Buns for the perfect soft and fluffy texture
✔️ Banana Ketchup: UFC or Papa for that authentic Pinoy sweet-savory taste
✔️ Mayonnaise: Lady’s Choice for the creamiest, best-tasting mayo


📜 The Story Behind Hotdog Cheese Bun Overload

Hotdog sandwiches are a Filipino street food favorite, often sold in food stalls outside schools, parks, and busy streets. The combination of sweet banana ketchup, creamy mayo, and shredded cheese gives it that distinct Pinoy flavor—a mix of sweet, savory, and tangy goodness. Lettuce adds a fresh crunch, balancing the richness of the loaded toppings. This version is inspired by the overloaded hotdogs found in Manila’s night markets and street carts, where more cheese means more happiness!

Sizzling Teriyaki Squid – Sweet, Savory, and Smoky!

📌 Prep Time: 15 mins | Cook Time: 10 mins | Total Time: 25 mins | Servings: 4


🛒 Ingredients:

For the Squid:

✔️ 2 large squid, cleaned and scored
✔️ 1 tbsp calamansi or lemon juice
✔️ ½ tsp salt
✔️ ¼ tsp black pepper
✔️ 1 tbsp cooking oil

For the Teriyaki Sauce:

✔️ 3 tbsp soy sauce
✔️ 2 tbsp mirin (or substitute with honey + vinegar)
✔️ 1 tbsp brown sugar
✔️ 1 tbsp oyster sauce
✔️ 1 tbsp grated ginger
✔️ 2 cloves garlic, minced
✔️ 1 tsp cornstarch dissolved in 2 tbsp water

For Garnish:

✔️ 1 tbsp toasted sesame seeds
✔️ 2 stalks green onions, sliced


🔥 Directions:

Step 1: Prepare the Squid

1️⃣ Clean the squid thoroughly, removing the beak and inner cartilage. Score the body lightly to allow the flavors to absorb.
2️⃣ Marinate with calamansi juice, salt, and pepper for 10 minutes.

Step 2: Make the Teriyaki Sauce

3️⃣ In a saucepan, combine soy sauce, mirin, brown sugar, oyster sauce, ginger, and garlic over low heat.
4️⃣ Simmer for 3–4 minutes until slightly thickened.
5️⃣ Stir in the cornstarch slurry and cook until the sauce becomes glossy. Set aside.

Step 3: Grill or Sear the Squid

6️⃣ Heat cooking oil in a grill pan or skillet over medium-high heat.
7️⃣ Sear the squid for 1–2 minutes per side until lightly charred and tender. (Do not overcook to avoid toughness.)

Step 4: Sizzle & Serve

8️⃣ Heat a sizzling plate and brush lightly with oil.
9️⃣ Place the grilled squid on the hot plate and drizzle with the teriyaki sauce.
🔟 Garnish with sesame seeds and green onions.

🔥 Serve immediately while sizzling hot!


🔎 Tips for Perfect Sizzling Teriyaki Squid

✔️ Don’t overcook the squid—it only needs 1-2 minutes per side to stay tender.
✔️ For deeper flavor, let the squid marinate for 30 minutes before cooking.
✔️ Want more caramelization? Brush some extra teriyaki sauce while grilling.
✔️ Use a sizzling plate for that restaurant-style presentation!


🍽️ What to Pair with Sizzling Teriyaki Squid

This dish pairs well with Chop Suey—the fresh, crunchy vegetables complement the sweet and savory teriyaki sauce perfectly.


🛒 Best Ingredient Brands to Use

✔️ Soy Sauce: Kikkoman or Silver Swan for authentic umami.
✔️ Oyster Sauce: Lee Kum Kee for a rich, savory depth.
✔️ Mirin Substitute: Use honey + apple cider vinegar for a close match.


📜 The Story Behind Sizzling Teriyaki Squid

Sizzling Teriyaki Squid combines Japanese teriyaki flavors with the Filipino sizzling plate experience. This dish is a street food favorite in the Philippines, often served in seaside restaurants and dampa-style eateries. The balance of sweet, salty, and smoky flavors makes it an irresistible seafood dish for any occasion.

Chop Suey – Colorful, Nutritious, and Delicious!

📌 Prep Time: 15 mins | Cook Time: 20 mins | Total Time: 35 mins | Servings: 4

🛒 Ingredients:

Vegetables:

✔️ 1 cup cauliflower, cut into florets
✔️ 1 cup broccoli, cut into florets
✔️ 1 medium carrot, sliced diagonally
✔️ 1 red bell pepper, sliced into strips
✔️ 1 green bell pepper, sliced into strips
✔️ 1 cup young corn, sliced
✔️ 1 cup snow peas (chicharo)
✔️ 1 cup cabbage, roughly chopped

Protein (Choose One or Combine):

✔️ 200g chicken breast, sliced thinly
✔️ 200g pork, sliced thinly
✔️ 200g shrimp, peeled and deveined
✔️ 100g liver, sliced thinly (optional)

Sauce & Seasoning:

✔️ 3 cloves garlic, minced
✔️ 1 small onion, sliced
✔️ 1 ½ tbsp soy sauce
✔️ 1 tbsp oyster sauce
✔️ 1 ½ cups chicken broth or water
✔️ 1 tbsp cornstarch dissolved in 3 tbsp water (for thickening)
✔️ ½ tsp salt
✔️ ½ tsp ground black pepper
✔️ 1 tbsp cooking oil


🔥 Directions:

Step 1: Sauté the Aromatics

1️⃣ Heat oil in a wok or large pan over medium heat.
2️⃣ Sauté garlic and onion until fragrant.

Step 2: Cook the Protein

3️⃣ Add the chicken, pork, or liver and cook until lightly browned.
4️⃣ If using shrimp, add it last and cook until pink (about 2 minutes).

Step 3: Add Vegetables & Sauce

5️⃣ Pour in chicken broth, soy sauce, and oyster sauce. Stir well.
6️⃣ Add carrots, young corn, and cauliflower. Cover and cook for 3 minutes.
7️⃣ Add broccoli, bell peppers, and snow peas. Cook for another 3 minutes.
8️⃣ Stir in cabbage and let it cook for 1 minute.

Step 4: Thicken & Serve

9️⃣ Pour in the cornstarch slurry and mix until the sauce thickens.
🔟 Season with salt & pepper to taste.

🔥 Serve hot with steamed rice!


🔎 Tips for the Best Chop Suey

✔️ Use high heat when stir-frying to keep the vegetables crisp and vibrant.
✔️ Add the vegetables in stages, starting with the firmest ones to ensure even cooking.
✔️ Don’t overcook the cabbage—it should still have a slight crunch.
✔️ For extra umami, add a few drops of sesame oil before serving.


🍽️ What to Pair with Chop Suey

Chop Suey pairs well with Pritong Galunggong—the crispiness of the fried fish contrasts beautifully with the saucy vegetables.


🛒 Best Ingredient Brands to Use

✔️ Oyster Sauce: Try Lee Kum Kee for an authentic, rich umami flavor.
✔️ Soy Sauce: Silver Swan or Marca Piña for the perfect balance of saltiness.
✔️ Cornstarch: Argo or Kingsford for smooth thickening.


📜 The Story Behind Chop Suey

Chop Suey is a stir-fried vegetable dish with Chinese origins that became a Filipino household favorite. With its colorful mix of vegetables and choice of protein, it’s a healthy, budget-friendly meal perfect for busy days. Whether enjoyed with steamed rice or as a side dish, its savory, umami-packed sauce makes every bite satisfying.

Ginataang Monggo – Creamy & Nutritious Filipino Comfort Food

📌 Prep Time: 10 mins | Cook Time: 40 mins | Total Time: 50 mins | Servings: 4


🛒 Ingredients

✔️ 1 cup mung beans (monggo)
✔️ 4 cups water
✔️ 1 tbsp cooking oil
✔️ 3 cloves garlic (minced)
✔️ 1 small onion (chopped)
✔️ 1 medium tomato (diced)
✔️ 1 ½ cups coconut milk (gata)
✔️ 1 cup malunggay leaves (or spinach as an alternative)
✔️ ½ tsp salt (adjust to taste)
✔️ ¼ tsp black pepper
✔️ 1 tbsp fish sauce (optional, for extra umami)


🔥 Directions

Step 1: Toast & Cook the Monggo

1️⃣ Rinse mung beans thoroughly under running water.
2️⃣ In a dry pan over medium heat, toast the mung beans for 3-5 minutes until fragrant and lightly browned.
3️⃣ Transfer to a pot, add water, and bring to a boil. Simmer for 30 minutes or until the beans are soft. Mash lightly with a spoon for a thicker consistency.

Step 2: Sauté the Aromatics

4️⃣ In another pan, heat cooking oil over medium heat.
5️⃣ Sauté garlic until golden brown, then add onions and tomatoes. Cook until softened and fragrant.

Step 3: Combine & Simmer

6️⃣ Pour the sautéed mixture into the pot with the softened mung beans. Stir well.
7️⃣ Add coconut milk and simmer for another 5 minutes.
8️⃣ Season with salt, black pepper, and fish sauce (if using). Stir to combine.

Step 4: Add Greens & Serve

9️⃣ Stir in malunggay leaves and let it cook for another 2 minutes.
🔟 Turn off the heat and let it rest for a few minutes before serving.

🔥 Serve hot with steamed rice and enjoy this comforting, nutritious dish!


🔎 Tips for the Best Ginataang Monggo

✔️ Toast the mung beans – This enhances their nutty flavor.
✔️ Adjust consistency – Mash some of the beans for a creamier texture or leave them whole for a soupier consistency.
✔️ Use fresh coconut milk – If available, fresh gata provides the richest flavor.
✔️ Make it heartier – Add sliced shrimp, fried dried fish, or pork bits for extra protein.


🍽️ What to Pair with Ginataang Monggo

Ginataang Monggo pairs well with Tortang Talong! The smoky, egg-battered eggplant balances the creamy texture of the monggo dish. Want to try it? Check out the Tortang Talong recipe!


🛒 Best Ingredient Brands to Use

✔️ Coconut Milk: Use high-quality canned coconut milk or fresh gata for the best flavor.
✔️ Mung Beans: Choose clean, unpolished mung beans for better texture and taste.
✔️ Fish Sauce: A splash of premium fish sauce enhances the umami flavor.
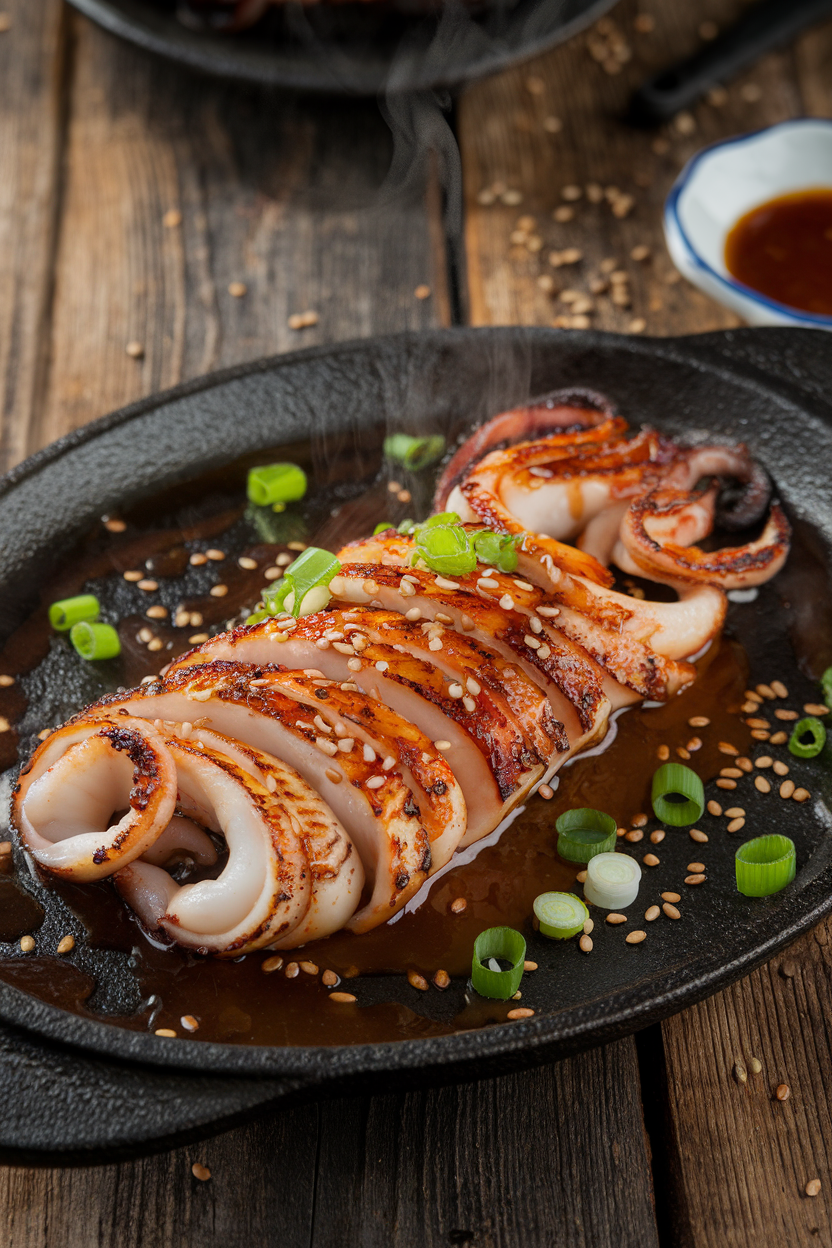

📜 The Story Behind Ginataang Monggo

Ginataang Monggo is a comforting Filipino dish that blends the nutty taste of mung beans with the rich, creamy texture of coconut milk. It is a staple in many households, often enjoyed during rainy days or as a nutritious everyday meal. Some versions add shrimp, dried fish, or even pork for extra depth of flavor.
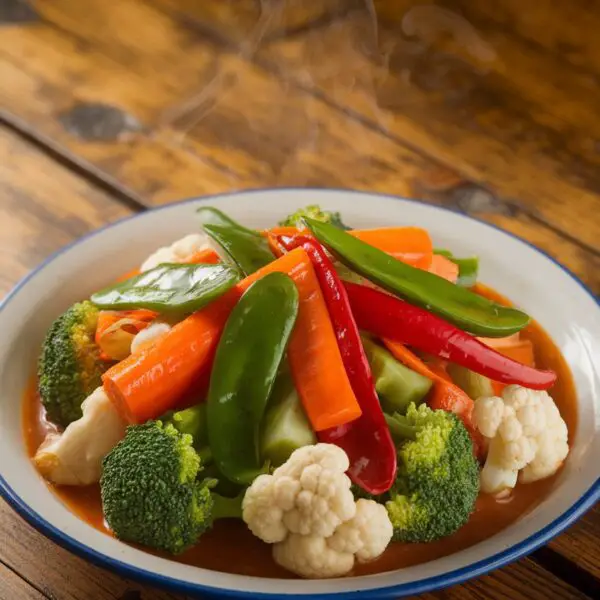
Tortang Talong (Filipino Eggplant Omelet) Recipe

📌 Prep Time: 10 mins | Cook Time: 20 mins | Total Time: 30 mins | Servings: 2

Ingredients

  • 2 large eggplants (talong) – Choose firm, deep purple ones for best results.
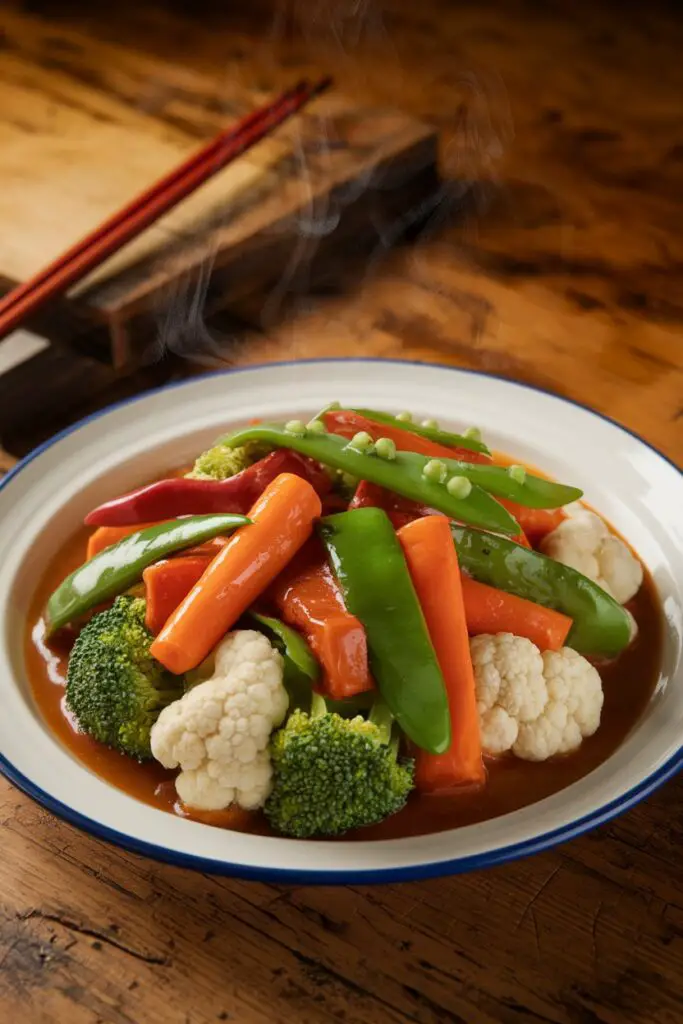
  • 2 large eggs – Preferably free-range for a richer taste.
  • ½ tsp salt – Adjust to taste.
  • ¼ tsp black pepper – Freshly ground for better aroma.
  • ½ tsp garlic powder (optional) – Adds depth of flavor.
  • ¼ cup cooking oil – Golden Fiesta or Baguio Oil work well for frying.

Directions

Step 1: Grill the Eggplants

  • Using an open flame or stovetop burner, roast the eggplants until the skin is charred and soft, turning occasionally for even cooking.
  • Once done, let them cool slightly, then peel off the blackened skin while keeping the stem intact.
  • Flatten each eggplant with a fork, spreading it out into an oval shape.

Step 2: Prepare the Egg Mixture

  • In a bowl, beat the eggs with salt, black pepper, and garlic powder (if using).
  • Dip the flattened eggplants into the beaten eggs, ensuring they are well-coated.

Step 3: Fry the Tortang Talong

  • Heat oil in a pan over medium heat.
  • Carefully place one coated eggplant in the pan, pouring a little extra beaten egg on top.
  • Fry for 2-3 minutes per side or until golden brown and crispy on the edges.
  • Repeat for the second eggplant.

Step 4: Serve and Enjoy!

  • Drain excess oil on paper towels. Serve hot with banana ketchup or spicy vinegar.

What to Pair with Tortang Talong

For a complete meal, pair Tortang Talong with Ginataang Monggo (mung bean stew with coconut milk). The creamy, slightly nutty flavors of the monggo dish perfectly balance the smoky, crispy texture of the eggplant omelet.

Best Ingredient Brands to Use

✔️ Eggs: Use fresh, high-quality eggs for a richer taste.
✔️ Cooking Oil: Choose a neutral oil for frying like Golden Fiesta or Baguio Oil.
✔️ Salt & Pepper: Freshly ground black pepper enhances the flavor.
✔️ Banana Ketchup: Use Jufran or UFC for an authentic Filipino touch.

The History of Tortang Talong

Tortang Talong is a staple in Filipino households, often served as a budget-friendly yet delicious meal. The dish’s origins are rooted in traditional Filipino cooking, where eggplant is commonly used due to its availability and versatility. It’s believed to have evolved from Spanish-influenced omelets but has retained a unique Pinoy twist with its smoky eggplant base.

Chicharon Bulaklak – Crispy & Savory Filipino Delight

Prep Time: 15 mins | Cook Time: 40 mins | Total Time: 55 mins | Servings: 4


🛒 Ingredients

✔️ 1 kg pork mesentery (bulaklak)
✔️ 1 tbsp salt
✔️ 1 tbsp whole black peppercorns
✔️ 5 cloves garlic (crushed)
✔️ 4 cups water
✔️ 1 tbsp vinegar
✔️ Cooking oil (for deep frying)

For Dipping Sauce:
✔️ Spiced vinegar (sukang Iloko or cane vinegar)
✔️ Chopped red chilies (optional)
✔️ 1 tsp soy sauce (optional for extra umami)


🔥 Directions

Step 1: Clean the Bulaklak

1️⃣ Wash the pork mesentery thoroughly under running water.
2️⃣ Trim excess fat and remove any impurities.
3️⃣ Rub with salt and vinegar, then rinse well.

Step 2: Boil Until Tender

4️⃣ In a pot, add the pork bulaklak, water, garlic, salt, and peppercorns. Bring to a boil.
5️⃣ Simmer for 30–40 minutes or until tender.
6️⃣ Drain and let it cool completely. (For extra crispiness, chill in the fridge for 1 hour.)

Step 3: Fry Until Crispy

7️⃣ Heat enough oil in a deep pan over medium-high heat.
8️⃣ Fry the boiled bulaklak in batches until golden brown and crispy (about 3–5 minutes per batch).
9️⃣ Drain excess oil on paper towels.

Step 4: Serve & Enjoy!

🔥 Serve hot with spiced vinegar dipping sauce!


🔎 Tips for Extra Crunchy Chicharon Bulaklak

✔️ Double-fry method: Fry once at low heat to render fat, then fry again at high heat for ultimate crispiness.
✔️ Air-dry for 1 hour before frying to prevent oil splatter.
✔️ Use a wire strainer when frying to keep the pieces crispy and evenly cooked.
✔️ For less grease, place on a cooling rack after frying instead of paper towels.


🍽️ What to Pair with Chicharon Bulaklak

Chicharon Bulaklak pairs perfectly with an ice-cold beer or a refreshing soda. For an ulam pairing, try it with Laing (Spicy Taro Leaves in Coconut Milk)!


🛒 Best Ingredient Brands to Use

✔️ Vinegar: Sukang Iloko or Datu Puti for the best dipping sauce
✔️ Pork: Get fresh mesentery from a reputable butcher for best quality
✔️ Soy Sauce: Marca Piña or Silver Swan for added umami in the sauce


📜 The Story Behind Chicharon Bulaklak

Chicharon Bulaklak is a popular Filipino pulutan (beer snack) known for its crispy, savory, and addictive flavor. The name “bulaklak” (flower) comes from its frilly, curled-up shape after frying. Despite being high in cholesterol, it remains a beloved guilty pleasure, often served in Filipino gatherings and street food stalls. Traditionally enjoyed with sukang Iloko, its crunchy texture and tangy dip make it a must-try snack!