Table of contents
- TM SIM Registration Link Online
- TM SIM Registration Step-by-Step Procedure:
- STEP 1: Enter Your Mobile Number for Verification
- STEP 2: Complete the Registration Form with Accuracy
- STEP 3: Choose the Appropriate Identification for Registration
- STEP 4: Provide a Government-issued ID for TM SIM Registration
- STEP 5: Taking a Clear Selfie for Profile Verification
- STEP 6: Agree to Terms and Conditions and Privacy Policies
- STEP 7: Hit the “Submit” button to complete the registration process
- STEP 8: Keep Your Reference Number as Proof of Registration
- Registration of More than one SIM
- SIM Card Registration For Foreigners
- TM Sim Registration ERROR
Welcome to our TM SIM Registration Guide, designed to provide you with a straightforward step-by-step process for registering your TM SIM card in the Philippines. With the implementation of the SIM Card Registration Act, all TM subscribers must complete the registration to ensure compliance and maintain uninterrupted mobile services.
This guide aims to make the registration process easy and hassle-free by providing you with clear instructions and valuable information.
Key Takeaways:
- Registering your TM SIM card is essential to comply with the SIM Card Registration Act in the Philippines.
- This guide provides step-by-step instructions to make the registration process easy and convenient.
- Completing your TM SIM registration accurately ensures uninterrupted mobile services.
- Make sure to have the necessary personal information and identification documents ready before starting the registration process.
- Following this guide will help you navigate the official TM SIM registration portal and troubleshoot common access issues.

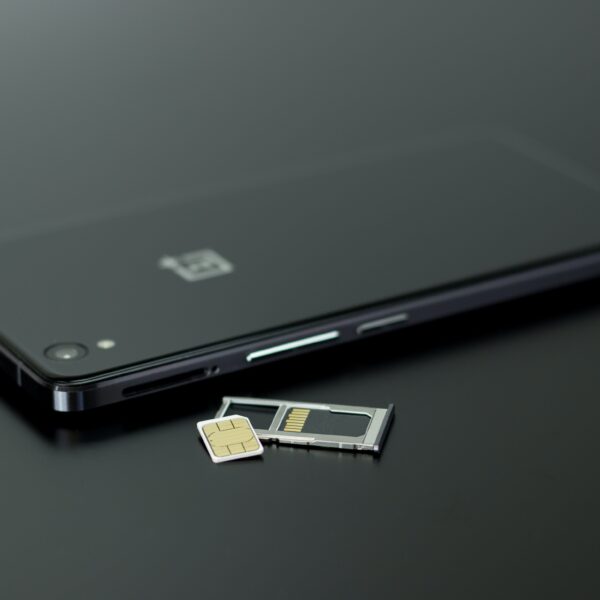
TM SIM Registration Link Online
Registering your TM SIM is quick and easy! Visit https://new.globe.com.ph/simreg to begin the quick registration process. Simply follow the step-by-step instructions provided on the website, and your SIM card will be registered in minutes.
Alternatively, Click the button below to access the TM SIM registration link and get started
Preparatory Steps for TM SIM Registration
Before starting the TM SIM registration process, there are a few preparatory steps that TM subscribers need to follow. By completing these steps, you can ensure a smooth and hassle-free registration experience.
Here are the key preparatory steps you should take:
- Gather Necessary Information and Documents: It is important to have all the required information and documents ready before starting the registration process. This may include your full name, date of birth, address, and valid identification documents. Make sure to have these documents readily available to provide accurate information during registration.
- Ensure a Stable Internet Connection: TM SIM registration requires a stable internet connection to access the registration portal and complete the necessary steps. Before starting the registration process, ensure that you have a reliable internet connection to avoid any interruptions.
- Create an Account: Depending on the registration portal, you may be required to create an account before proceeding with the registration process. If this is the case, make sure to create an account by providing the necessary details and following the registration instructions.
By completing these preparatory steps, you will be better equipped to navigate through the TM SIM registration process smoothly. Taking the time to gather the necessary information, ensure a stable internet connection, and create an account (if required) will help expedite the registration process and ensure a successful registration.

Official TM SIM Registration Portal Access
This section provides step-by-step instructions on accessing the official TM SIM registration portal. By following these directions, TM subscribers will be able to navigate to the registration page and complete the process hassle-free.
Navigating to the TM Registration Page
Follow these simple steps to access the official TM SIM registration portal:
- Open your preferred web browser.
- Enter the URL https://www.tmtambayan.ph/products/sim.html for the official TM SIM registration portal in the address bar.
- Press Enter or click Go to navigate to the website.
Once you have reached the registration page, you will be ready to begin the SIM registration process.
TM SIM Registration Step-by-Step Procedure:
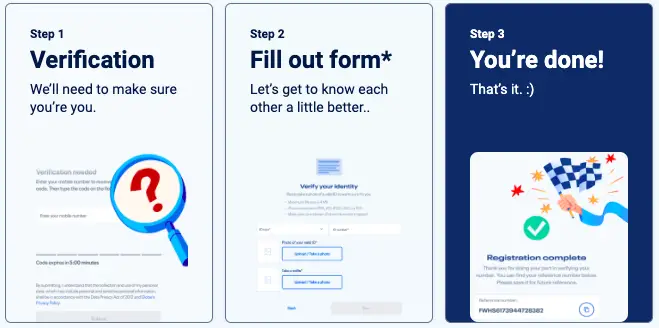
STEP 1: Enter Your Mobile Number for Verification
During the TM SIM registration process, you will need to enter your mobile number for verification. This ensures that the SIM card you are registering is associated with the correct mobile number.
Follow the steps below to complete this process:
- Locate your mobile number: Your mobile number can typically be found on the back of your SIM card or by dialing a specific USSD code on your phone.
- On the TM SIM registration page, enter your mobile number in the designated field.
- Double-check the number for accuracy to avoid any errors during the verification process.
- Once you have entered your mobile number correctly, click on the “Verify” button to proceed.
By entering your mobile number for verification, you are ensuring that the SIM card is linked to your registered phone number, providing you with a secure and personalized mobile communication experience.
Remember to keep your mobile number and SIM card information confidential to protect yourself from unauthorized use and potential fraud.
If you encounter any issues during this verification process, refer to the troubleshooting section or contact TM customer support for assistance.
STEP 2: Complete the Registration Form with Accuracy
Once you have accessed the official TM SIM registration portal, it’s time to complete the registration form with accuracy.
Providing the required personal information is crucial to ensure a successful registration process. Take note of the following:
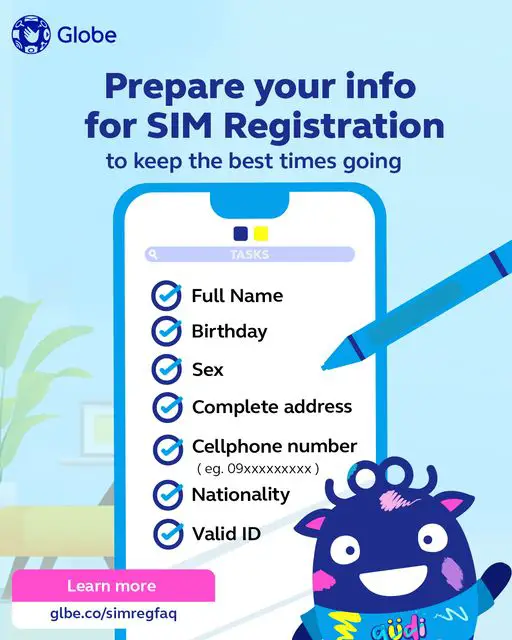
Required Personal Information
When filling out the registration form, you will be asked to provide specific personal information. Make sure to input the following details accurately:
- Your full name
- Your complete birthday
- Your gender
- Your address
- Your nationality
- Your type of registration (individual or corporate entity)
Double-check each field to ensure that there are no errors or typographical mistakes. Accurate personal information is essential for proper identification and SIM registration.
STEP 3: Choose the Appropriate Identification for Registration
During the registration process, you will be required to provide appropriate identification documents. These documents serve as verification of your identity for SIM registration. Choose one of the following acceptable options:
- Driver’s License
- Firearms License
- Government Service Insurance System (GSIS) ID
- Integrated Bar of the Philippines (IBP) Identification
- National Bureau of Investigation (NBI) Clearance
- Overseas Workers Welfare Administration (OWWA) ID
- Passport
- Philippine National ID (PhilSys ID)
- Police Clearance
- Postal ID
- Professional Regulation Commission (PRC) ID
- Persons with Disabilities (PWD) Card
- Senior Citizen’s Card
- Social Security System (SSS) or Government Service Insurance System (GSIS) Card
- Tax Identification Number (TIN) ID
- Unified Multi-Purpose ID (UMID)
- Voter’s ID
Ensure that the identification document you choose is valid and clear. Take a clear photo or scan of the chosen identification, as you will be asked to upload it during the registration process.
By completing the registration form accurately and providing the appropriate identification, you are one step closer to successfully registering your TM SIM card.
STEP 4: Provide a Government-issued ID for TM SIM Registration
When registering your TM SIM card, it is important to provide a valid government-issued ID. This helps ensure the accuracy and legitimacy of your registration. Accepted government-issued IDs may include:
- Passport
- Driver’s license
- Social Security Service ID (SSS ID)
To complete the registration process, you will need to upload a clear copy of your chosen ID. Make sure the document is well-lit and all information is visible. This step is crucial for identity verification and compliance with the SIM Card Registration Act.
By submitting a valid government-issued ID, you contribute to maintaining the integrity of the registration process and help prevent fraudulent activities. Take this opportunity to ensure the security of your TM SIM card and enjoy a hassle-free mobile experience.
STEP 5: Taking a Clear Selfie for Profile Verification
During the TM SIM registration process, it is important to take a clear selfie for profile verification. The selfie will serve as a visual identity confirmation and ensure the accuracy of your registration details.
Follow these tips to ensure your selfie meets the requirements:
- Find a well-lit area: Choose a location with ample lighting to avoid shadows on your face. Natural daylight or evenly distributed artificial light is ideal.
- Position yourself properly: Hold the camera at eye level and make sure your face is centered and fully visible. Avoid tilting your head or using extreme angles.
- Remove obstructions: Remove any accessories or items that may cover your face, such as hats, sunglasses, or scarves. Your face should be fully visible in the selfie.
- Maintain a neutral expression: Keep a relaxed and natural expression in your selfie. Avoid smiling excessively or making exaggerated facial gestures.
- Eliminate distractions: Ensure that the background of your selfie is clean and free from any distractions or clutter. A simple and neutral background is recommended.
- Check image quality: Before submitting your selfie, review the image to ensure it is clear and not blurry. Make sure all facial features are easily recognizable.
By following these tips, you can capture a clear and accurate selfie for profile verification during the TM SIM registration process.
STEP 6: Agree to Terms and Conditions and Privacy Policies
As part of the TM SIM registration process, it is crucial to carefully read and agree to the terms and conditions and privacy policies set forth by TM. By doing so, you acknowledge and consent to the rules, regulations, and data collection practices outlined in these documents.
The terms and conditions govern your rights and responsibilities as a TM subscriber, ensuring a clear understanding of the services provided and the obligations you must adhere to. These may include provisions related to usage limits, call and messaging rates, and account termination policies.
The privacy policies, on the other hand, detail how TM collects, uses, shares, and protects the personal information you provide during the registration process. These policies are designed to safeguard your privacy and ensure compliance with applicable data protection laws.
By agreeing to the terms and conditions and privacy policies, you demonstrate your commitment to TM’s guidelines and practices. Failure to accept these policies may result in the inability to proceed with the SIM registration process.
It is important to note that TM may update these terms and policies from time to time. Therefore, it is advisable to review them periodically to stay informed of any changes that may affect your rights and obligations as a TM subscriber.
By providing your consent, you contribute to a safer and more secure mobile communications environment, in line with the SIM Card Registration Act and the efforts to prevent scams and protect mobile device users in the Philippines.
STEP 7: Hit the “Submit” button to complete the registration process
Upon successful submission, you’ll receive a personalized reference number. Remember to jot it down or store it safely for future reference. This reference number serves as your key to accessing exclusive benefits and assistance related to your registered TM SIM card.
Get ready to experience uninterrupted connectivity and enjoy a host of exciting offers tailored just for you!
STEP 8: Keep Your Reference Number as Proof of Registration
Acquiring a reference number is an essential step in the TM SIM registration process as it serves as a valid proof of registration. Once you have successfully registered your TM SIM card, you will be provided with a unique reference number that confirms your registration.
This reference number is important as it can be used to verify and validate your registration status, especially if you need to provide proof of registration to any authorities or service providers. It is recommended to keep a record of the reference number for future reference.
To ensure you have a copy of the reference number, you can either save it or take a screenshot of it. By doing so, you have tangible proof of your TM SIM registration, which can be handy in case you need to access any services or resolve any issues related to your registered SIM card.
Remember, the reference number is unique to each SIM card registration and cannot be reused or replicated. It is your evidence that you have successfully complied with the TM SIM registration process and have a registered SIM card under your name.
Keep your reference number safe and secure, as it may be required in the future to validate your registration and to ensure seamless connectivity and access to various TM services.
Troubleshooting Common Access Issues
In case you encounter any difficulties accessing the official TM SIM registration portal, here are some common solutions to consider:
- Ensure that you have a stable internet connection. If you are using mobile data, check your signal strength.
- Clear your browser’s cache and cookies. This can help resolve any temporary issues or conflicts with previous website data.
- Try accessing the registration page from a different web browser. Sometimes, compatibility issues can arise with specific browsers.
- If the problem persists, contact TM’s customer support for further assistance. They will be able to guide you through any technical issues and provide additional troubleshooting steps if necessary.
By following these troubleshooting tips, you should be able to access the official TM SIM registration portal without any issues.
TM SIM Registration Guide for Minors and Corporate Entities
Registering a TM SIM card for minors or corporate entities follows specific guidelines and requirements. Whether you are a parent or legal guardian registering a minor’s SIM or representing a corporate or business entity, it is important to understand the process and provide the necessary documentation.
This section will outline the guidelines for registering a minor’s SIM and the requirements for corporate and business entity registrations.
Guidelines for Registering a Minor’s SIM
When registering a minor’s SIM card, it is essential to ensure that the registration is done under the name of a parent or legal guardian. Follow these guidelines to complete the registration process:
- Provide the parent or legal guardian’s information, including full name, contact details, and identification documents.
- Submit the minor’s information, such as full name, date of birth, and relationship to the parent or legal guardian.
- Upload a copy of the parent or legal guardian’s valid government-issued identification card.
- Verify the information provided and complete the registration process.
By following these guidelines, parents and legal guardians can register a TM SIM card for their minors in compliance with the SIM Card Registration Act.
Requirements for Corporate and Business Entity Registrations
If you are registering a TM SIM card on behalf of a corporate or business entity, the following requirements must be met:
- Secure the applicable corporate documents, such as the SEC Certificate of Registration and other legal permits.
- Prepare a Board Resolution authorizing the registration of the SIM card under the corporate or business entity’s name.
- Provide the necessary information about the corporation or business, including the name, address, contact details, and identification details of the authorized representative.
- Submit a clear copy of the authorized representative’s valid government-issued identification card.
- Ensure that all provided information is accurate and complete, and proceed with the registration process.
By fulfilling these requirements, corporate and business entities can comply with the SIM registration guidelines and facilitate the successful registration of their TM SIM cards.
Registration of More than one SIM
Subscribers are permitted to use multiple SIMs, but they must register each SIM in their name.
SIM Card Registration For Foreigners
Your registered SIM will only be valid for 30 days if you are a foreign tourist visiting the country, and it will be automatically canceled after that.
Foreign Tourists
Requirements
- Passport (i.e., copy of the bio-page and pages where the current visa is stamped or shown)
- Proof of address in the Philippines (booking in a hotel or other type of accommodation, or in the absence thereof, an affidavit/letter from the owner of the house or residence where such foreign national will stay)
- Return ticket to country of origin or to another country indicating date and time of departure from the Philippines
Foreign Nationals With Other Type Of Visa
Requirements
- Passport (i.e., copy of the bio-page and pages where the current visa is stamped or shown) indicating passport number, full name, and nationality
- Proof of address in the Philippines (booking in a hotel or other type of accommodation, or in the absence thereof, an affidavit/letter from the owner of the house or residence where such foreign national will stay)
- Other pertinent documents, whichever is applicable:
- Alien Certificate of Registration Identification Card (ACRI-Card) from the Bureau of Immigration or other types of official ID issued by any other visa-issuing agency
- Alien Employment Permit from the Department of Labor and Employment or School registration and ID for students
- For Persons of Concern or POCs, the type of travel or admission document validly issued by the Philippine Department of Justice
Understanding the SIM Card Registration Act in the Philippines
The SIM Card Registration Act in the Philippines is a regulatory measure implemented to prevent scams and protect mobile device users. The act requires all SIM card owners to register their cards with the Department of Information and Communications Technology (DICT) and the National Telecommunications Commission (NTC).
The objective of the SIM Card Registration Act
The main objective of the SIM Card Registration Act is to safeguard mobile device users by reducing fraud, illegal activities, and unauthorized SIM card usage.
By requiring SIM card owners to register their cards, the act aims to provide traceability and improve accountability in the telecommunications sector.
Penalty For No-Compliance
Laws specify penalties for both individuals and telcos.
False information or fraudulent identification, spoofing a registered SIM, or selling a stolen SIM are all crimes that are subject to a prison time of six months to 2 years and a P300,000 fine.
For refusing to register SIM cards, telecommunications may be fined between P100,000 and P1,000,000 depending on the severity of the offenses.
Additionally, telcos, their representatives, or employees who violate data confidentiality may be penalized with fines between P500,000 and P4,000,000 for their actions.
Post-Registration Steps and Keeping Your SIM Active
After completing your TM SIM registration, it is essential to follow certain post-registration steps to keep your SIM card active and enjoy uninterrupted service. Failure to register your TM SIM can have severe consequences, so it’s crucial to be aware of the potential risks and take the necessary actions.
Consequences of Not Registering Your TM SIM
Not registering your TM SIM can lead to service interruptions and the suspension of your mobile number. The SIM Card Registration Act requires all mobile subscribers in the Philippines to register their SIM cards for security purposes and to prevent unauthorized use of mobile devices. Failing to comply with this registration requirement can result in the deactivation of your TM SIM, rendering it unusable.
To avoid these consequences, make sure to complete the TM SIM registration process as soon as possible and follow the guidelines provided by TM and the regulatory agencies. This will ensure the continued activation and usability of your TM SIM card.
Next Steps After Completing Your TM SIM Registration
- Activate Your SIM Card: Once you have completed the TM SIM registration process, you will receive an activation message on your registered mobile number. Follow the instructions provided in the message to activate your SIM card and start using TM services.
- Top-Up Your Account: To keep your SIM active, it is important to regularly top up your TM account. This will ensure that you have sufficient balance to make calls, send messages, and access data services. TM offers various top-up options, including online platforms, physical retailers, and mobile apps.
- Maintain Up-to-Date Information: Keep your personal and contact information up to date with TM. This includes updating your address, email address, and contact number. This will ensure that you receive important notifications and updates from TM regarding your SIM registration and other services.
- Monitor Your Usage: Regularly check your TM account balance and usage to track your consumption and avoid any unexpected charges. TM provides tools and services to help you monitor your usage, such as online account portals and mobile apps.
- Contact Customer Support: If you encounter any issues or have questions regarding your TM SIM registration or SIM card activation, don’t hesitate to reach out to TM’s customer support. They will be able to assist you and provide the necessary guidance to resolve any concerns.
By following these post-registration steps and staying proactive, you can ensure the continued activation and usability of your TM SIM card. Registering your TM SIM is not only a legal requirement but also a way to protect your mobile services and maintain connectivity.
Keep in mind that each telecom service provider may have specific guidelines and procedures for post-registration steps and SIM card activation. Always refer to TM’s official website, customer support, or the latest information provided by TM for the most accurate and up-to-date instructions.
Conclusion
Registering your TM SIM card is an essential step to comply with the SIM Card Registration Act in the Philippines. By following this detailed TM SIM registration guide, you can easily and conveniently complete the registration process and ensure the continued use of your SIM card.
Registering your TM SIM card provides numerous benefits, including enhanced protection against scams and better security for your mobile device. By complying with the registration requirements, you contribute to a safer mobile environment for all users in the country.
If you encounter any difficulties during the registration process or need further assistance, TM customer support is available to help you. Feel free to reach out to them for guidance or clarification on any aspect of the SIM registration procedure.
Remember, a registered TM SIM card ensures uninterrupted mobile services and allows you to fully enjoy the benefits of TM’s network. Take the necessary steps outlined in this guide to complete your TM SIM registration and stay connected with ease and peace of mind.

FAQ
What is the objective of the SIM Card Registration Act in the Philippines?
The objective of the SIM Card Registration Act is to prevent scams and protect mobile device users.
What are the deadlines for SIM card registration in the Philippines?
The registration deadlines set by the Department of Information and Communications Technology (DICT) and the National Telecommunications Commission (NTC) vary. Please refer to the official announcements for the current registration deadlines.
What preparatory steps do I need to take before starting the TM SIM registration process?
To prepare for the TM SIM registration process, ensure you have the necessary information and documents, a stable internet connection, and create an account if required.
How do I access the official TM SIM registration portal?
To access the official TM SIM registration portal, navigate to the TM registration page by following the provided instructions. If you encounter any access issues, refer to the troubleshooting guide for assistance.
How do I enter my mobile number for verification during the TM SIM registration process?
Locate your mobile number and input it correctly on the TM SIM registration page. Follow the step-by-step instructions for a successful verification process.
What information is required to complete the registration form accurately?
The registration form requires personal information such as name, birthday, gender, address, nationality, and registration type. Make sure to provide accurate and up-to-date information.
What identification document should I choose for TM SIM registration?
Choose the appropriate government-issued identification document such as a passport, driver’s license, or Social Security Service ID. Follow the instructions on uploading a clear copy of the chosen ID.
How do I take a clear selfie for profile verification during TM SIM registration?
Ensure the selfie is well-lit and your face is visible to the camera. Follow the provided tips for capturing a clear selfie for profile verification.
Do I need to agree to the terms and conditions and privacy policies during the TM SIM registration process?
Yes, it is important to read and agree to the terms and conditions and privacy policies. They outline the rules and regulations that govern the use of the TM SIM card and protect your privacy.
What are the guidelines for registering a minor’s SIM card under the name of a parent or legal guardian?
Please refer to the provided guidelines for registering a minor’s SIM card under the name of a parent or legal guardian. Follow the specific requirements and procedures outlined for registering a minor’s SIM card.
What requirements are needed for corporate and business entity registrations?
Corporate and business entity registrations require documents such as the SEC Certificate of Registration and Board Resolution. Make sure to fulfill the specific requirements for corporate and business entity registrations.
How do I acquire a reference number as proof of registration?
After completing the TM SIM registration process, you will receive a reference number. Follow the instructions provided on how to save or screenshot the reference number for future reference and proof of registration.
What are the post-registration steps to keep my TM SIM active?
After registering your TM SIM, make sure to follow the post-registration steps outlined to keep your SIM card active. Failure to comply with the registration requirements may have consequences. Refer to the guide for more information on the post-registration steps.

Further Reading and Resources
If you’d like to explore more about TM SIM card registration and related topics, here are some helpful resources and links:
- TM Official Website: For the most up-to-date information on TM SIM card registration and other services, visit the official TM website.
- National Telecommunications Commission (NTC): The NTC is the regulatory authority for telecommunications in the Philippines. You can find official announcements and regulations related to SIM card registration on their website.
- Department of Information and Communications Technology (DICT): The DICT often publishes information related to telecommunications regulations and policies in the Philippines.
- TM SIM Card Registration Guide: TM may provide a detailed guide on its website explaining the SIM card registration process, requirements, and FAQs.
- News Updates: Stay informed about any changes or updates to SIM card registration requirements by following news articles and press releases from reputable sources.
- Official Social Media Channels: TM and regulatory authorities often share important updates on their official social media profiles. You can follow them for real-time information.
TM Sim Registration ERROR
[wpdiscuz-feedback id=”7ociz6d51x” question=”Please leave a feedback on this” opened=”0″][/wpdiscuz-feedback] Please leave a feedback on this.RELATED POSTS
-
Activate Your Smart SIM Quickly – Easy Guide

Are you ready to activate your Smart SIM and start enjoying all the benefits of Smart’s network? Whether you’re a new subscriber or switching from another provider, activating your Smart SIM is a simple and necessary step in getting connected in the Philippines. If you’re unsure how to activate your Smart SIM, don’t worry. In
-
Philippines SIM Card Guide for Travelers & Expats
In this guide, we’ll provide you with all the information you need on SIM card options, prices, where to buy them, activation processes, compatibility, and tips for choosing the best SIM card for your needs. Key Takeaways: Understanding Mobile Connectivity in the Philippines In order to navigate the world of mobile connectivity in the Philippines,
-
Unleash the Power of Gcash App: The Ultimate Digital Wallet
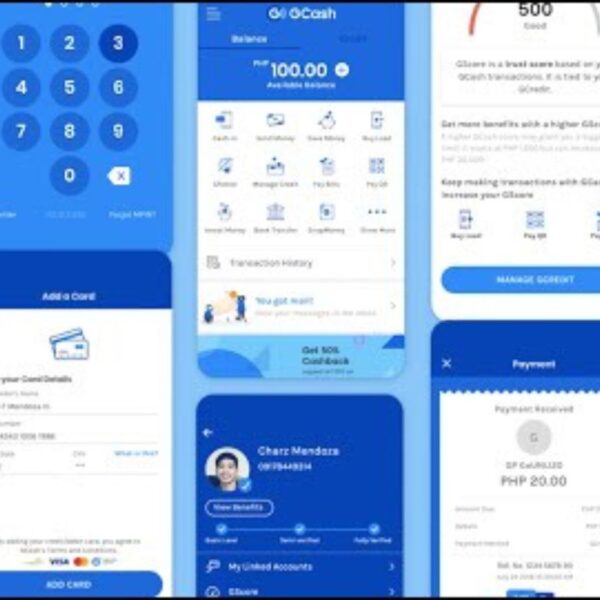
Unleashing the potential of the Gcash app: Discover seamless mobile transactions, bill payments, online shopping, and peer-to-peer transfers.
-
TM SIM REGISTRATION 2024 | Easy Step-by-Step Guide

The SIM Registration Act stipulates that all SIMs must be registered before being activated. Use this link to register your TM SIM online.
-
Smart SIM Registration 2024 | Easy Step-by-Step Guide

Discover the importance of Smart SIM registration and follow our quick guide to ensure a secure and hassle-free process. Protect your identity now!
-
Unveiling Exceptional Travel Accessories: Your Essential Guide to Enhancing Your Journey

Discover the ultimate travel gear guide: expert reviews and recommendations for luggage, backpacks, and accessories. Enhance your journey with the right gear!
-
Choosing the Right Travel Insurance Company in the Philippines

Find the best travel insurance companies in the Philippines with this comprehensive guide. Compare coverage, benefits, and price to make the right choice for your next trip.
-
THE BEST SIM CARD TO BUY IN THE PHILIPPINES
Find the best SIM card in the Philippines that suits your needs and budget. Reliable coverage, fast data speeds, and affordable pricing.
-
IS YOUR SIM DEACTIVATED? Here’s What You Should Do
Have you missed the deadline for SIM registration? Learn what you can do next to avoid losing access to essential services.
-
What Should You Do If Your PH SIM Card Is Lost Or Stolen
Lost or stolen SIM card? Protect your personal information and get a replacement with our guide on what to do if your Philippines SIM card is lost or stolen.